Setting Up The Weld
1. Make practice welds on pieces of scrap the same |
thickness as your intended workpiece to practice |
technique before welding anything of value. |
Clean the weld surfaces thoroughly with |
a wire brush or angle grinder; there must |
be no rust, paint, oil, or other materials on |
the weld surfaces, only bare metal. |
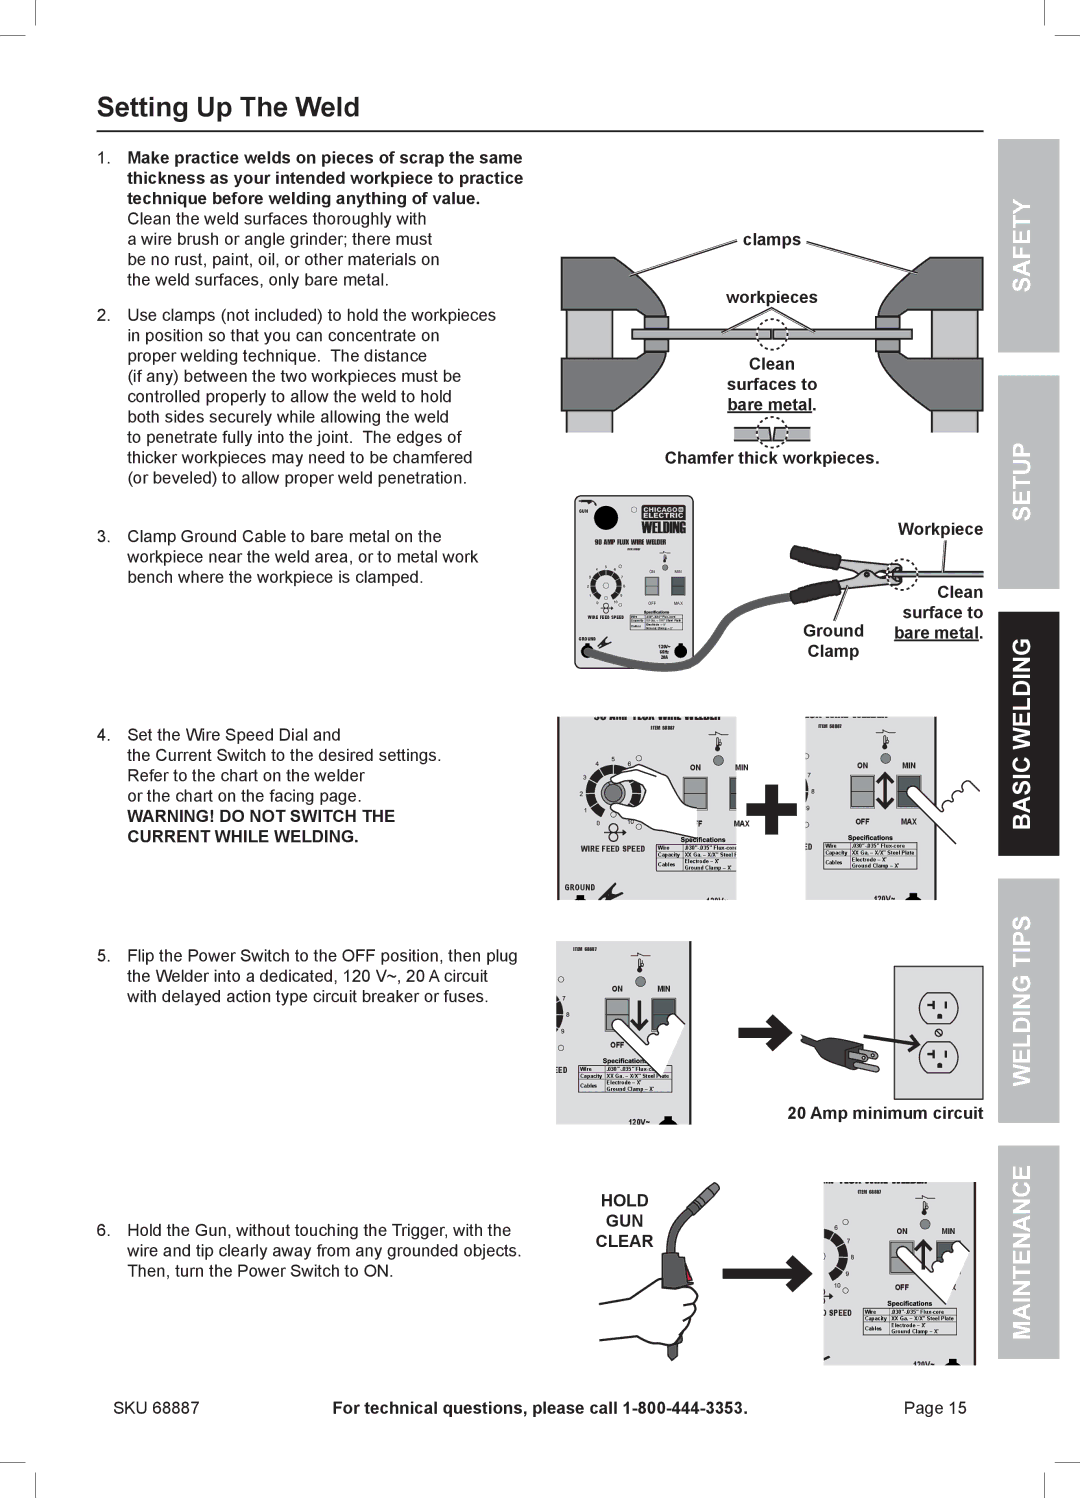
2. Use clamps (not included) to hold the workpieces |
in position so that you can concentrate on |
proper welding technique. The distance |
(if any) between the two workpieces must be |
controlled properly to allow the weld to hold |
both sides securely while allowing the weld |
to penetrate fully into the joint. The edges of |
thicker workpieces may need to be chamfered |
(or beveled) to allow proper weld penetration. |
clamps
workpieces
Clean
surfaces to bare metal.
Chamfer thick workpieces.
SAFETY
SETUP
3. Clamp Ground Cable to bare metal on the |
workpiece near the weld area, or to metal work |
bench where the workpiece is clamped. |
GUN
90 AMP FLUX WIRE WELDER
| ITEM 68887 |
|
|
| |
|
|
| ON | MIN | |
|
|
|
|
|
|
|
|
|
|
|
|
|
|
| OFF | MAX | |
WIRE FEED SPEED |
|
|
|
|
|
| Wire | ||||
| Capacity | XX Ga. – X/X″ Steel Plate | |||
|
| Cables | Electrode – X′ |
| |
|
| Ground Clamp – X′ |
| ||
GROUND
120V~ 60Hz 20A
90 AMP FLUX WIRE WELDER
Workpiece
![]()
![]() Clean surface to Ground bare metal.
Clean surface to Ground bare metal.
Clamp
LUX WIRE WELDER
WELDING
4. Set the Wire Speed Dial and |
the Current Switch to the desired settings. |
Refer to the chart on the welder |
or the chart on the facing page. |
WARNING! DO NOT SWITCH THE |
CURRENT WHILE WELDING. |
ITEM 68887 |
|
|
|
| ITEM 68887 |
|
|
| ON | MIN |
|
| ON | MIN | |
| OFF | MAX |
|
| OFF | MAX | |
WIRE FEED SPEED Wire |
| ED | Wire | ||||
| Capacity XX Ga. – X/X″ Steel Plate | ||||||
Capacity XX Ga. – X/X″ Steel P |
|
| |||||
+ Cables | Electrode – X′ |
| |||||
Cables | Electrode – X′ |
|
| ||||
Ground Clamp – X′ |
| Ground Clamp – X′ |
| ||||
GROUND |
|
|
|
|
|
|
|
| 120V~ |
|
|
|
| 120V~ |
|
BASIC
5.Flip the Power Switch to the OFF position, then plug the Welder into a dedicated, 120 V~, 20 A circuit with delayed action type circuit breaker or fuses.
P FLUX WIRE WELDER
| ITEM 68887 |
|
|
|
| ON | MIN |
|
| OFF | MAX |
SPEED | Wire | ||
| Capacity XX Ga. – X/X″ Steel Plate | ||
| Cables | Electrode – X′ |
|
| Ground Clamp – X′ |
| |
|
|
| |
120V~
60Hz
20 Amp minimum circuit
WELDING TIPS
| HOLD | |
6. Hold the Gun, without touching the Trigger, with the | GUN | |
CLEAR | ||
wire and tip clearly away from any grounded objects. | ||
| ||
Then, turn the Power Switch to ON. |
|
SKU 68887 | For technical questions, please call |
MP FLUX WIRE WELDER
| ITEM 68887 |
|
|
|
| ON | MIN |
|
| OFF | MAX |
ED SPEED | Wire | ||
| Capacity XX Ga. – X/X″ Steel Plate | ||
| Cables | Electrode – X′ |
|
| Ground Clamp – X′ |
| |
|
|
| |
120V~
Page 15
MAINTENANCE