If the electrode fuses to the workpiece, quickly twist to release it and lift it slightly farther on your next attempt.
19.The Welding Wire/Electrode should be directed straight into the joint. This gives an angle of 90 degrees (straight up and down) for groove (end to end) welds, and an angle of 45 degrees for fillet
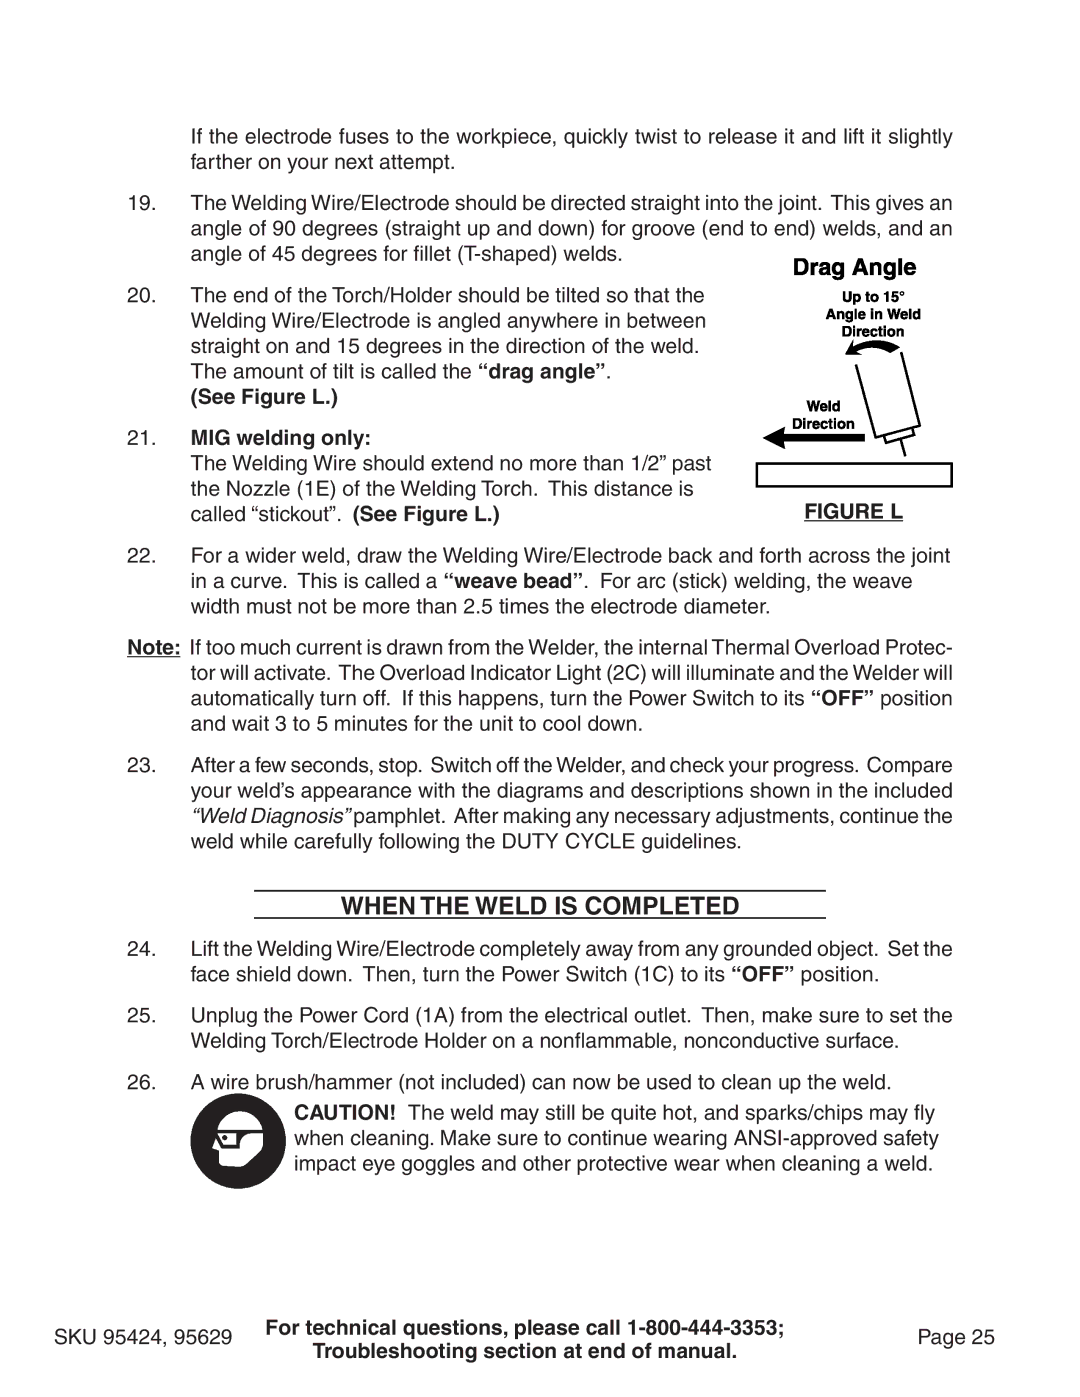
20.The end of the Torch/Holder should be tilted so that the Welding Wire/Electrode is angled anywhere in between straight on and 15 degrees in the direction of the weld. The amount of tilt is called the “drag angle”.
(See Figure L.)
21.MIG welding only:
The Welding Wire should extend no more than 1/2” past
the Nozzle (1E) of the Welding Torch. This distance is | FIGURE L |
called “stickout”. (See Figure L.) |
22.For a wider weld, draw the Welding Wire/Electrode back and forth across the joint in a curve. This is called a “weave bead”. For arc (stick) welding, the weave width must not be more than 2.5 times the electrode diameter.
Note: If too much current is drawn from the Welder, the internal Thermal Overload Protec- tor will activate. The Overload Indicator Light (2C) will illuminate and the Welder will automatically turn off. If this happens, turn the Power Switch to its “OFF” position and wait 3 to 5 minutes for the unit to cool down.
23.After a few seconds, stop. Switch off the Welder, and check your progress. Compare your weld’s appearance with the diagrams and descriptions shown in the included “Weld Diagnosis” pamphlet. After making any necessary adjustments, continue the weld while carefully following the DUTY CYCLE guidelines.
When the Weld is Completed
24.Lift the Welding Wire/Electrode completely away from any grounded object. Set the face shield down. Then, turn the Power Switch (1C) to its “OFF” position.
25.Unplug the Power Cord (1A) from the electrical outlet. Then, make sure to set the Welding Torch/Electrode Holder on a nonflammable, nonconductive surface.
26.A wire brush/hammer (not included) can now be used to clean up the weld.
CAUTION! The weld may still be quite hot, and sparks/chips may fly when cleaning. Make sure to continue wearing
SKU 95424, 95629 | For technical questions, please call | Page 25 | |
Troubleshooting section at end of manual. | |||
|
|