Deployment and Design Requirements
Step 6 | Check to enable the Maintain Aspect Ratio check box. Enabling this check box causes the horizontal | |
| span of the campus to be 5000 feet and adjusts the vertical span according to the image file’s aspect ratio. | |
| Adjusting either the horizontal or vertical span changes the other field in accordance with the image | |
| ratio. |
|
| You should uncheck the Maintain Aspect Ratio check box if you want to override this automatic | |
| adjustment. You could then adjust both span values to match the real world campus dimensions. | |
Step 7 | Click OK. |
|
Step 8 | On the Monitor > Maps subtab, click the hyperlink associated with the | |
| window showing the new campus image is displayed. | |
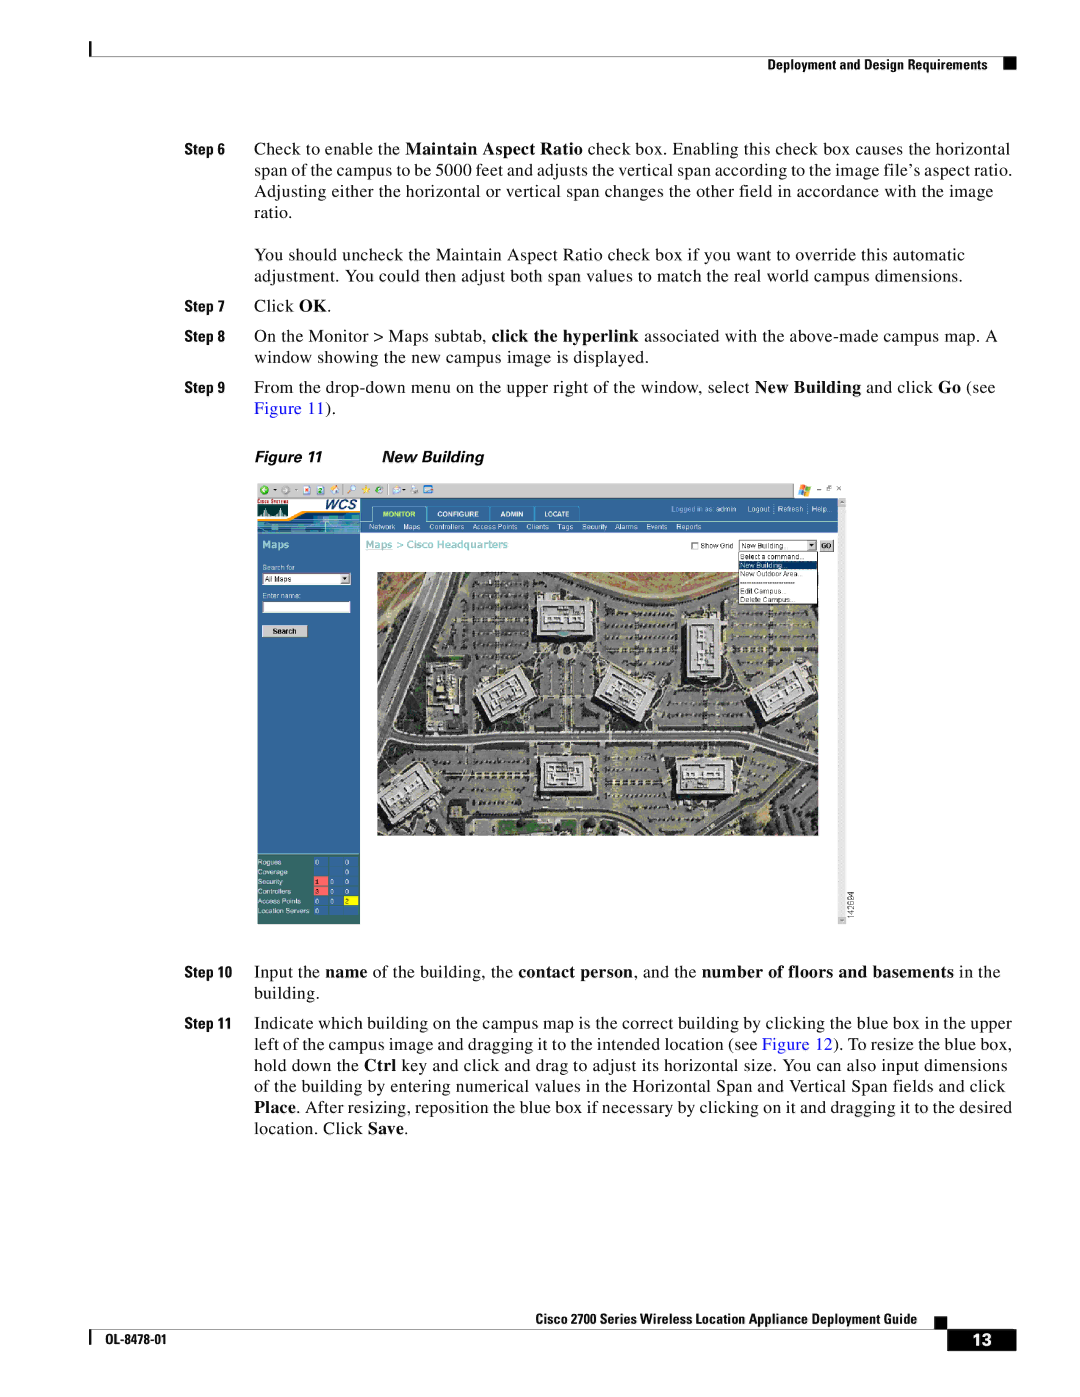
Step 9 | From the | |
| Figure 11). |
|
| Figure 11 | New Building |
Step 10 Input the name of the building, the contact person, and the number of floors and basements in the building.
Step 11 Indicate which building on the campus map is the correct building by clicking the blue box in the upper left of the campus image and dragging it to the intended location (see Figure 12). To resize the blue box, hold down the Ctrl key and click and drag to adjust its horizontal size. You can also input dimensions of the building by entering numerical values in the Horizontal Span and Vertical Span fields and click Place. After resizing, reposition the blue box if necessary by clicking on it and dragging it to the desired location. Click Save.
Cisco 2700 Series Wireless Location Appliance Deployment Guide
| 13 |
| |
|
|
