Chapter 2 Setting Up Your Cisco Unified Videoconferencing 3515 MCU
How to Perform the Cisco Unified Videoconferencing 3515 MCU Unit Initial Configuration
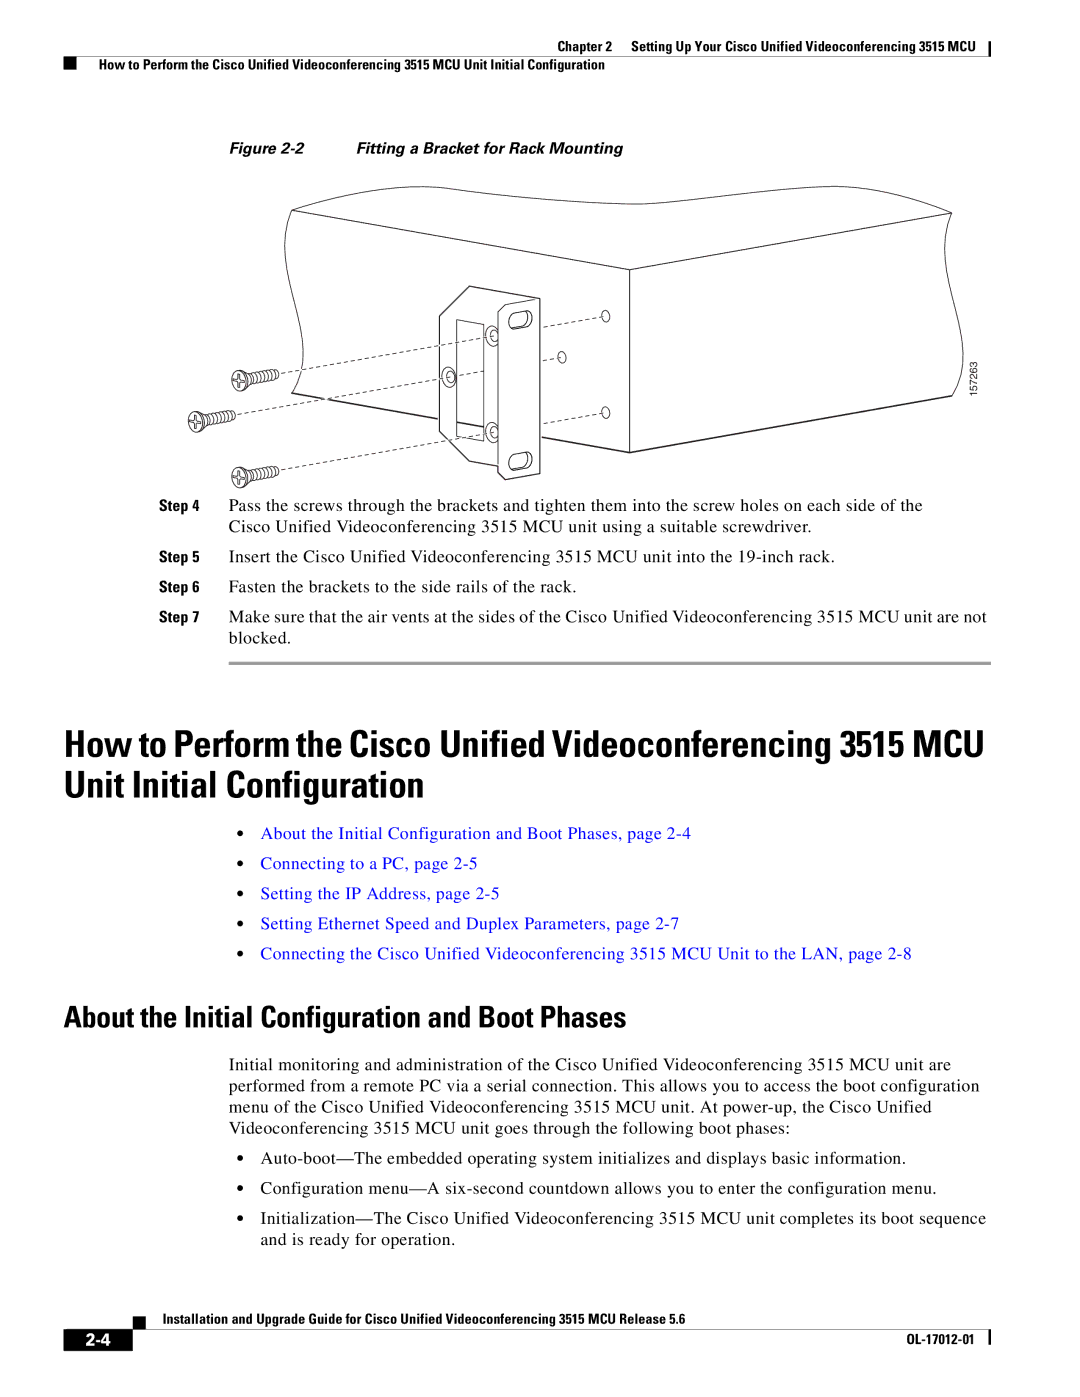
Figure 2-2 Fitting a Bracket for Rack Mounting
157263
Step 4 Pass the screws through the brackets and tighten them into the screw holes on each side of the Cisco Unified Videoconferencing 3515 MCU unit using a suitable screwdriver.
Step 5 Insert the Cisco Unified Videoconferencing 3515 MCU unit into the
Step 6 Fasten the brackets to the side rails of the rack.
Step 7 Make sure that the air vents at the sides of the Cisco Unified Videoconferencing 3515 MCU unit are not blocked.
How to Perform the Cisco Unified Videoconferencing 3515 MCU Unit Initial Configuration
•About the Initial Configuration and Boot Phases, page
•Connecting to a PC, page
•Setting the IP Address, page
•Setting Ethernet Speed and Duplex Parameters, page
•Connecting the Cisco Unified Videoconferencing 3515 MCU Unit to the LAN, page
About the Initial Configuration and Boot Phases
Initial monitoring and administration of the Cisco Unified Videoconferencing 3515 MCU unit are performed from a remote PC via a serial connection. This allows you to access the boot configuration menu of the Cisco Unified Videoconferencing 3515 MCU unit. At
•
•Configuration
•
Installation and Upgrade Guide for Cisco Unified Videoconferencing 3515 MCU Release 5.6
| ||
|
