Chapter 2 Installing the Cisco Nexus 5000 Series Switches
Installing the Switch
Se n d d o c u m e n t a t i o n c o m m e n t s t o n ex u s 5 k d o c s @ c i s c o . c o m .
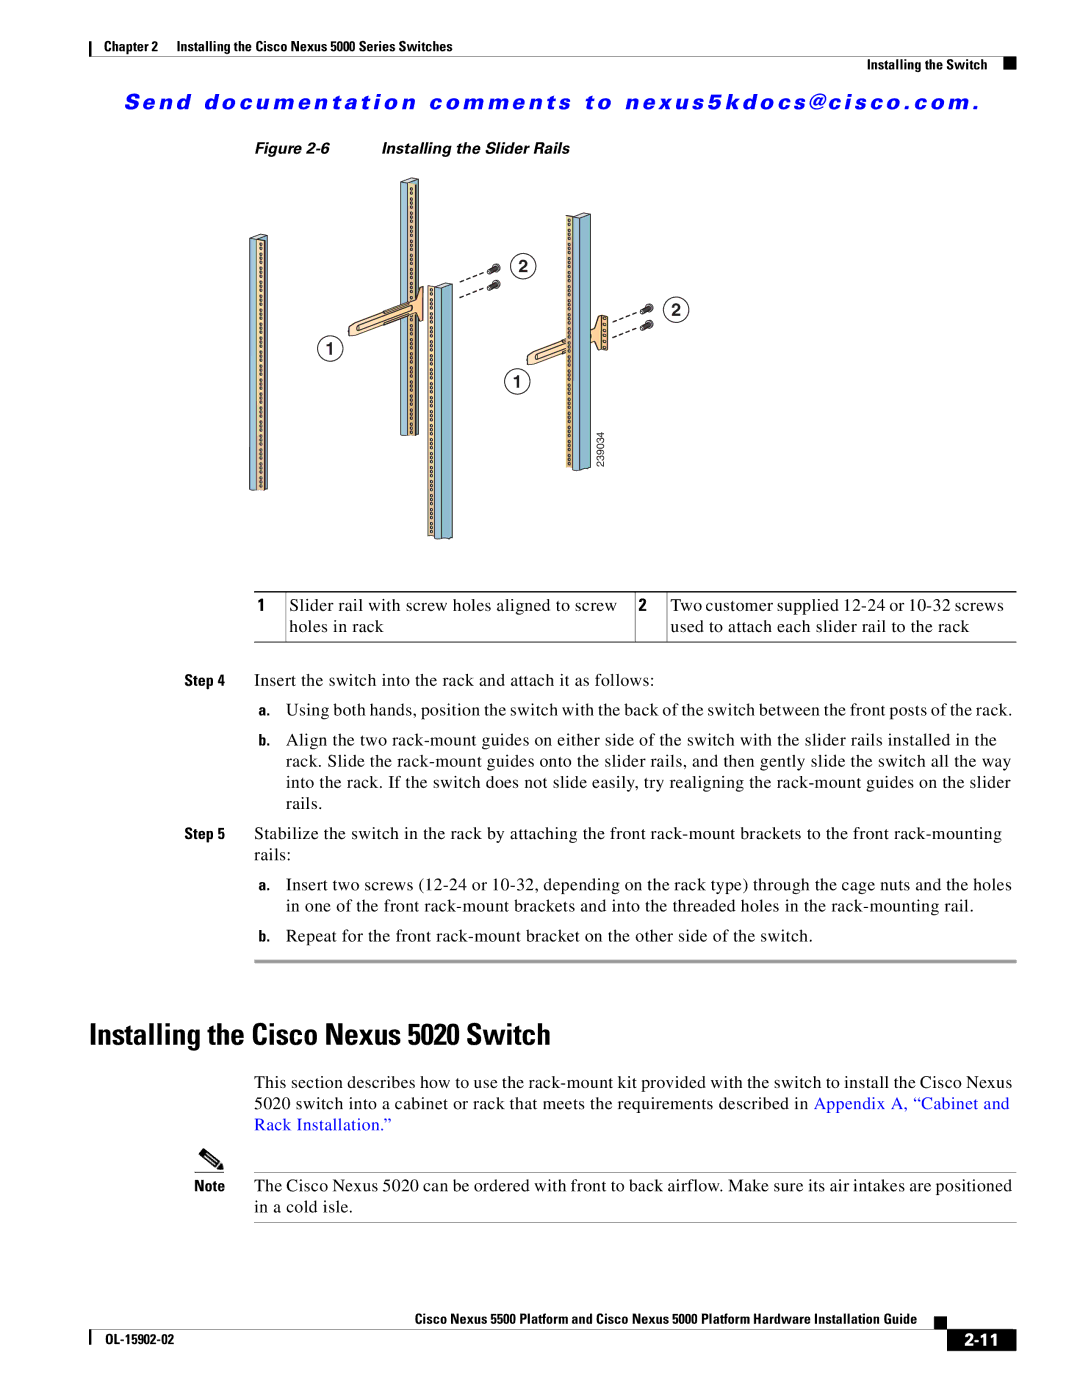
Figure 2-6 Installing the Slider Rails
2
2
1
1
239034
1
Slider rail with screw holes aligned to screw holes in rack
2
Two customer supplied
Step 4 Insert the switch into the rack and attach it as follows:
a.Using both hands, position the switch with the back of the switch between the front posts of the rack.
b.Align the two
Step 5 Stabilize the switch in the rack by attaching the front
a.Insert two screws
b.Repeat for the front
Installing the Cisco Nexus 5020 Switch
This section describes how to use the
Note The Cisco Nexus 5020 can be ordered with front to back airflow. Make sure its air intakes are positioned in a cold isle.
|
| Cisco Nexus 5500 Platform and Cisco Nexus 5000 Platform Hardware Installation Guide |
|
| |
|
|
| |||
|
|
|
| ||
|
|
|
| ||