1

Installed in 4-post rack—rear installation

3

Installed in 4-post rack—protruding front installation


2

Installed in a Telco-type rack—middle rack-mount

4

Installed in 4-post rack—front installation

installation


Attach the Rack-Mount Brackets to the Rear of the Chassis

To install the rack-mount brackets on the chassis for a rear rack-mount configuration, complete the following steps:

Step 1 Locate the threaded holes in the rear sides of the chassis.

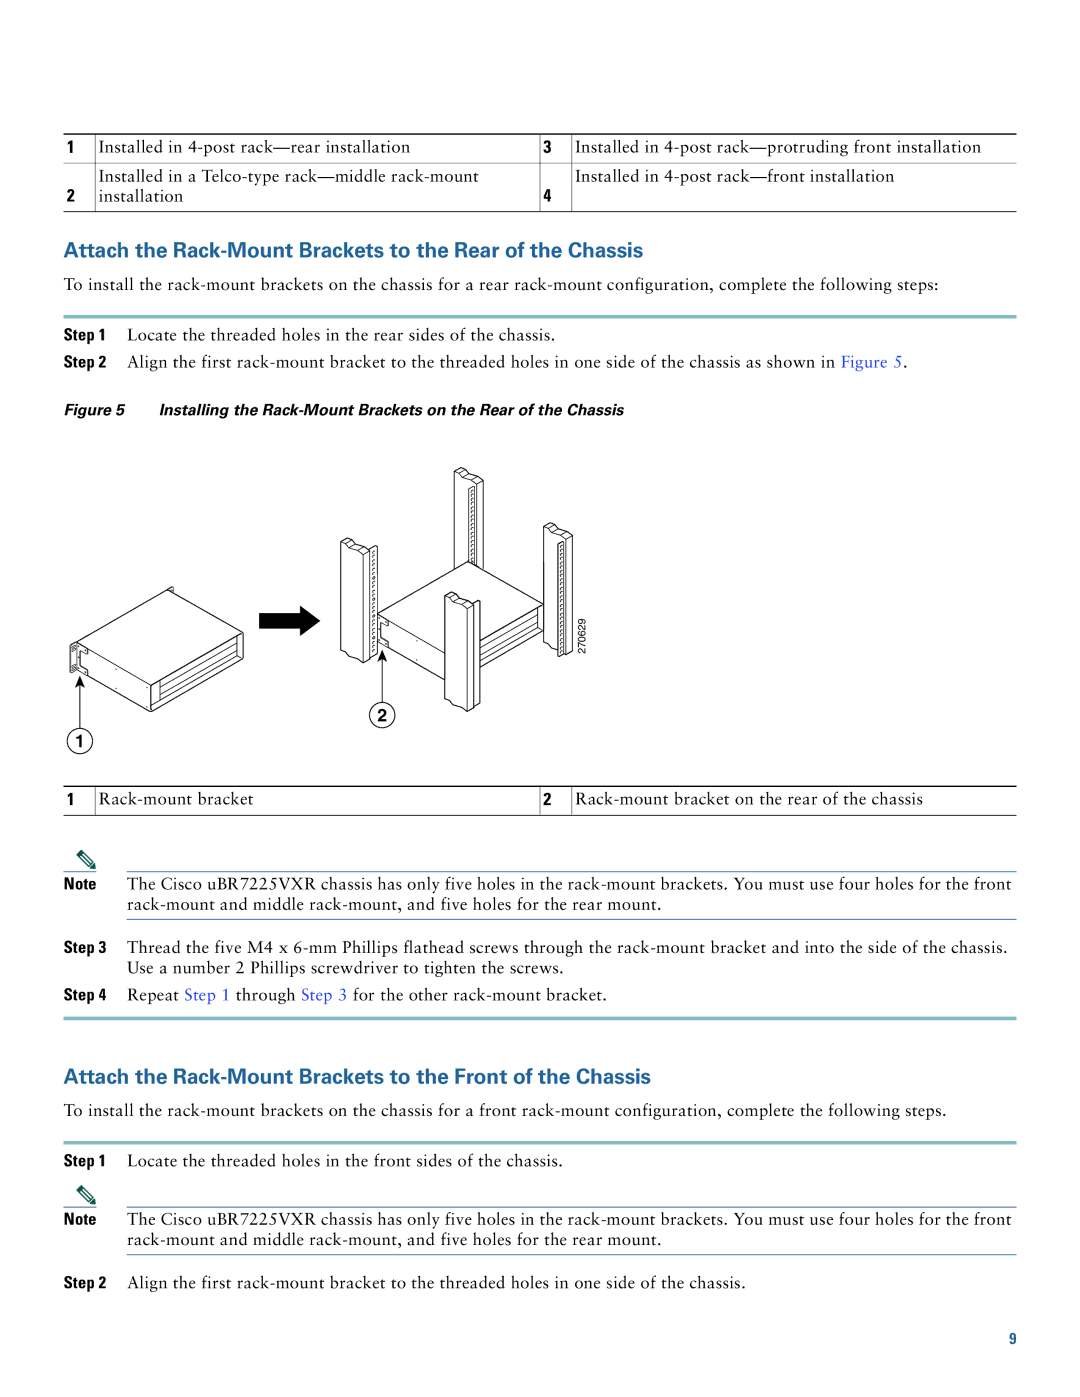
Step 2 Align the first rack-mount bracket to the threaded holes in one side of the chassis as shown in Figure 5.

Figure 5 Installing the Rack-Mount Brackets on the Rear of the Chassis

2

1

270629

1

Rack-mount bracket

2

Rack-mount bracket on the rear of the chassis

Note The Cisco uBR7225VXR chassis has only five holes in the rack-mount brackets. You must use four holes for the front rack-mount and middle rack-mount, and five holes for the rear mount.

Step 3 Thread the five M4 x 6-mm Phillips flathead screws through the rack-mount bracket and into the side of the chassis. Use a number 2 Phillips screwdriver to tighten the screws.

Step 4 Repeat Step 1 through Step 3 for the other rack-mount bracket.

Attach the Rack-Mount Brackets to the Front of the Chassis

To install the rack-mount brackets on the chassis for a front rack-mount configuration, complete the following steps.

Step 1 Locate the threaded holes in the front sides of the chassis.

Note The Cisco uBR7225VXR chassis has only five holes in the rack-mount brackets. You must use four holes for the front rack-mount and middle rack-mount, and five holes for the rear mount.

Step 2 Align the first rack-mount bracket to the threaded holes in one side of the chassis.

9

Page 9
Image 9
Cisco Systems UBR7225VXR quick start Attach the Rack-Mount Brackets to the Rear of the Chassis