Step 3 Thread the four M4 x 6-mm Phillips flathead screws through the bracket and into the side of the chassis. Use a number 2 Phillips screwdriver to tighten the screws.
Step 4 Repeat Step 1 through Step 3 for the other rack-mount bracket.
Note Ensure you fasten the cable-management bracket before installing the chassis in the rack.
Attach the Rack-Mount Brackets to the Middle of the Chassis
To install the rack-mount brackets on the chassis for a middle rack-mount configuration, complete the following steps:
Step 1 Locate the threaded holes in the middle sides of the chassis.
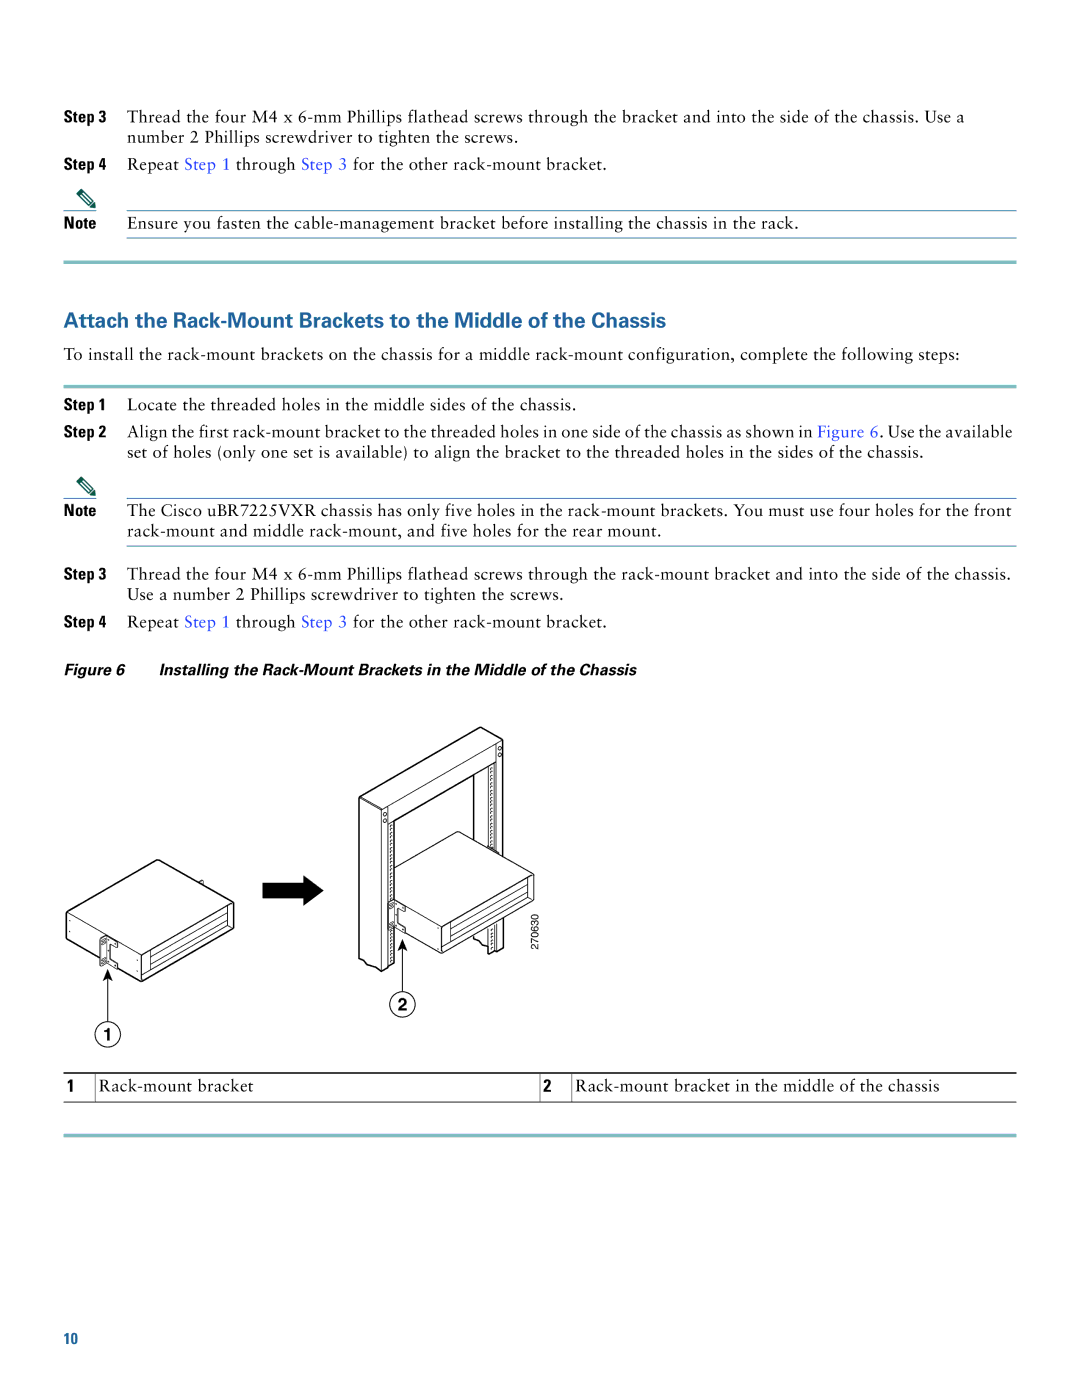
Step 2 Align the first rack-mount bracket to the threaded holes in one side of the chassis as shown in Figure 6. Use the available set of holes (only one set is available) to align the bracket to the threaded holes in the sides of the chassis.
Note The Cisco uBR7225VXR chassis has only five holes in the rack-mount brackets. You must use four holes for the front rack-mount and middle rack-mount, and five holes for the rear mount.
Step 3 Thread the four M4 x 6-mm Phillips flathead screws through the rack-mount bracket and into the side of the chassis. Use a number 2 Phillips screwdriver to tighten the screws.
Step 4 Repeat Step 1 through Step 3 for the other rack-mount bracket.
Figure 6 Installing the Rack-Mount Brackets in the Middle of the Chassis

 270630
2
1
Rack-mount bracket in the middle of the chassis