Installing the Cable-Management Bracket
Before installing the chassis in the rack, both
To install the
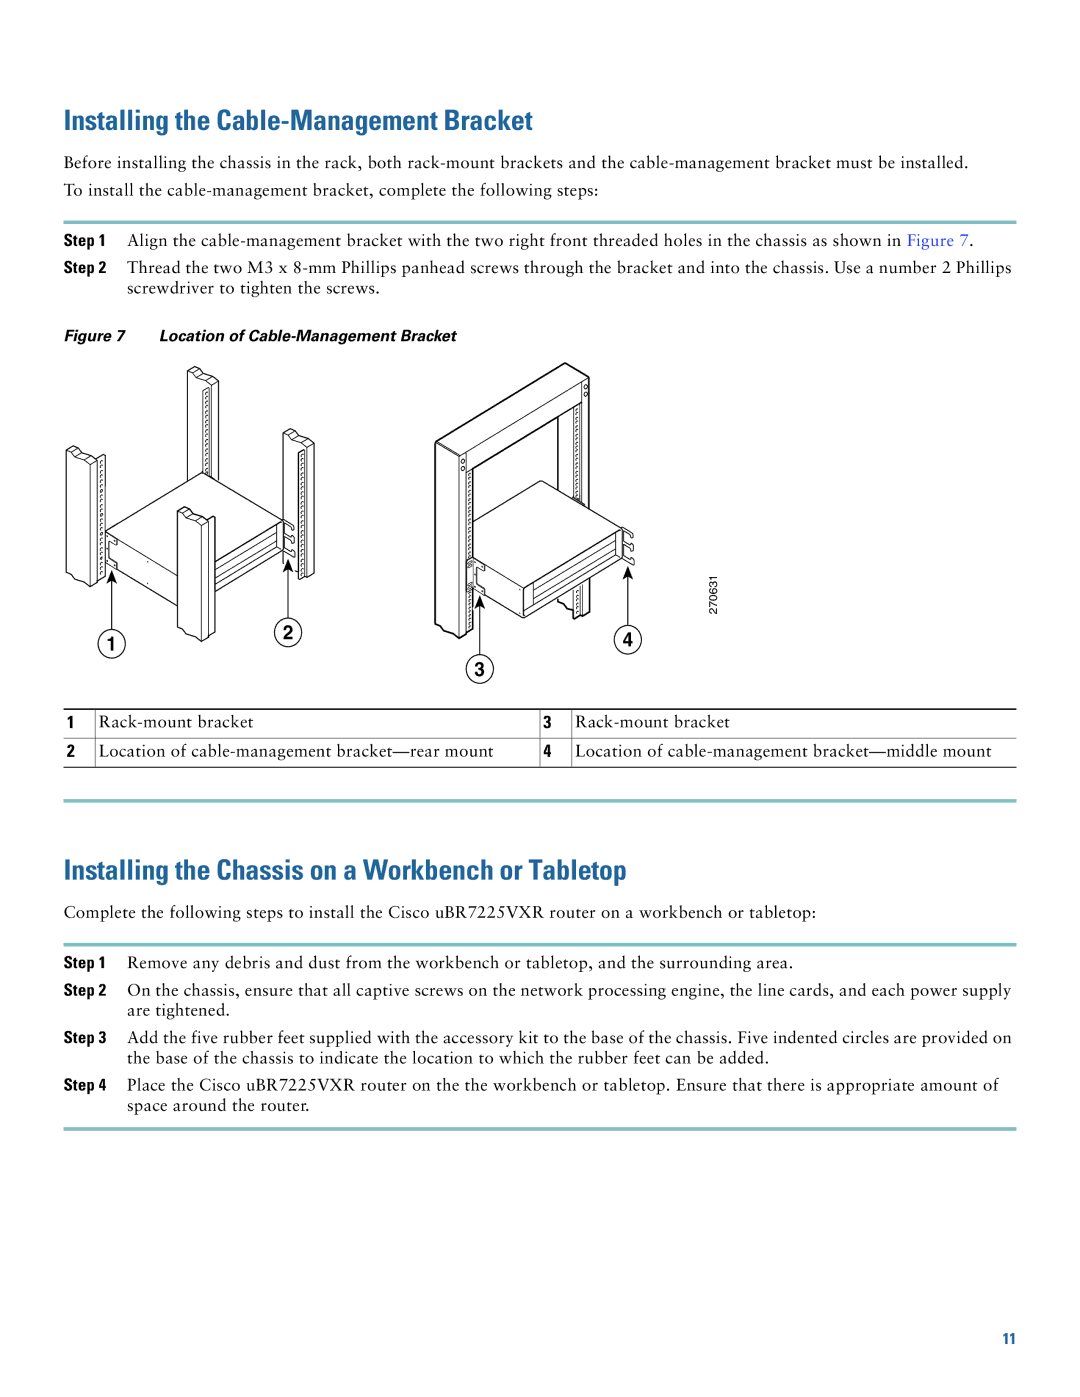
Step 1 Align the
Step 2 Thread the two M3 x
Figure 7 Location of Cable-Management Bracket
1
2
|
|
| 270631 |
1 | 2 |
| 4 |
|
| ||
| 3 |
|
|
| 3 | ||
Location of | 4 | Location of | |
Installing the Chassis on a Workbench or Tabletop
Complete the following steps to install the Cisco uBR7225VXR router on a workbench or tabletop:
Step 1 Remove any debris and dust from the workbench or tabletop, and the surrounding area.
Step 2 On the chassis, ensure that all captive screws on the network processing engine, the line cards, and each power supply are tightened.
Step 3 Add the five rubber feet supplied with the accessory kit to the base of the chassis. Five indented circles are provided on the base of the chassis to indicate the location to which the rubber feet can be added.
Step 4 Place the Cisco uBR7225VXR router on the the workbench or tabletop. Ensure that there is appropriate amount of space around the router.
11