Camera Setup
To define a camera and associate it with a Channel Number.
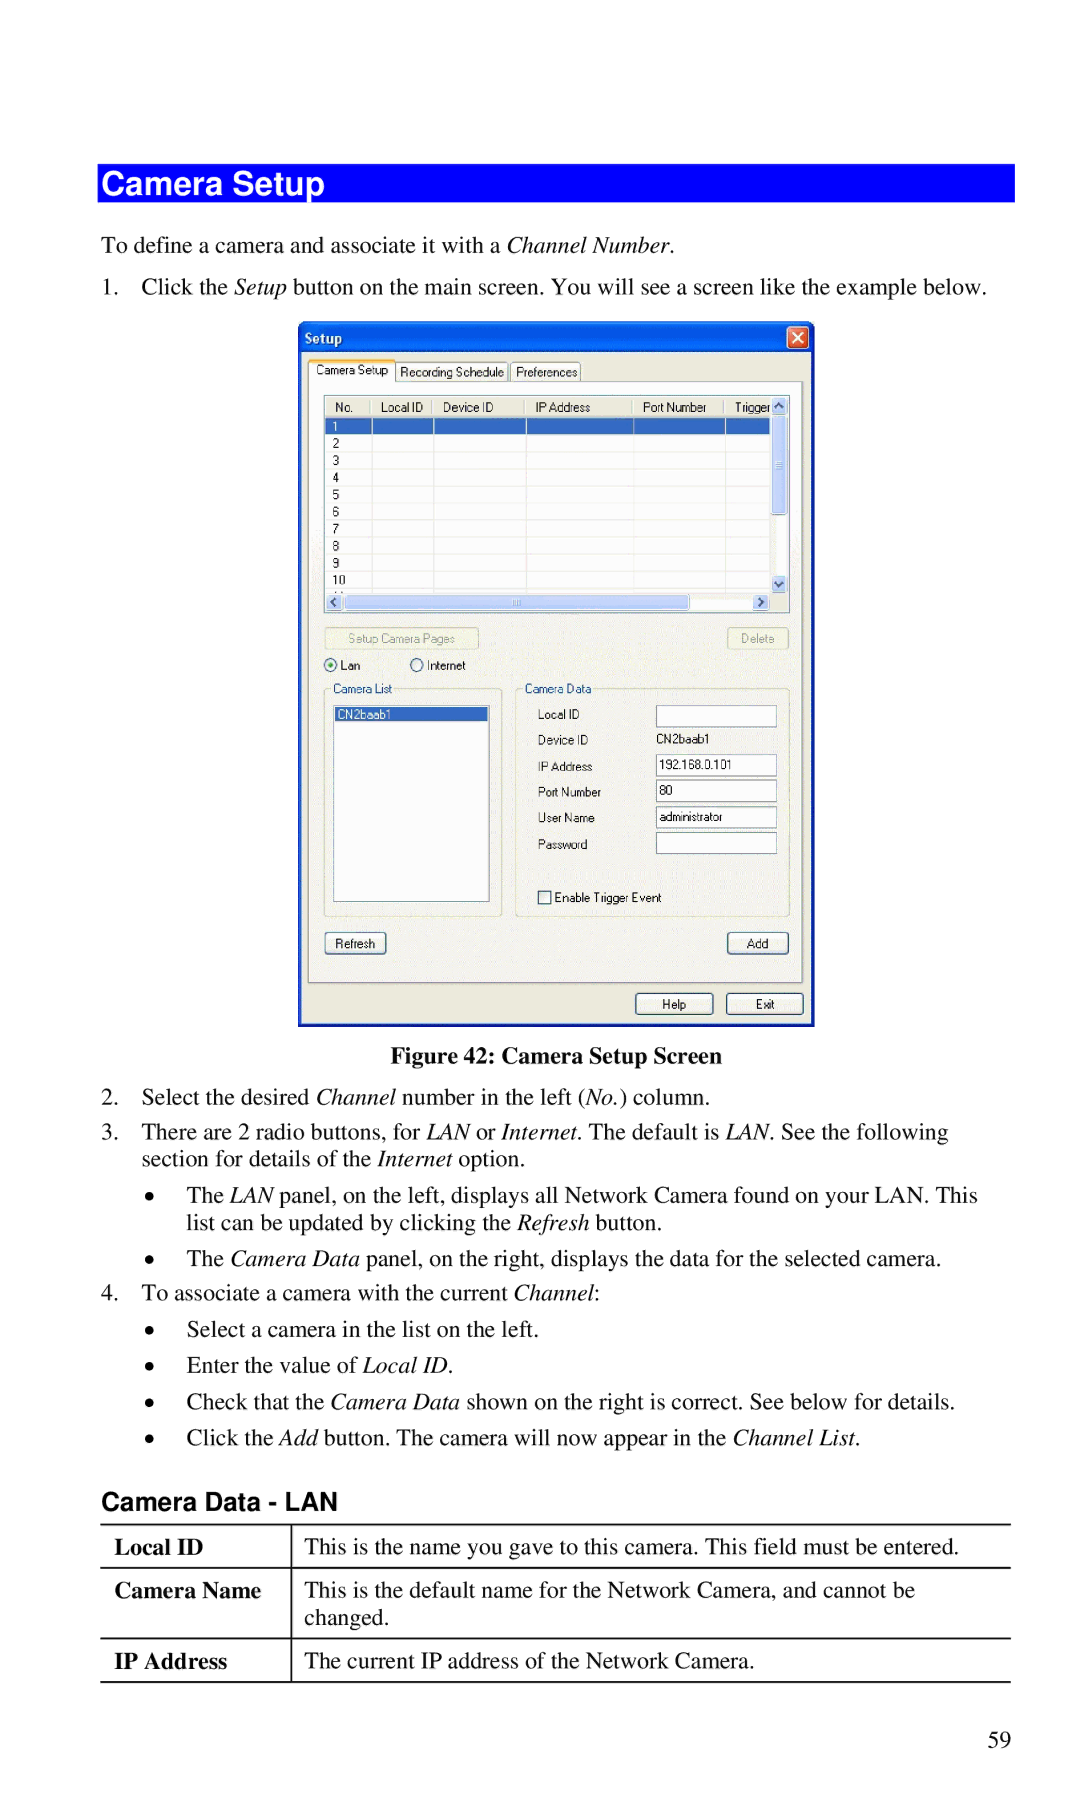
1. Click the Setup button on the main screen. You will see a screen like the example below.
Figure 42: Camera Setup Screen
2.Select the desired Channel number in the left (No.) column.
3.There are 2 radio buttons, for LAN or Internet. The default is LAN. See the following section for details of the Internet option.
•The LAN panel, on the left, displays all Network Camera found on your LAN. This list can be updated by clicking the Refresh button.
•The Camera Data panel, on the right, displays the data for the selected camera.
4.To associate a camera with the current Channel:
•Select a camera in the list on the left.
•Enter the value of Local ID.
•Check that the Camera Data shown on the right is correct. See below for details.
•Click the Add button. The camera will now appear in the Channel List.
Camera Data - LAN
Local ID
Camera Name
IP Address
This is the name you gave to this camera. This field must be entered.
This is the default name for the Network Camera, and cannot be changed.
The current IP address of the Network Camera.
59
