4.10.2Removing an External 5.25-Inch Drive
1. Prepare the computer for disassembly (Section 4.2).
WARNING: Power is continuous to the system board and power supply even when the power switch is turned off. To prevent damage to the unit, disconnect the power cord from the power source or the unit before beginning disassembly procedures.
2.Remove the access panel (Section 4.5).
3.Remove the front bezel (Section 4.6).
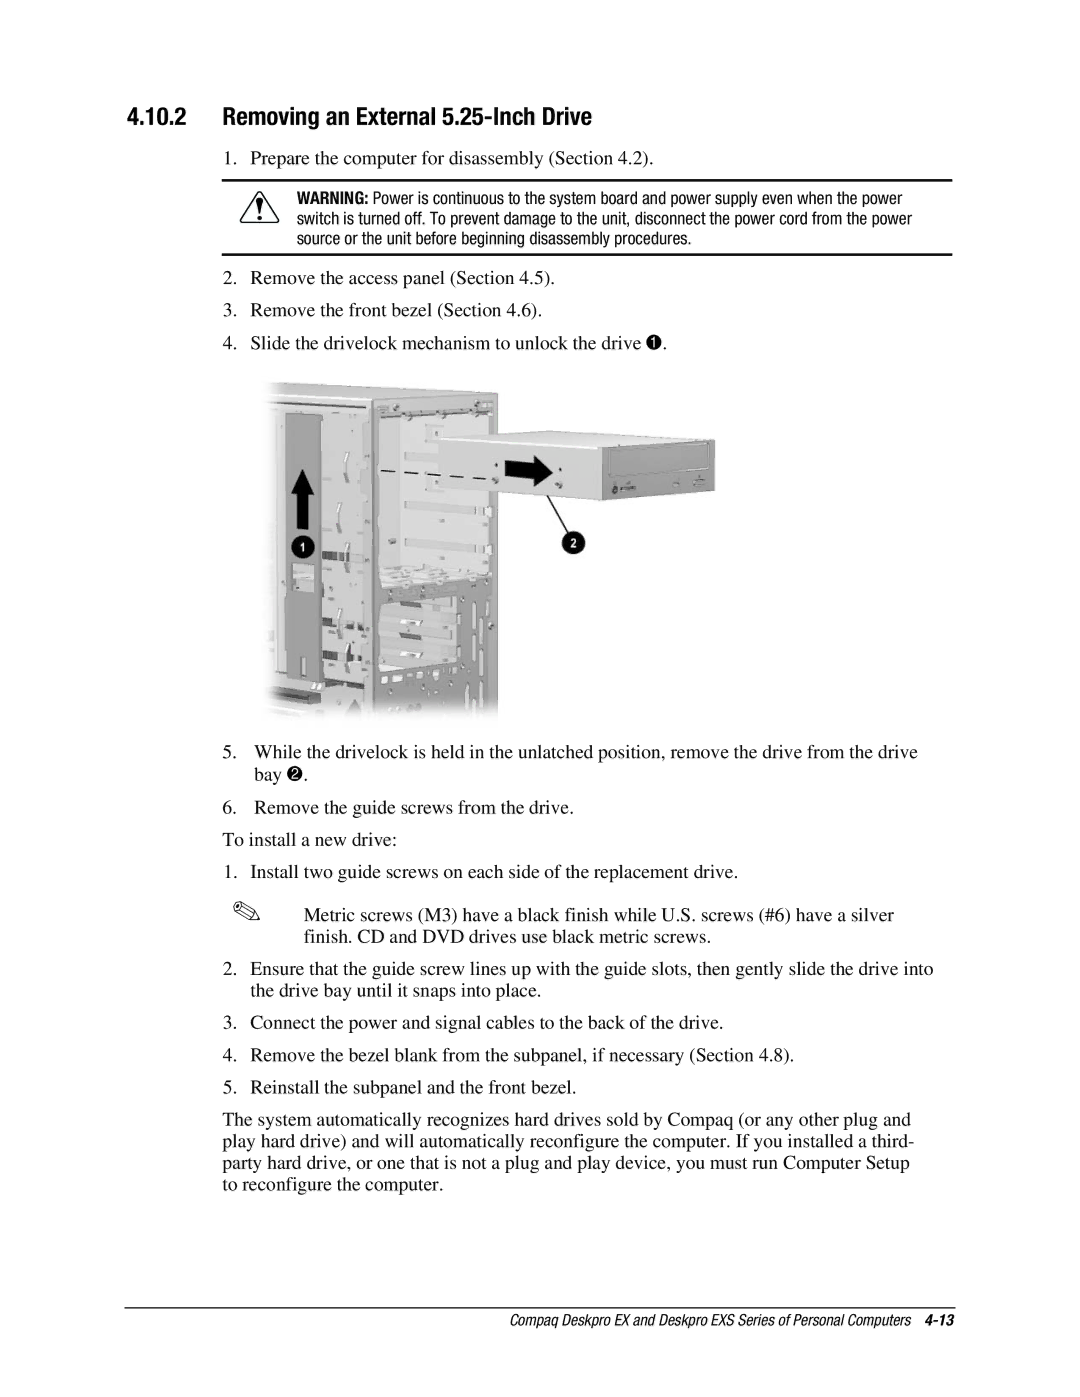
4.Slide the drivelock mechanism to unlock the drive 1.
5.While the drivelock is held in the unlatched position, remove the drive from the drive bay 2.
6.Remove the guide screws from the drive.
To install a new drive:
1.Install two guide screws on each side of the replacement drive.
✎Metric screws (M3) have a black finish while U.S. screws (#6) have a silver finish. CD and DVD drives use black metric screws.
2.Ensure that the guide screw lines up with the guide slots, then gently slide the drive into the drive bay until it snaps into place.
3.Connect the power and signal cables to the back of the drive.
4.Remove the bezel blank from the subpanel, if necessary (Section 4.8).
5.Reinstall the subpanel and the front bezel.
The system automatically recognizes hard drives sold by Compaq (or any other plug and play hard drive) and will automatically reconfigure the computer. If you installed a third- party hard drive, or one that is not a plug and play device, you must run Computer Setup to reconfigure the computer.
Compaq Deskpro EX and Deskpro EXS Series of Personal Computers
