2.2Reshipment
If possible, retain the original packing material for reshipment. If the original packing material is not used, insure that printer and the printer carriage will not move during shipment and that the unit has sufficient protective padding.
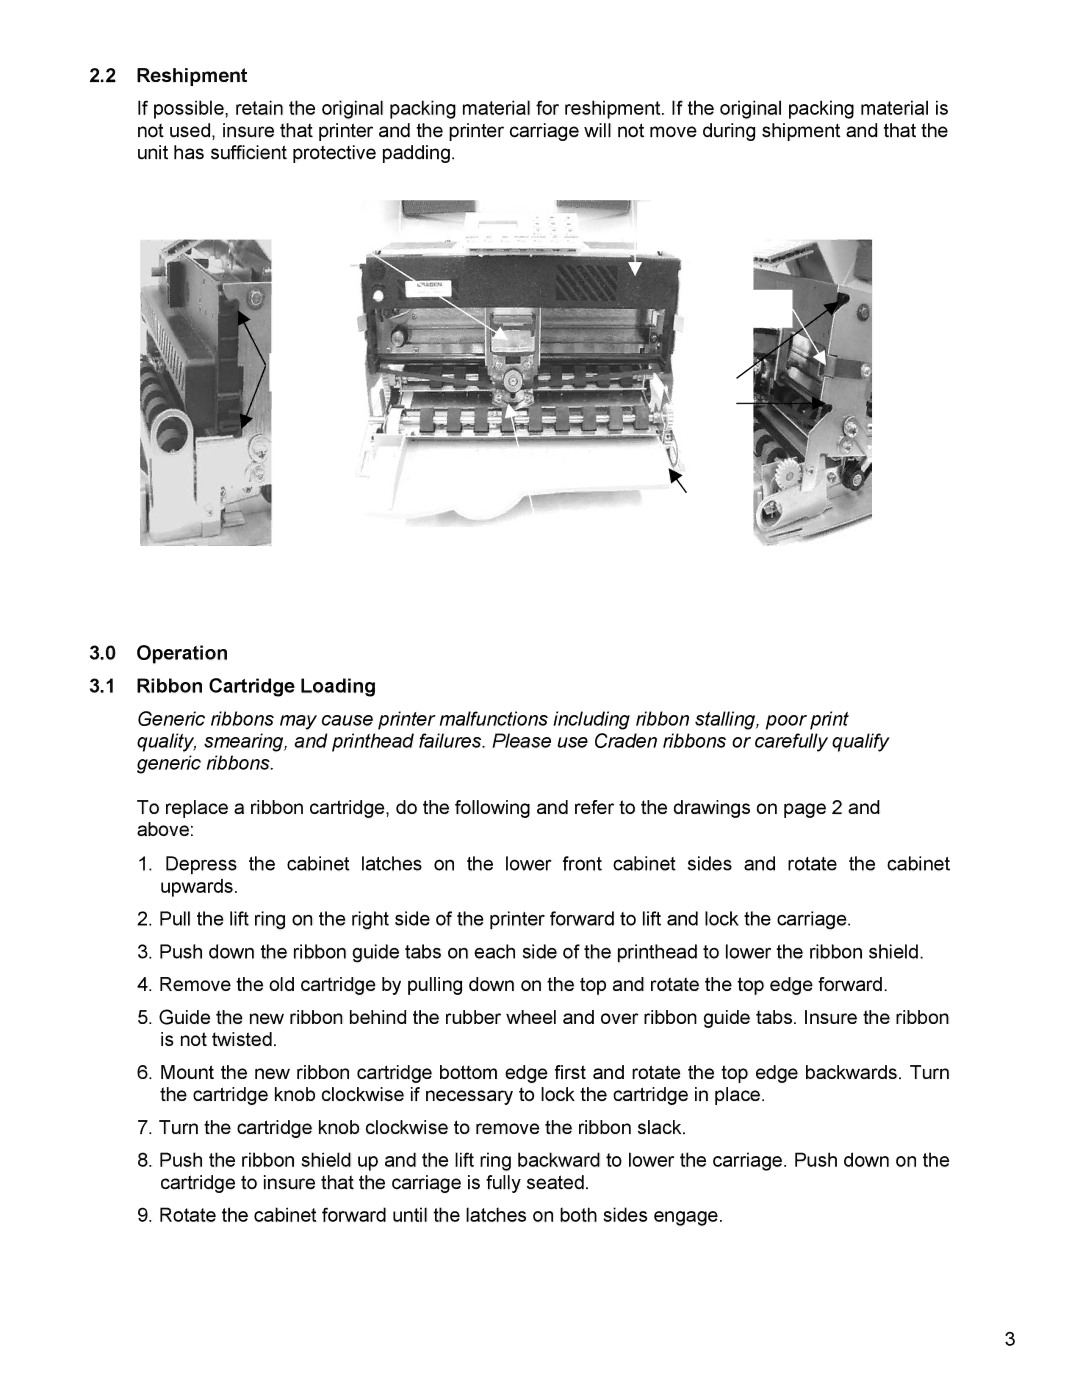
| Ribbon |
Printhead | Cartridge |
|
Cartridge p
| Lift |
| |
| Ring |
| |
| Ribbon guide & shield |
| |
DP8 Ribbon | DP9 printer with cabinet open, lift ring down and | DP9 Ribbon | |
Fit, Sides | Fit, Sides | ||
ribbon guide down | |||
|
|
3.0Operation
3.1Ribbon Cartridge Loading
Generic ribbons may cause printer malfunctions including ribbon stalling, poor print quality, smearing, and printhead failures. Please use Craden ribbons or carefully qualify generic ribbons.
To replace a ribbon cartridge, do the following and refer to the drawings on page 2 and above:
1.Depress the cabinet latches on the lower front cabinet sides and rotate the cabinet upwards.
2.Pull the lift ring on the right side of the printer forward to lift and lock the carriage.
3.Push down the ribbon guide tabs on each side of the printhead to lower the ribbon shield.
4.Remove the old cartridge by pulling down on the top and rotate the top edge forward.
5.Guide the new ribbon behind the rubber wheel and over ribbon guide tabs. Insure the ribbon is not twisted.
6.Mount the new ribbon cartridge bottom edge first and rotate the top edge backwards. Turn the cartridge knob clockwise if necessary to lock the cartridge in place.
7.Turn the cartridge knob clockwise to remove the ribbon slack.
8.Push the ribbon shield up and the lift ring backward to lower the carriage. Push down on the cartridge to insure that the carriage is fully seated.
9.Rotate the cabinet forward until the latches on both sides engage.
3