5.6.4 Defective Sensor
All sensors transmit infrared light and sense light reflected by a document, gap roller or cabinet. The sensors are automatically
Press 9 0 FUNCT to run diagnostics and display “SENSORS” and the letters LFBMRCE. L is the left home carriage sensor; F and B are the front and back document sensors, M and R are the middle and right skew sensors, C is the cabinet open sensor and E is the document edge sensor. The cabinet open sensor is mounted on the main PCB and looks through a slot in the rear panel heat sink. The document edge sensor is mounted on the carriage and “looks” down toward the platen. All other sensors are mounted on the
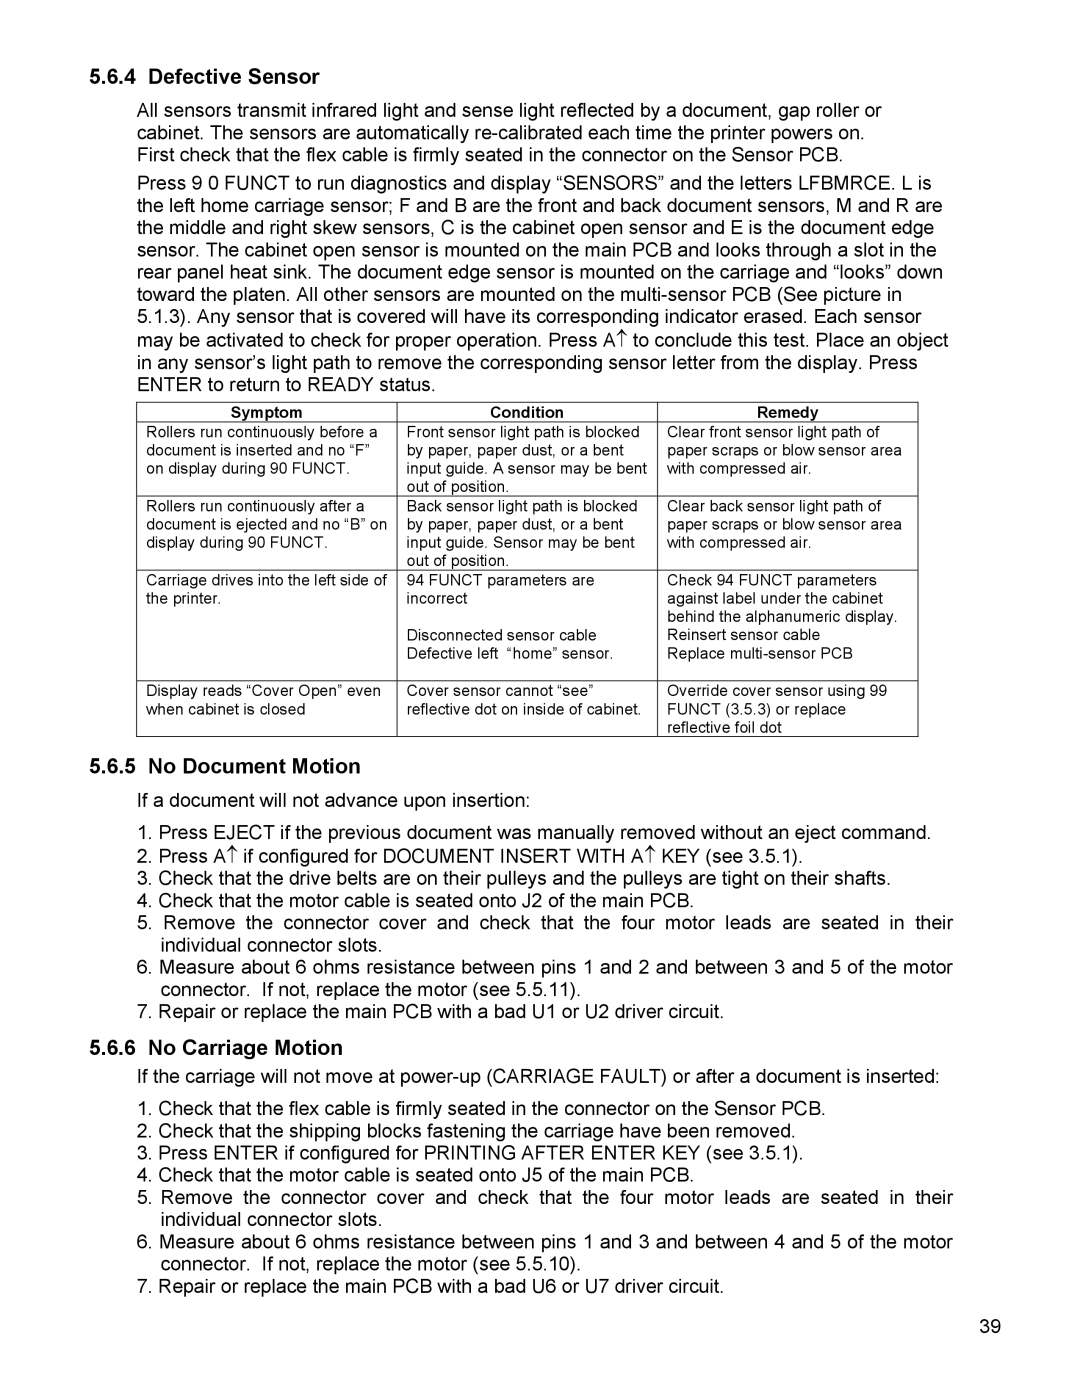
Symptom | Condition | Remedy |
Rollers run continuously before a | Front sensor light path is blocked | Clear front sensor light path of |
document is inserted and no “F” | by paper, paper dust, or a bent | paper scraps or blow sensor area |
on display during 90 FUNCT. | input guide. A sensor may be bent | with compressed air. |
| out of position. |
|
Rollers run continuously after a | Back sensor light path is blocked | Clear back sensor light path of |
document is ejected and no “B” on | by paper, paper dust, or a bent | paper scraps or blow sensor area |
display during 90 FUNCT. | input guide. Sensor may be bent | with compressed air. |
| out of position. |
|
Carriage drives into the left side of | 94 FUNCT parameters are | Check 94 FUNCT parameters |
the printer. | incorrect | against label under the cabinet |
|
| behind the alphanumeric display. |
| Disconnected sensor cable | Reinsert sensor cable |
| Defective left “home” sensor. | Replace |
|
|
|
Display reads “Cover Open” even | Cover sensor cannot “see” | Override cover sensor using 99 |
when cabinet is closed | reflective dot on inside of cabinet. | FUNCT (3.5.3) or replace |
|
| reflective foil dot |
5.6.5 No Document Motion
If a document will not advance upon insertion:
1.Press EJECT if the previous document was manually removed without an eject command.
2.Press A↑ if configured for DOCUMENT INSERT WITH A↑ KEY (see 3.5.1).
3.Check that the drive belts are on their pulleys and the pulleys are tight on their shafts.
4.Check that the motor cable is seated onto J2 of the main PCB.
5.Remove the connector cover and check that the four motor leads are seated in their individual connector slots.
6.Measure about 6 ohms resistance between pins 1 and 2 and between 3 and 5 of the motor connector. If not, replace the motor (see 5.5.11).
7.Repair or replace the main PCB with a bad U1 or U2 driver circuit.
5.6.6No Carriage Motion
If the carriage will not move at
1.Check that the flex cable is firmly seated in the connector on the Sensor PCB.
2.Check that the shipping blocks fastening the carriage have been removed.
3.Press ENTER if configured for PRINTING AFTER ENTER KEY (see 3.5.1).
4.Check that the motor cable is seated onto J5 of the main PCB.
5.Remove the connector cover and check that the four motor leads are seated in their individual connector slots.
6.Measure about 6 ohms resistance between pins 1 and 3 and between 4 and 5 of the motor connector. If not, replace the motor (see 5.5.10).
7.Repair or replace the main PCB with a bad U6 or U7 driver circuit.
39