7.Replace the cable cover.
8.Plug the power cables of your computer and your display into a nearby outlet. Your monitor is equipped with an automatic power supply for a voltage range from 100 to 240 Volt at a frequency of 50/60 Hz. Be sure that your local power is within the supported range. If you are unsure, ask your electricity supplier.
9.Turn on power to the monitor and your computer.
If your monitor displays an image, installation is complete. If it does not display an image, see Solving Problems.
Using the OSD
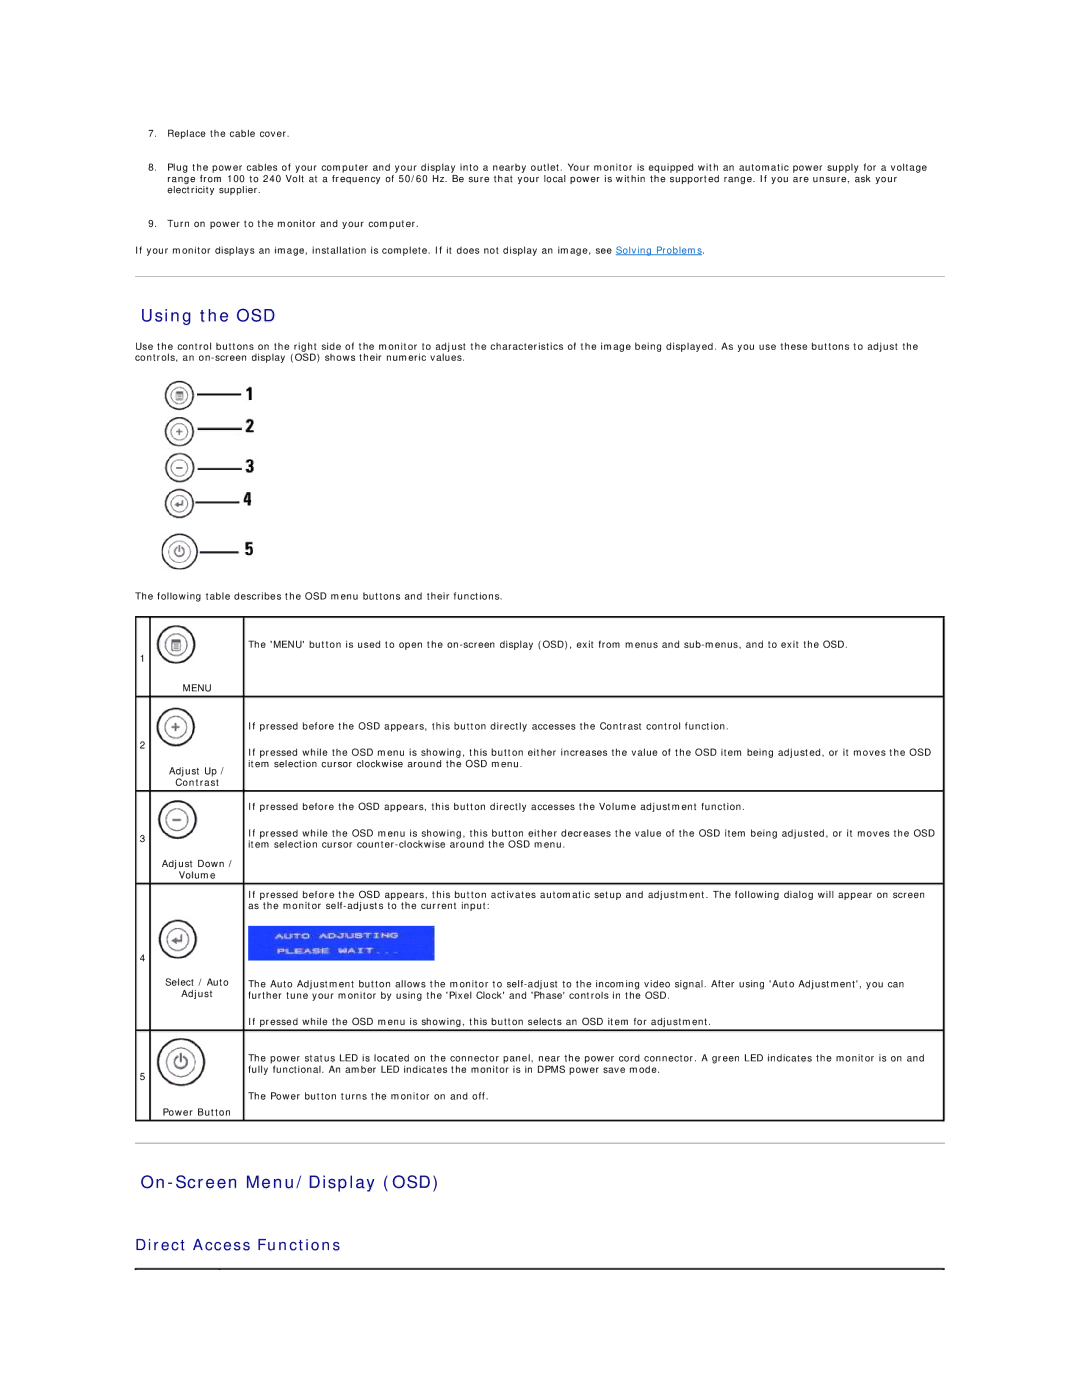
Use the control buttons on the right side of the monitor to adjust the characteristics of the image being displayed. As you use these buttons to adjust the controls, an
The following table describes the OSD menu buttons and their functions.
|
| The 'MENU' button is used to open the |
1 |
|
|
| MENU |
|
|
|
|
|
| If pressed before the OSD appears, this button directly accesses the Contrast control function. |
2 |
| If pressed while the OSD menu is showing, this button either increases the value of the OSD item being adjusted, or it moves the OSD |
|
| |
| Adjust Up / | item selection cursor clockwise around the OSD menu. |
|
| |
| Contrast |
|
|
|
|
|
| If pressed before the OSD appears, this button directly accesses the Volume adjustment function. |
3 |
| If pressed while the OSD menu is showing, this button either decreases the value of the OSD item being adjusted, or it moves the OSD |
| item selection cursor | |
|
| |
| Adjust Down / |
|
| Volume |
|
|
| If pressed before the OSD appears, this button activates automatic setup and adjustment. The following dialog will appear on screen |
|
| as the monitor |
4 |
|
|
| Select / Auto | The Auto Adjustment button allows the monitor to |
| Adjust | further tune your monitor by using the 'Pixel Clock' and 'Phase' controls in the OSD. |
|
| If pressed while the OSD menu is showing, this button selects an OSD item for adjustment. |
|
|
|
|
| The power status LED is located on the connector panel, near the power cord connector. A green LED indicates the monitor is on and |
5 |
| fully functional. An amber LED indicates the monitor is in DPMS power save mode. |
|
| |
|
| The Power button turns the monitor on and off. |
| Power Button |
|
|
|
|