4. Carefully move away any cables that are routed over the processor fan and heat sink assembly.
CAUTION: To ensure maximum cooling for the processor, do not touch the heat transfer areas on the processor heat sink. The oils in your skin can reduce the heat transfer capability of the thermal pads.
5. Loosen the four captive screws securing the processor fan and heat sink assembly.
CAUTION: When you remove the processor fan and heat sink assembly, lay it upside down or on its side to avoid damaging the heat sink thermal interface.
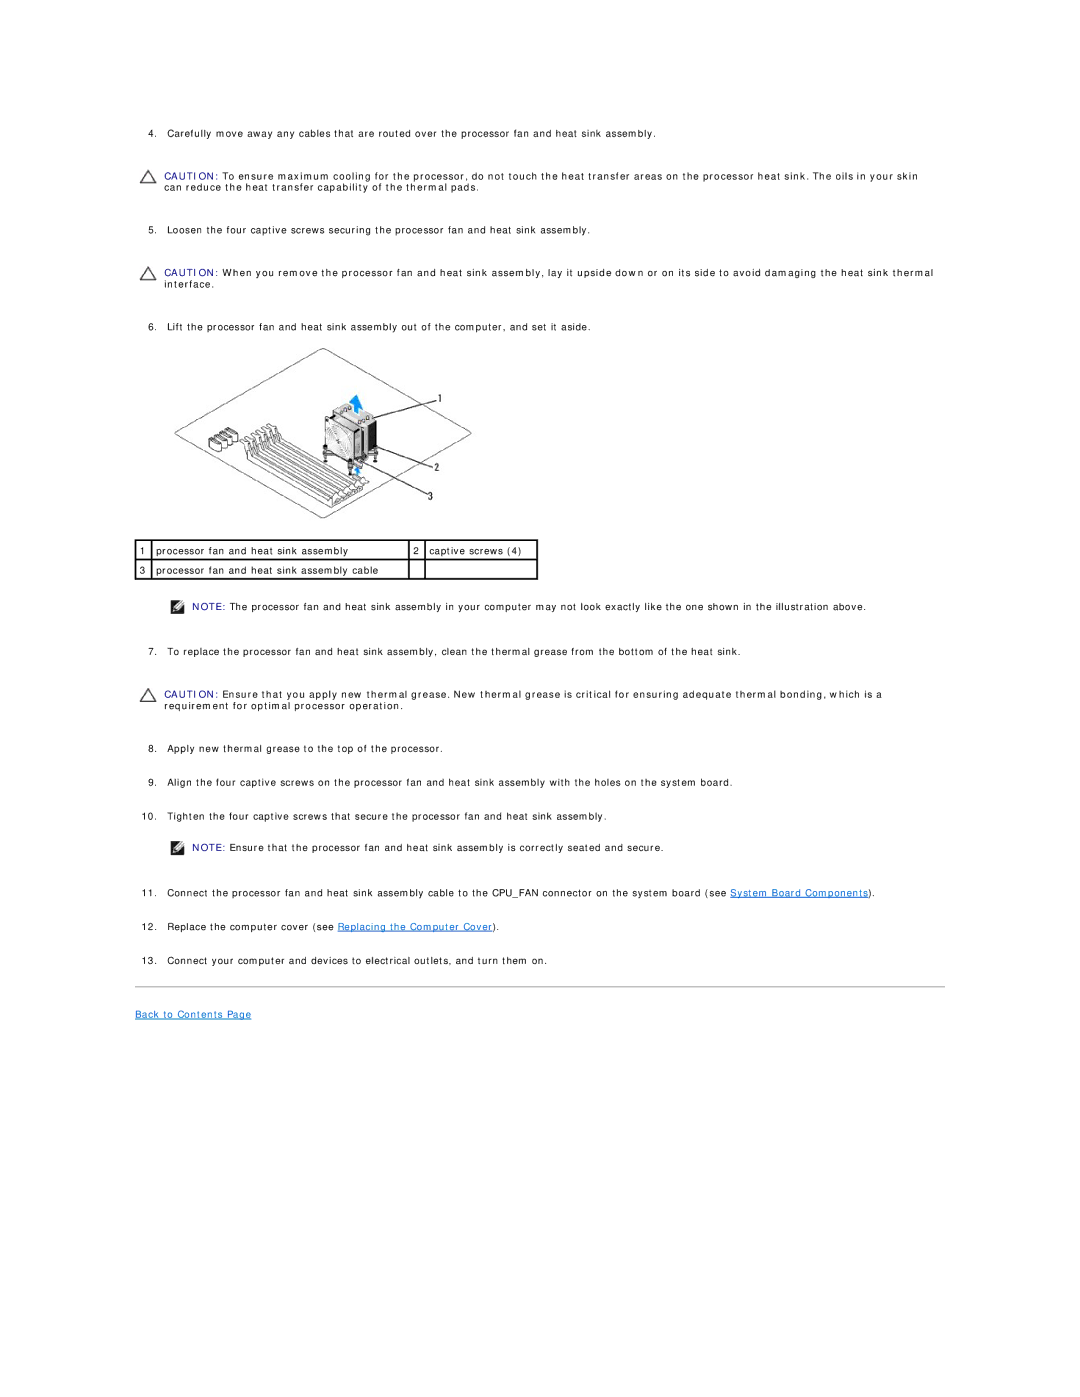
6. Lift the processor fan and heat sink assembly out of the computer, and set it aside.
1 | processor fan and heat sink assembly | 2 | captive screws (4) |
|
|
|
|
3 | processor fan and heat sink assembly cable |
|
|
|
|
|
|
NOTE: The processor fan and heat sink assembly in your computer may not look exactly like the one shown in the illustration above.
7. To replace the processor fan and heat sink assembly, clean the thermal grease from the bottom of the heat sink.
CAUTION: Ensure that you apply new thermal grease. New thermal grease is critical for ensuring adequate thermal bonding, which is a requirement for optimal processor operation.
8.Apply new thermal grease to the top of the processor.
9.Align the four captive screws on the processor fan and heat sink assembly with the holes on the system board.
10.Tighten the four captive screws that secure the processor fan and heat sink assembly.
NOTE: Ensure that the processor fan and heat sink assembly is correctly seated and secure.
11.Connect the processor fan and heat sink assembly cable to the CPU_FAN connector on the system board (see System Board Components).
12.Replace the computer cover (see Replacing the Computer Cover).
13.Connect your computer and devices to electrical outlets, and turn them on.