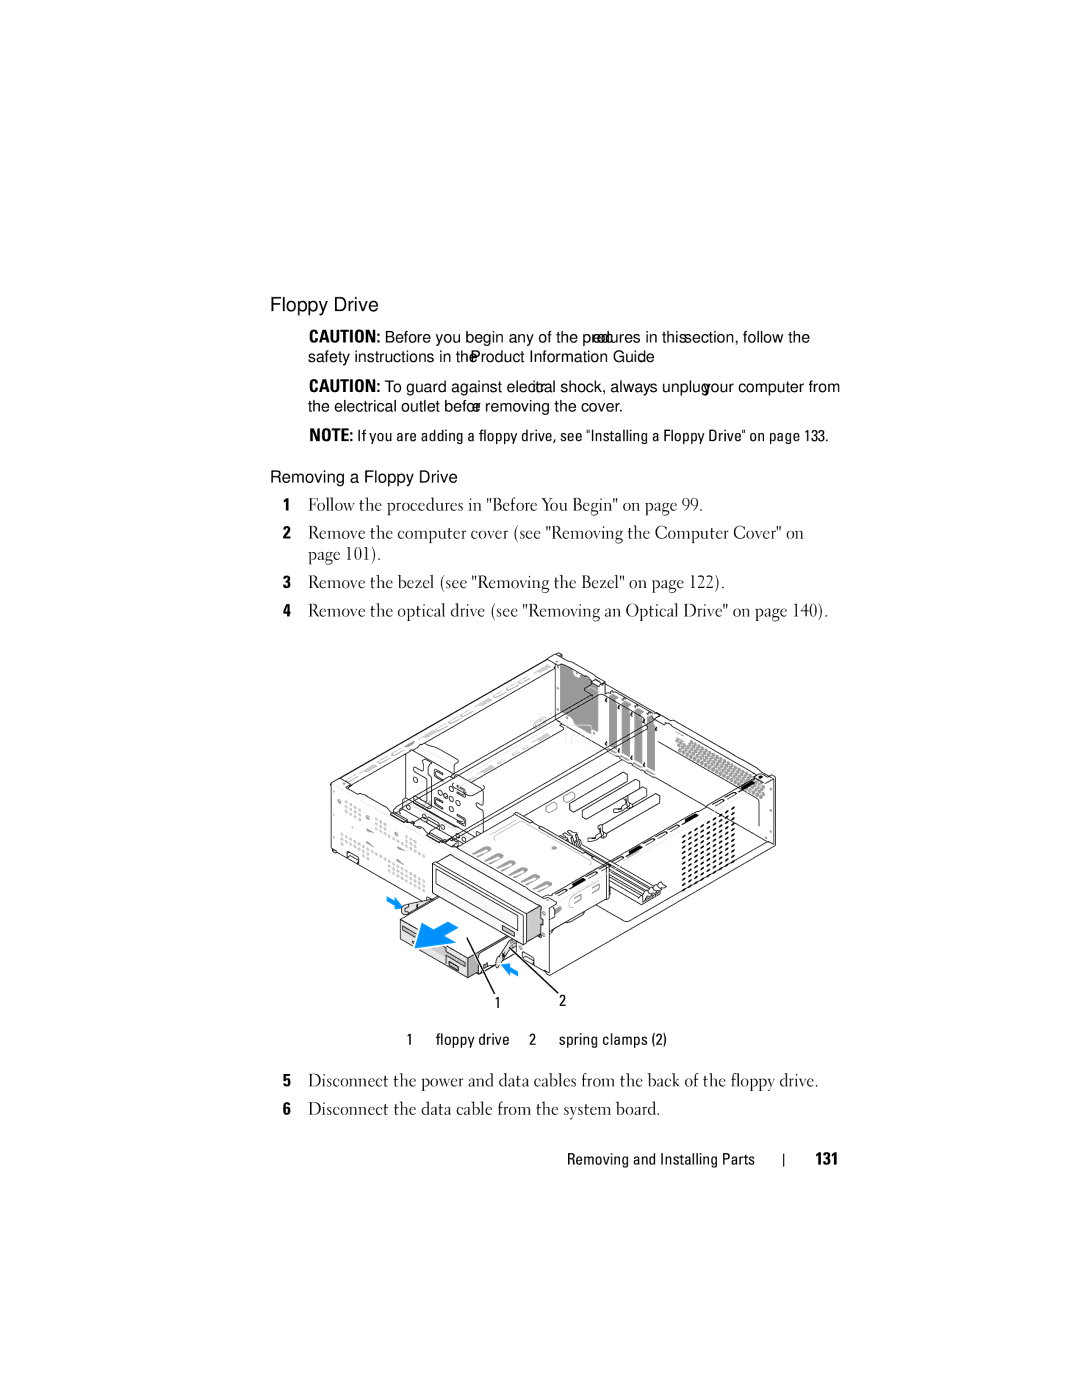
DCSLF specifications
Dell's DCSLF, or Data Center Solutions - Low-Friction, is a cutting-edge offering designed to streamline and optimize the operational capabilities of modern data centers. As businesses continue to rely heavily on data-driven decision-making and cloud services, the need for efficient infrastructure becomes paramount. Dell's DCSLF addresses these needs through its innovative features and technologies.One of the main features of DCSLF is its modular architecture, which allows businesses to scale their infrastructure based on current demands. This flexibility enables companies to efficiently match their capacity with workload requirements, minimizing waste and maximizing performance. Additionally, DCSLF supports a wide variety of workloads, from traditional computing applications to advanced AI and machine learning tasks, ensuring that organizations can adapt to changing technological landscapes.
Another standout characteristic of the DCSLF is its focus on energy efficiency. With rising energy costs and increasing environmental regulations, Dell has incorporated energy-saving technologies that reduce power consumption without sacrificing performance. This is achieved through advanced cooling solutions, power management features, and innovative hardware designs that optimize energy use at all levels of operation.
Dell DCSLF also places a strong emphasis on security. With cyber threats becoming more sophisticated, the platform offers robust security measures including hardware-based security features, encryption capabilities, and compliance with industry standards. This ensures that sensitive data remains secure while maintaining the flexibility needed for rapid deployments.
In terms of connectivity, DCSLF is designed to provide high bandwidth and low latency. Advanced networking technologies facilitate seamless integration with existing infrastructure and support for upcoming innovations in networking. This capability is essential for organizations looking to maintain competitiveness in an increasingly interconnected world.
In summary, Dell's DCSLF is a versatile and forward-thinking solution that caters to the evolving needs of data centers. Its modular architecture, energy efficiency, strong security measures, and robust connectivity options make it an ideal choice for organizations aiming to enhance their operational efficiency and scalability. As businesses continue to embrace digital transformation, Dell DCSLF stands out as a proven solution that meets the demands of modern data management and computation.