Delta 33-830 instruction manual Fastening SAW to the Floor, Cutting Into Table Boards

Models: 33-830

1 29
Download 29 pages 27.32 Kb
Page 19
Image 19

FASTENING SAW TO THE FLOOR

If during operation there is any tendency for the saw to tip over, slide, or walk on the supporting surface, the saw should be secured to the floor surface through holes provided on the bottom of each leg.

CUTTING INTO

TABLE BOARDS

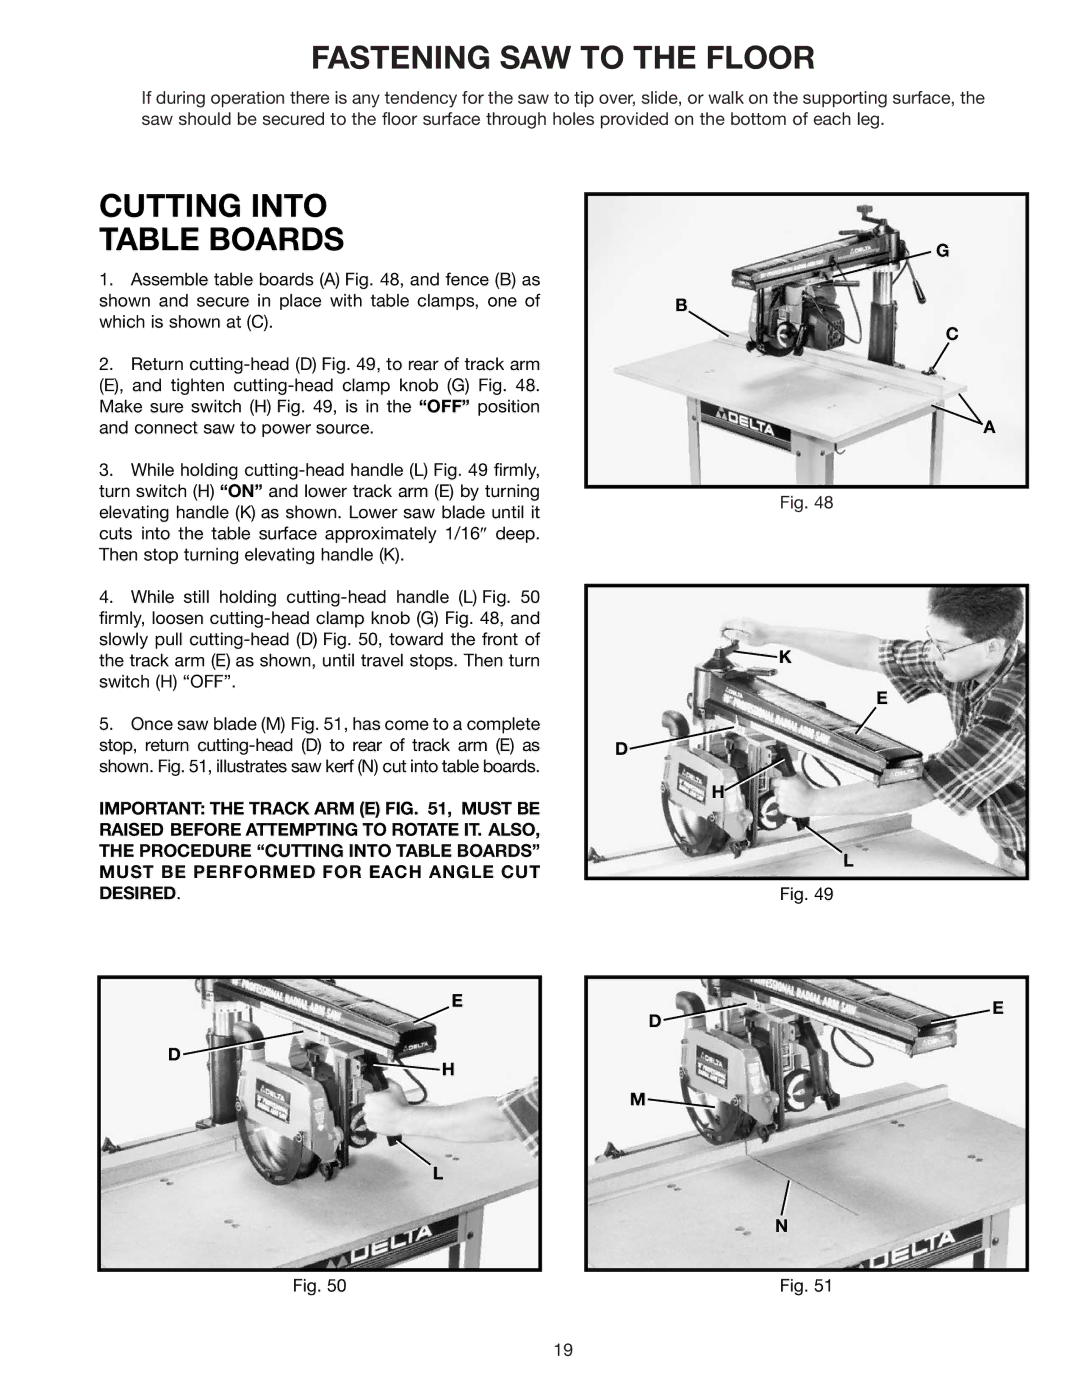
1.Assemble table boards (A) Fig. 48, and fence (B) as shown and secure in place with table clamps, one of which is shown at (C).

2.Return cutting-head (D) Fig. 49, to rear of track arm (E), and tighten cutting-head clamp knob (G) Fig. 48. Make sure switch (H) Fig. 49, is in the “OFF” position and connect saw to power source.

3.While holding cutting-head handle (L) Fig. 49 firmly, turn switch (H) “ON” and lower track arm (E) by turning elevating handle (K) as shown. Lower saw blade until it cuts into the table surface approximately 1/16″ deep. Then stop turning elevating handle (K).

4.While still holding cutting-head handle (L) Fig. 50 firmly, loosen cutting-head clamp knob (G) Fig. 48, and slowly pull cutting-head (D) Fig. 50, toward the front of the track arm (E) as shown, until travel stops. Then turn switch (H) “OFF”.

5.Once saw blade (M) Fig. 51, has come to a complete stop, return cutting-head (D) to rear of track arm (E) as shown. Fig. 51, illustrates saw kerf (N) cut into table boards.

IMPORTANT: THE TRACK ARM (E) FIG. 51, MUST BE RAISED BEFORE ATTEMPTING TO ROTATE IT. ALSO, THE PROCEDURE “CUTTING INTO TABLE BOARDS” MUST BE PERFORMED FOR EACH ANGLE CUT DESIRED.

E

D

H

G

B

C

A

Fig. 48

K

E

D

H

L

Fig. 49

E

D

M

L

N

Fig. 50

Fig. 51

19

Page 19
Image 19
Delta 33-830 instruction manual Fastening SAW to the Floor, Cutting Into Table Boards