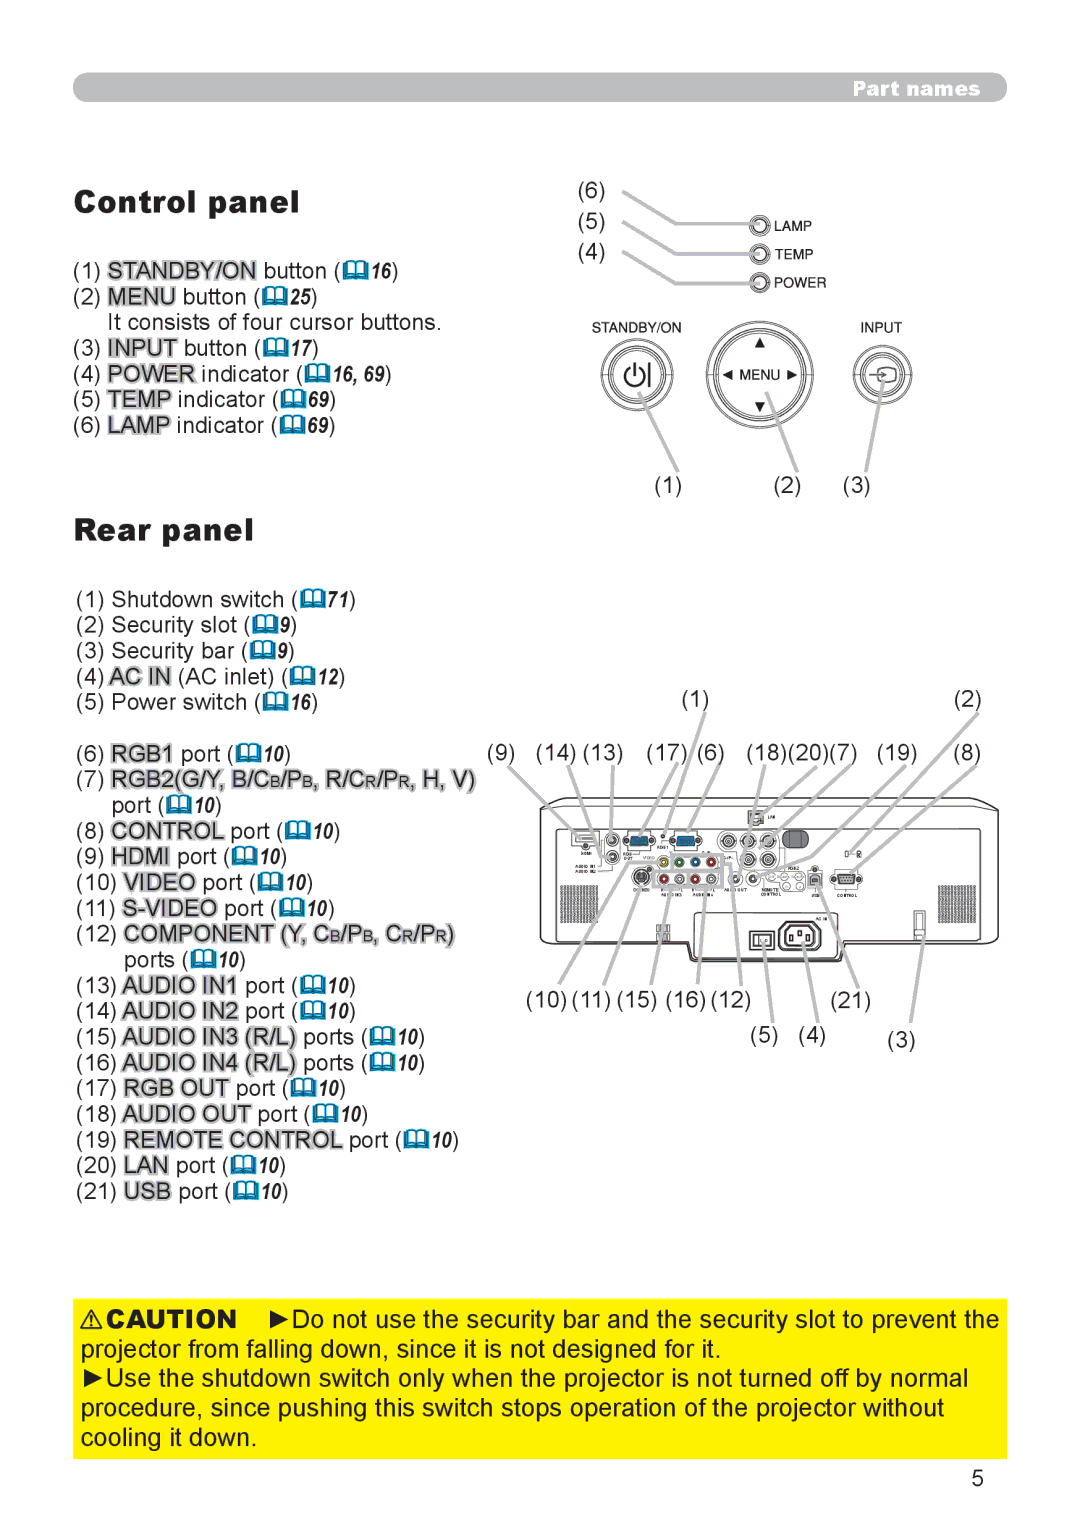
Control panel
(1)STANDBY/ON button (&16)
(2)MENU button (&25)
It consists of four cursor buttons.
(3)INPUT![]()
![]() button (&17)
button (&17)
(4)POWER indicator (&16, 69)
(5)TEMP indicator (&69)
(6)LAMP indicator (&69)
Part names
(6)
(5)![]()
![]()
(4)![]()
![]()
![]()
(1)(2) (3)
Rear panel
(1) | Shutdown switch (&71) |
|
|
|
|
|
| |
(2) | Security slot (&9) |
|
|
|
|
|
| |
(3) | Security bar (&9) |
|
|
|
|
|
| |
(4) AC IN (AC inlet) (&12) |
| (1) |
|
| (2) | |||
(5) | Power switch (&16) |
|
|
| ||||
(6) | RGB1 port (&10) | (9) (14) (13) | (17) (6) | (18)(20)(7) | (19) (8) | |||
(7) | RGB2(G/Y, B/CB/PB, R/CR/PR, H, V) |
|
|
|
|
|
| |
(8) | port (&10) |
|
|
|
| LAN |
|
|
CONTROL port (&10) |
|
|
|
|
|
| ||
(9) | HDMI port ( 10) | AUDIO IN2 | RGB1 |
|
| RGB2 |
| |
|
| & | HDMIRGB | Y | CB/PB |
|
|
|
|
| OUT VIDEO | CR/PR |
|
|
| ||
|
| AUDIO IN1 |
|
|
|
| ||
(10) VIDEO port (&10) |
| AUDIO IN4 | CONTROL | USB CONTROL |
| |||
|
|
|
|
|
| G/Y B/CB/PB R/CR/PR |
| |
|
|
|
| R L | R L AUDIO OUT | H | V |
|
(11) |
| REMOTE |
|
| ||||
|
|
|
| AC IN |
| |||
(12) COMPONENT (Y, CB/PB, CR/PR) |
|
|
| I O |
|
| ||
| ports (&10) |
|
|
|
|
|
| |
(13) AUDIO IN1 port (&10) | (10) (11) (15) (16) (12) | (21) |
| |||||
(14) AUDIO IN2 port (&10) |
| |||||||
|
|
|
|
|
| |||
(15) AUDIO IN3 (R/L) ports (&10) |
|
|
| (5) | (4) | (3) | ||
(16) AUDIO IN4 (R/L) ports (&10) |
|
|
|
|
|
| ||
(17) RGB OUT port (&10) |
|
|
|
|
|
| ||
(18) AUDIO OUT port (&10) |
|
|
|
|
|
| ||
(19) REMOTE CONTROL port (&10) |
|
|
|
|
|
| ||
(20) LAN port (&10) |
|
|
|
|
|
| ||
(21) USB port (&10) |
|
|
|
|
|
| ||
![]() CAUTION ►Do not use the security bar and the security slot to prevent the projector from falling down, since it is not designed for it.
CAUTION ►Do not use the security bar and the security slot to prevent the projector from falling down, since it is not designed for it.
►Use the shutdown switch only when the projector is not turned off by normal procedure, since pushing this switch stops operation of the projector without cooling it down.
5