47
Chapter7Reference
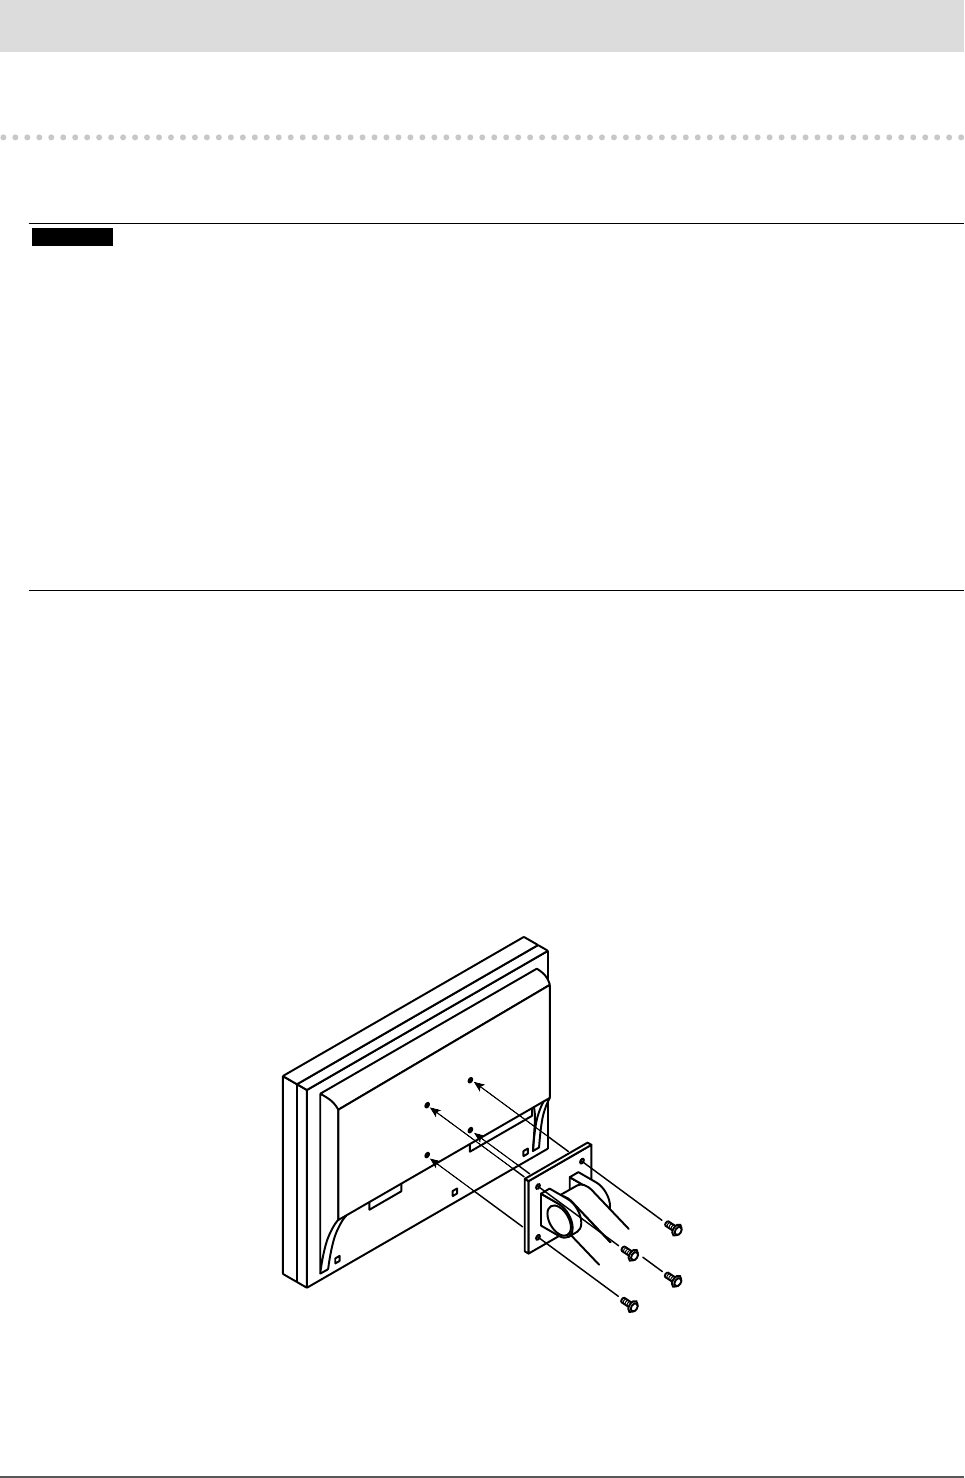
Chapter 7 Reference7-1. Attaching the Optional Arm
An optional arm (or an optional stand) can be attache d by removing the stand section. Please refer to our web site
for the corresponding optional arm (or optional stand). htt p://www.eizo.com
Attention
• When at taching an arm or stand , follow the instructions of their Use r’s Manual.
• When usi ng another manufacture r’s arm or stand, conrm the followin g in advance and select one conformi ng to the VESA
standard.
- Cleara nce between the screw holes: 100 mm × 100 mm
- Thick ness of plate: 2.6 mm
- Strong enoug h to support weight of the monitor unit (except the st and) and attachments such a s cables.
• When usi ng another manufacture r’s arm or stand, use the following screws to secu re it.
- Screws x ing the stand to the monitor.
• When usi ng an arm or stand, atta ch it to meet the following tilt angles of the monitor.
- Up 45˚, down 45˚
• Connect t he cables after attaching a n arm or stand.
• Do not move the removed stan d up and down. Doing so may result in injur y or device damage.
• The monitor a nd arm or stand are heavy. Dropping t hem may result in injury or equip ment damage.
• When set ting the monitor to the port rait style, turn the monit or screen 90˚ in clockwise direc tion.
Procedure
1. Lay the LCD monitor on a soft cloth spread over on a stable surface with the