When replacing the linings fit the side linings first.
Make sure you fit the oven roof with the slot at the front.
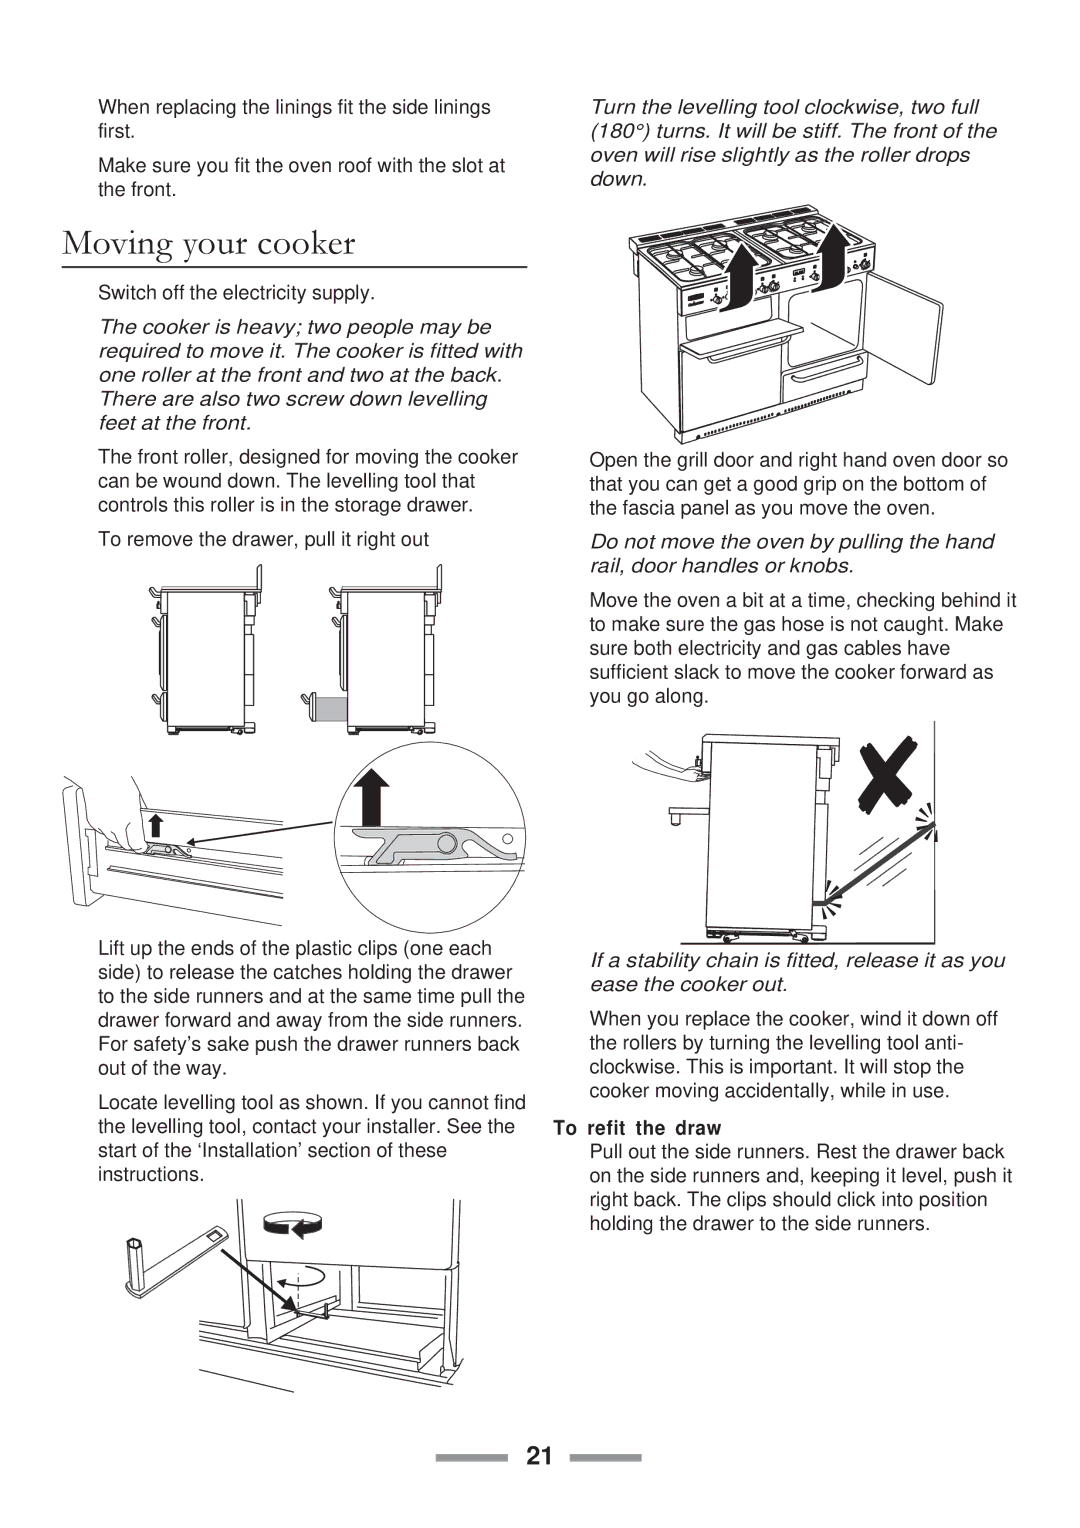
Turn the levelling tool clockwise, two full (180°) turns. It will be stiff. The front of the oven will rise slightly as the roller drops down.
Moving your cooker
Switch off the electricity supply.
The cooker is heavy; two people may be required to move it. The cooker is fitted with one roller at the front and two at the back. There are also two screw down levelling feet at the front.
The front roller, designed for moving the cooker can be wound down. The levelling tool that controls this roller is in the storage drawer.
To remove the drawer, pull it right out
Lift up the ends of the plastic clips (one each side) to release the catches holding the drawer to the side runners and at the same time pull the drawer forward and away from the side runners. For safety’s sake push the drawer runners back out of the way.
Locate levelling tool as shown. If you cannot find the levelling tool, contact your installer. See the start of the ‘Installation’ section of these instructions.
Open the grill door and right hand oven door so that you can get a good grip on the bottom of the fascia panel as you move the oven.
Do not move the oven by pulling the hand rail, door handles or knobs.
Move the oven a bit at a time, checking behind it to make sure the gas hose is not caught. Make sure both electricity and gas cables have sufficient slack to move the cooker forward as you go along.
If a stability chain is fitted, release it as you ease the cooker out.
When you replace the cooker, wind it down off the rollers by turning the levelling tool anti- clockwise. This is important. It will stop the cooker moving accidentally, while in use.
To refit the draw
Pull out the side runners. Rest the drawer back on the side runners and, keeping it level, push it right back. The clips should click into position holding the drawer to the side runners.
21