SERVICING - WARNING
Disconnect from electricity and gas before servicing. Check appliance is safe when you have finished.
7. To Remove A Thermostat
Remove control panel (see 2) and cooktop (see 3). Open the appropriate oven door and remove the oven shelves.
RH oven
Remove oven roof. Remove the two fixings that secure the thermostat phial cover. Unclip the thermostat phial from the clips in the oven back panel & remove from the top rear of the oven.
LH oven
Remove the two screws holding the thermostat phial to the oven fan cover at the rear of the oven. Pull the unit forward to access the rear of the cooker. Remove both rear cover boxes by removing the fixing screws and lifting clear. Feed the thermostat capillary clear of the oven. Disconnect the wires from the thermostat and undo the two fixings that secure the control to the mounting plate. Fit the replacement and
8. To Change Grill Controller
Remove the control panel (see 2) and cooktop (see 3). Disconnect wiring from controller. Remove 2 screws holding switch/controller to mounting panel. Fit new controller and reassemble in reverse order. Check for correct operation.
BEFORE SERVICING ANY GAS CARRYING COMPONENTS TURN OFF GAS SUPPLY.
9. To Change a Hotplate Tap
Remove the cooktop top, see 3. Undo the nut at rear of the valve and remove the screw(s) securing valve to gas rail. Remove old valve, discard old gasket/seal. Fit new gasket/seal to new valve.
Reassemble in reverse order. Check valve is adjusted for correct gas. Check cooker is gas sound.
10. To Change a Hotpate burner jet
Remove burner cap and head. Remove old jet. Fit new orifice. Note the Wok burner has 2 orifices. Reassemble in reverse order. Check appliance is gas sound.
11. To Change Hotplate Burner Electrode
Lift off cooktop grates, remove burner cap. Remove the screw holding the electrode. Pull electrode vertically up sufficiently to grip the lead between thumb and forefinger. Pull off the electrode, but keep hold of the
lead. Fit new electrode to the lead. Fix electrode in burner with screw. Replace burner cap. Check the burner ignition. Replace grates.
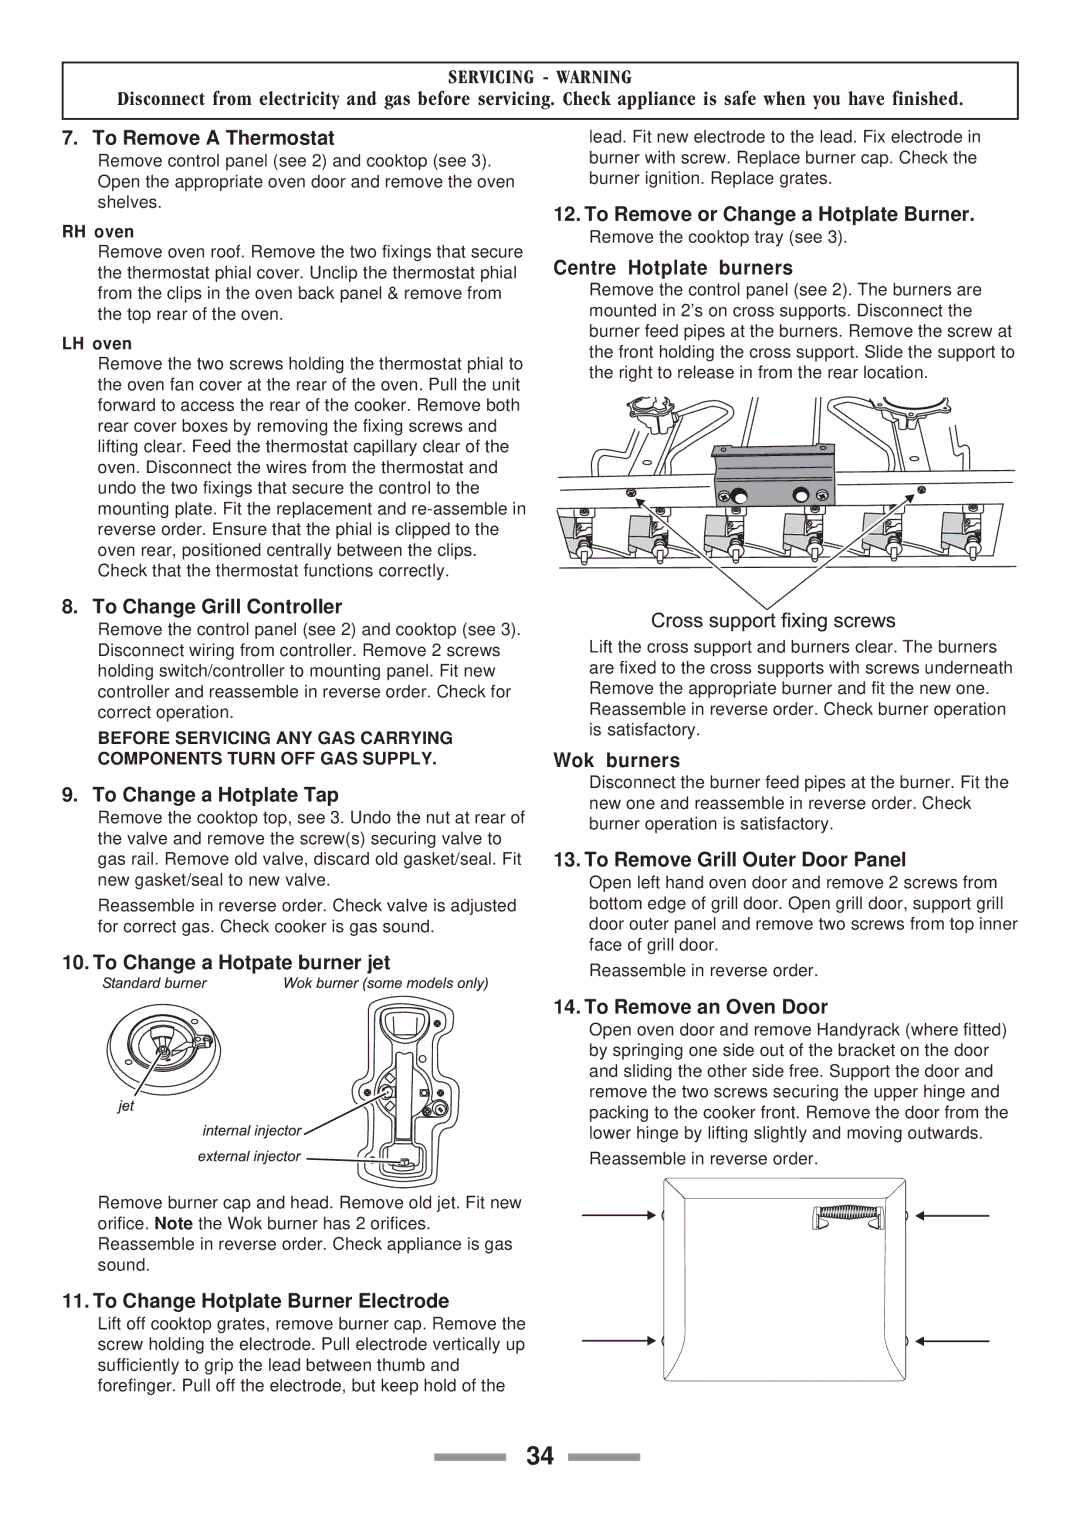
12. To Remove or Change a Hotplate Burner.
Remove the cooktop tray (see 3).
Centre Hotplate burners
Remove the control panel (see 2). The burners are mounted in 2’s on cross supports. Disconnect the burner feed pipes at the burners. Remove the screw at the front holding the cross support. Slide the support to the right to release in from the rear location.
Lift the cross support and burners clear. The burners are fixed to the cross supports with screws underneath Remove the appropriate burner and fit the new one. Reassemble in reverse order. Check burner operation is satisfactory.
Wok burners
Disconnect the burner feed pipes at the burner. Fit the new one and reassemble in reverse order. Check burner operation is satisfactory.
13. To Remove Grill Outer Door Panel
Open left hand oven door and remove 2 screws from bottom edge of grill door. Open grill door, support grill door outer panel and remove two screws from top inner face of grill door.
Reassemble in reverse order.
14. To Remove an Oven Door
Open oven door and remove Handyrack (where fitted) by springing one side out of the bracket on the door and sliding the other side free. Support the door and remove the two screws securing the upper hinge and packing to the cooker front. Remove the door from the lower hinge by lifting slightly and moving outwards.
Reassemble in reverse order.
34