Electrical Connection
This appliance must be installed by a qualified electrician to comply with the relevant Institute of Electrical Engineers (I.E.E.) regulations and also the local electricity supply company requirements.
WARNING: THIS APPLIANCE MUST BE EARTHED
Note
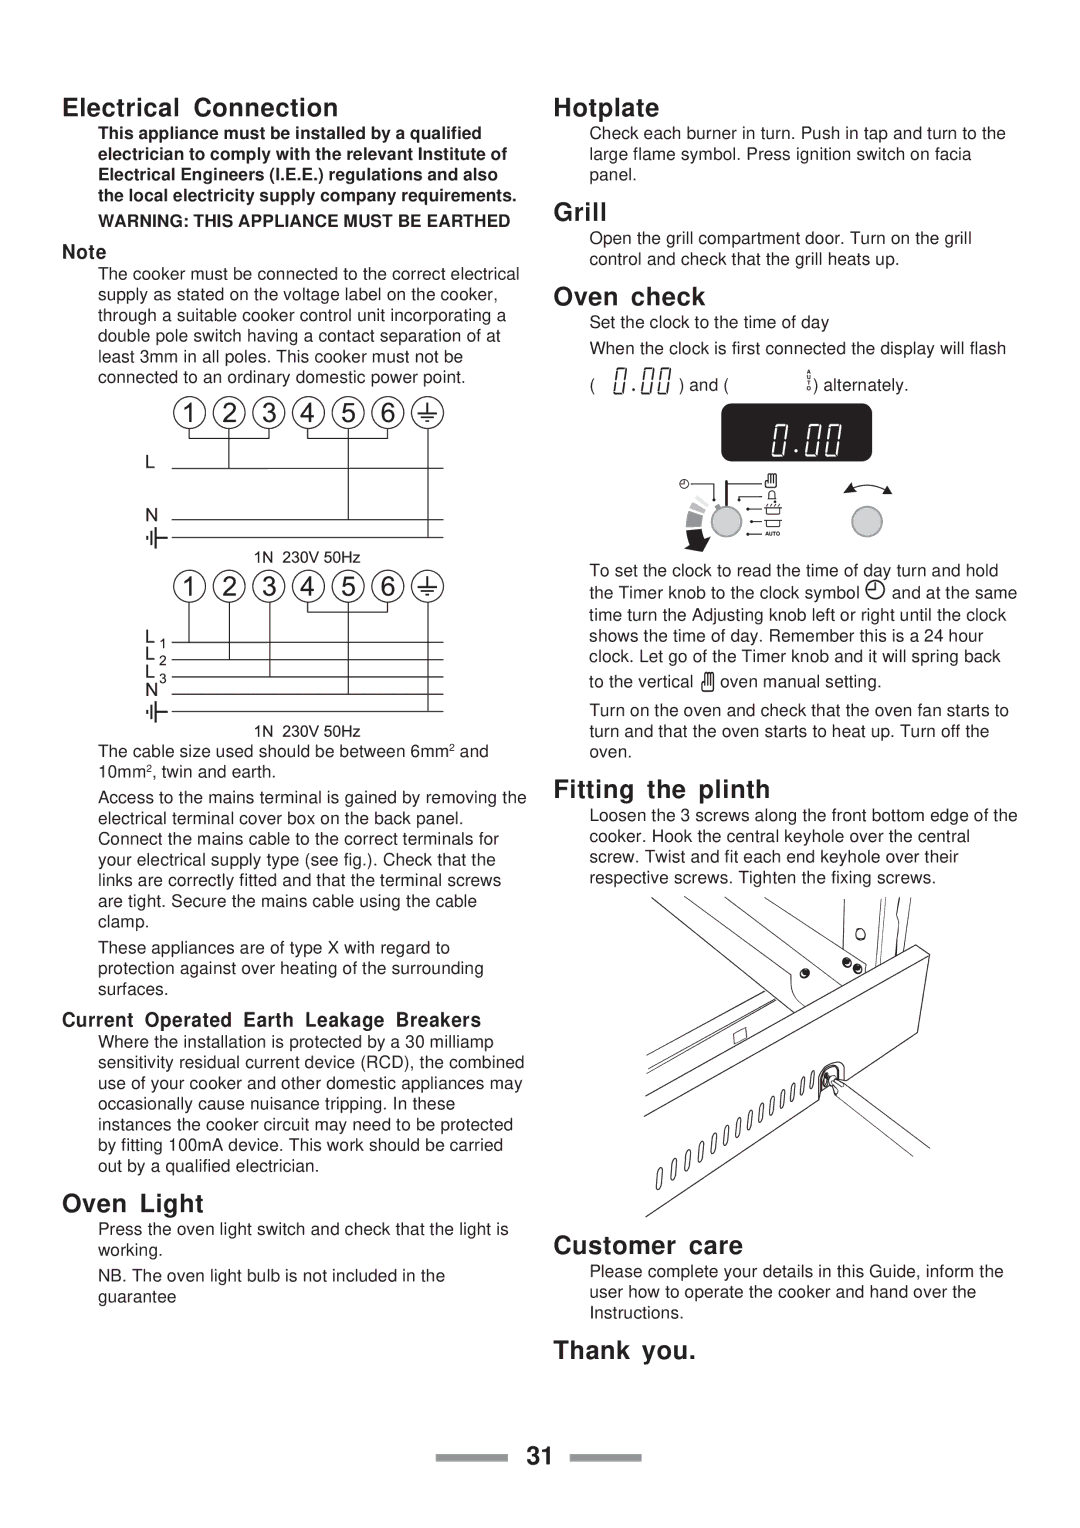
The cooker must be connected to the correct electrical supply as stated on the voltage label on the cooker, through a suitable cooker control unit incorporating a double pole switch having a contact separation of at least 3mm in all poles. This cooker must not be connected to an ordinary domestic power point.
The cable size used should be between 6mm2 and 10mm2, twin and earth.
Access to the mains terminal is gained by removing the electrical terminal cover box on the back panel. Connect the mains cable to the correct terminals for your electrical supply type (see fig.). Check that the links are correctly fitted and that the terminal screws are tight. Secure the mains cable using the cable clamp.
These appliances are of type X with regard to protection against over heating of the surrounding surfaces.
Current Operated Earth Leakage Breakers
Where the installation is protected by a 30 milliamp sensitivity residual current device (RCD), the combined use of your cooker and other domestic appliances may occasionally cause nuisance tripping. In these instances the cooker circuit may need to be protected by fitting 100mA device. This work should be carried out by a qualified electrician.
Oven Light
Press the oven light switch and check that the light is working.
NB. The oven light bulb is not included in the guarantee
Hotplate
Check each burner in turn. Push in tap and turn to the large flame symbol. Press ignition switch on facia panel.
Grill
Open the grill compartment door. Turn on the grill control and check that the grill heats up.
Oven check
Set the clock to the time of day
When the clock is first connected the display will flash
( | ) and ( | ) alternately. |
To set the clock to read the time of day turn and hold the Timer knob to the clock symbol ![]() and at the same time turn the Adjusting knob left or right until the clock shows the time of day. Remember this is a 24 hour clock. Let go of the Timer knob and it will spring back to the vertical
and at the same time turn the Adjusting knob left or right until the clock shows the time of day. Remember this is a 24 hour clock. Let go of the Timer knob and it will spring back to the vertical ![]() oven manual setting.
oven manual setting.
Turn on the oven and check that the oven fan starts to turn and that the oven starts to heat up. Turn off the oven.
Fitting the plinth
Loosen the 3 screws along the front bottom edge of the cooker. Hook the central keyhole over the central screw. Twist and fit each end keyhole over their respective screws. Tighten the fixing screws.
Customer care
Please complete your details in this Guide, inform the user how to operate the cooker and hand over the Instructions.
Thank you.
31