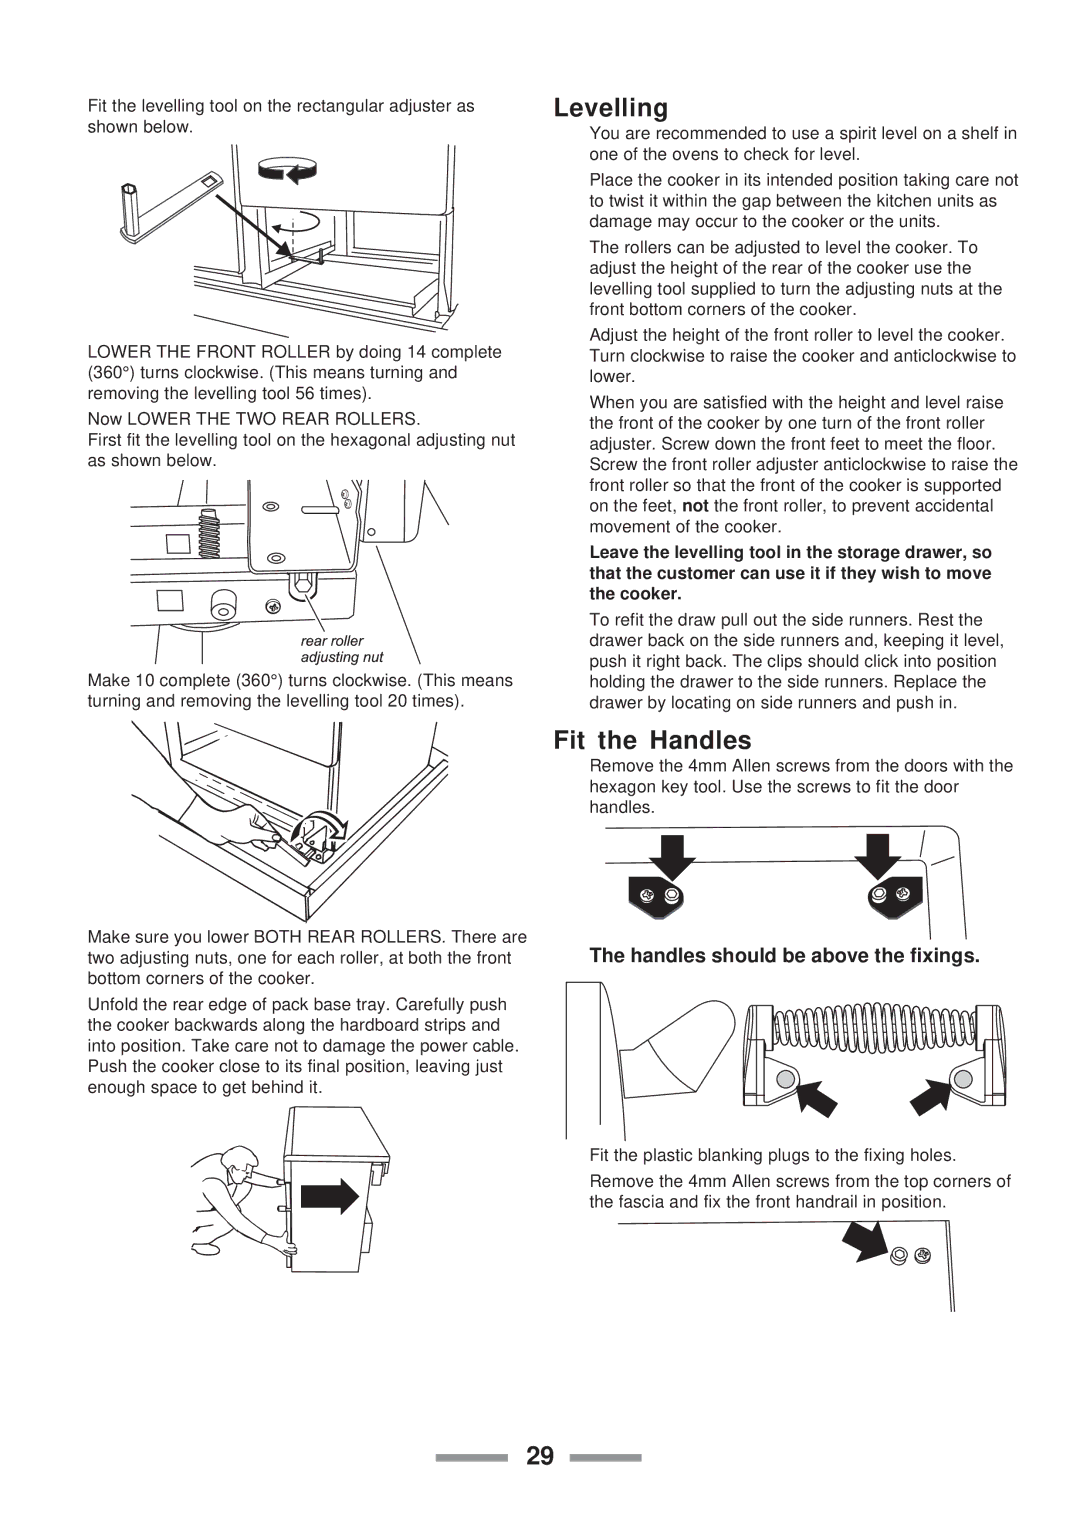
Fit the levelling tool on the rectangular adjuster as shown below.
LOWER THE FRONT ROLLER by doing 14 complete (360°) turns clockwise. (This means turning and removing the levelling tool 56 times).
Now LOWER THE TWO REAR ROLLERS.
First fit the levelling tool on the hexagonal adjusting nut as shown below.
Make 10 complete (360°) turns clockwise. (This means turning and removing the levelling tool 20 times).
Levelling
You are recommended to use a spirit level on a shelf in one of the ovens to check for level.
Place the cooker in its intended position taking care not to twist it within the gap between the kitchen units as damage may occur to the cooker or the units.
The rollers can be adjusted to level the cooker. To adjust the height of the rear of the cooker use the levelling tool supplied to turn the adjusting nuts at the front bottom corners of the cooker.
Adjust the height of the front roller to level the cooker. Turn clockwise to raise the cooker and anticlockwise to lower.
When you are satisfied with the height and level raise the front of the cooker by one turn of the front roller adjuster. Screw down the front feet to meet the floor. Screw the front roller adjuster anticlockwise to raise the front roller so that the front of the cooker is supported on the feet, not the front roller, to prevent accidental movement of the cooker.
Leave the levelling tool in the storage drawer, so that the customer can use it if they wish to move the cooker.
To refit the draw pull out the side runners. Rest the drawer back on the side runners and, keeping it level, push it right back. The clips should click into position holding the drawer to the side runners. Replace the drawer by locating on side runners and push in.
Make sure you lower BOTH REAR ROLLERS. There are two adjusting nuts, one for each roller, at both the front bottom corners of the cooker.
Unfold the rear edge of pack base tray. Carefully push the cooker backwards along the hardboard strips and into position. Take care not to damage the power cable. Push the cooker close to its final position, leaving just enough space to get behind it.
Fit the Handles
Remove the 4mm Allen screws from the doors with the hexagon key tool. Use the screws to fit the door handles.
The handles should be above the fixings.
Fit the plastic blanking plugs to the fixing holes.
Remove the 4mm Allen screws from the top corners of the fascia and fix the front handrail in position.
29