24Operation
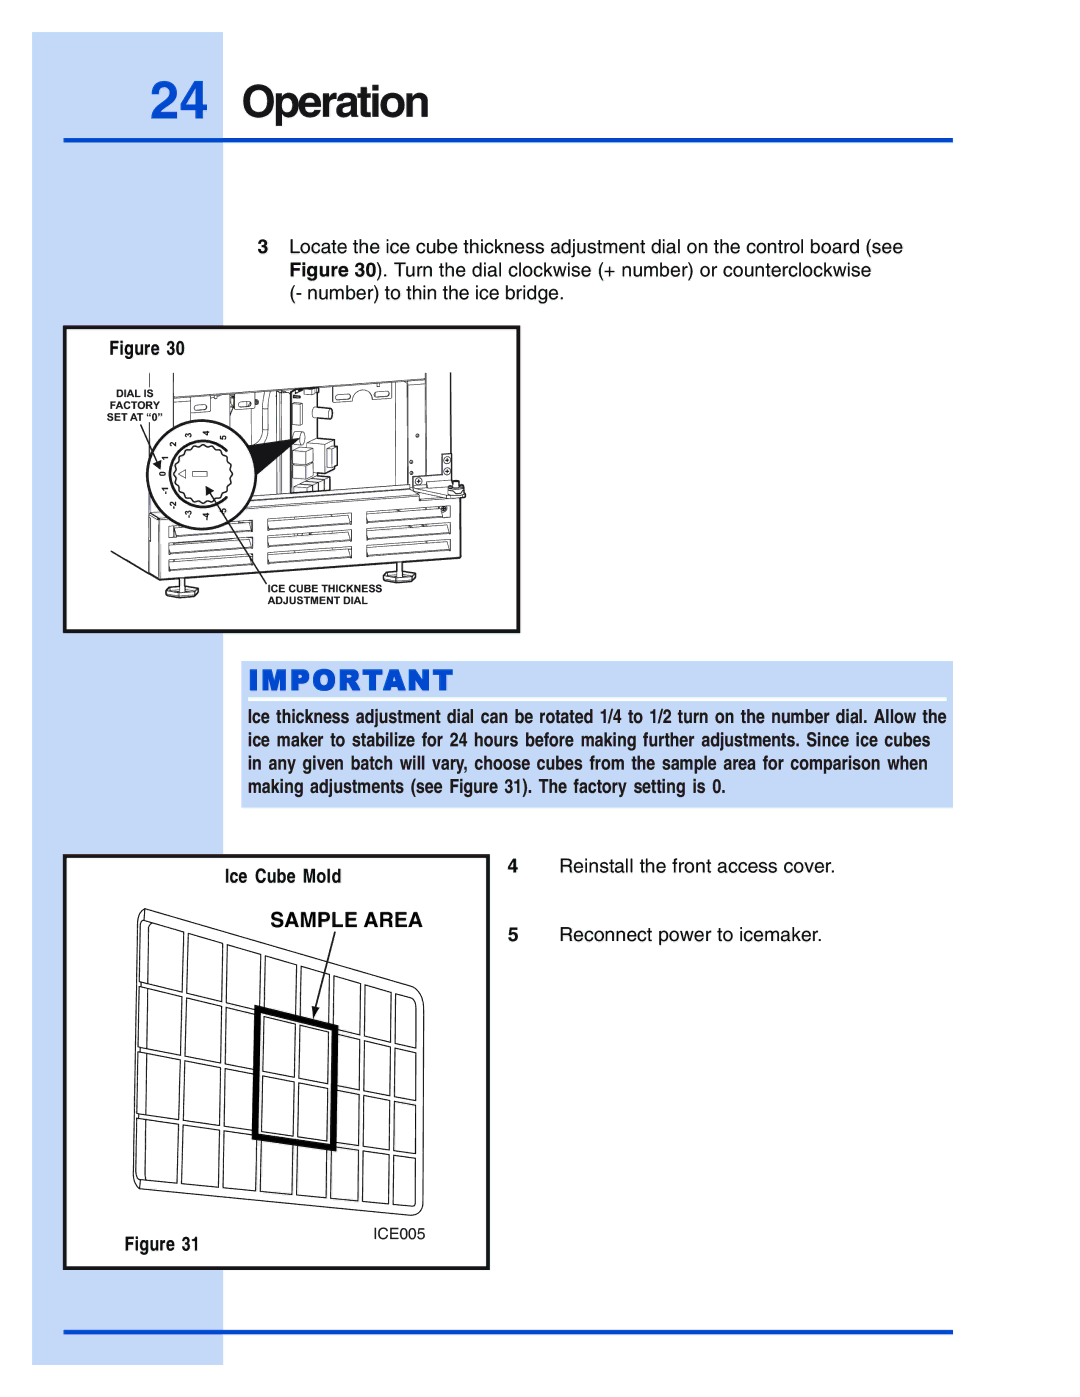
3Locate the ice cube thickness adjustment dial on the control board (see Figure 30). Turn the dial clockwise (+ number) or counterclockwise
(- number) to thin the ice bridge.
Figure 30 |
|
|
|
DIAL IS |
|
|
|
FACTORY |
|
|
|
SET AT “0” |
|
|
|
2 | 3 | 4 | 5 |
|
|
| |
1 |
|
|
|
0 |
|
|
|
|
|
| |
|
|
| ICE CUBE THICKNESS |
|
|
| ADJUSTMENT DIAL |
IMPORTANT
Ice thickness adjustment dial can be rotated 1/4 to 1/2 turn on the number dial. Allow the ice maker to stabilize for 24 hours before making further adjustments. Since ice cubes in any given batch will vary, choose cubes from the sample area for comparison when making adjustments (see Figure 31). The factory setting is 0.
Ice Cube Mold
SAMPLE AREA
4Reinstall the front access cover.
5Reconnect power to icemaker.
Figure 31
ICE005
