3. BIOS Utility Configuration Guide
The BIOS utility allows you to change HBA parameters (such as topology, PLOGI retry timer and auto scan setting) and configure boot devices.
Default settings are acceptable for most installations.
In the BIOS utility, press d to reset the selected adapter to default values.
Note: The default topology is auto topology with loop first. Change this topology setting, if necessary, before configuring boot devices.
3.1. Starting the BIOS Utility
If x86 BootBIOS was not enabled at the factory, you must enable it. See section 1.5.1, Upgrading Firmware and Enabling x86 BootBIOS, on page
1.Turn on the computer.
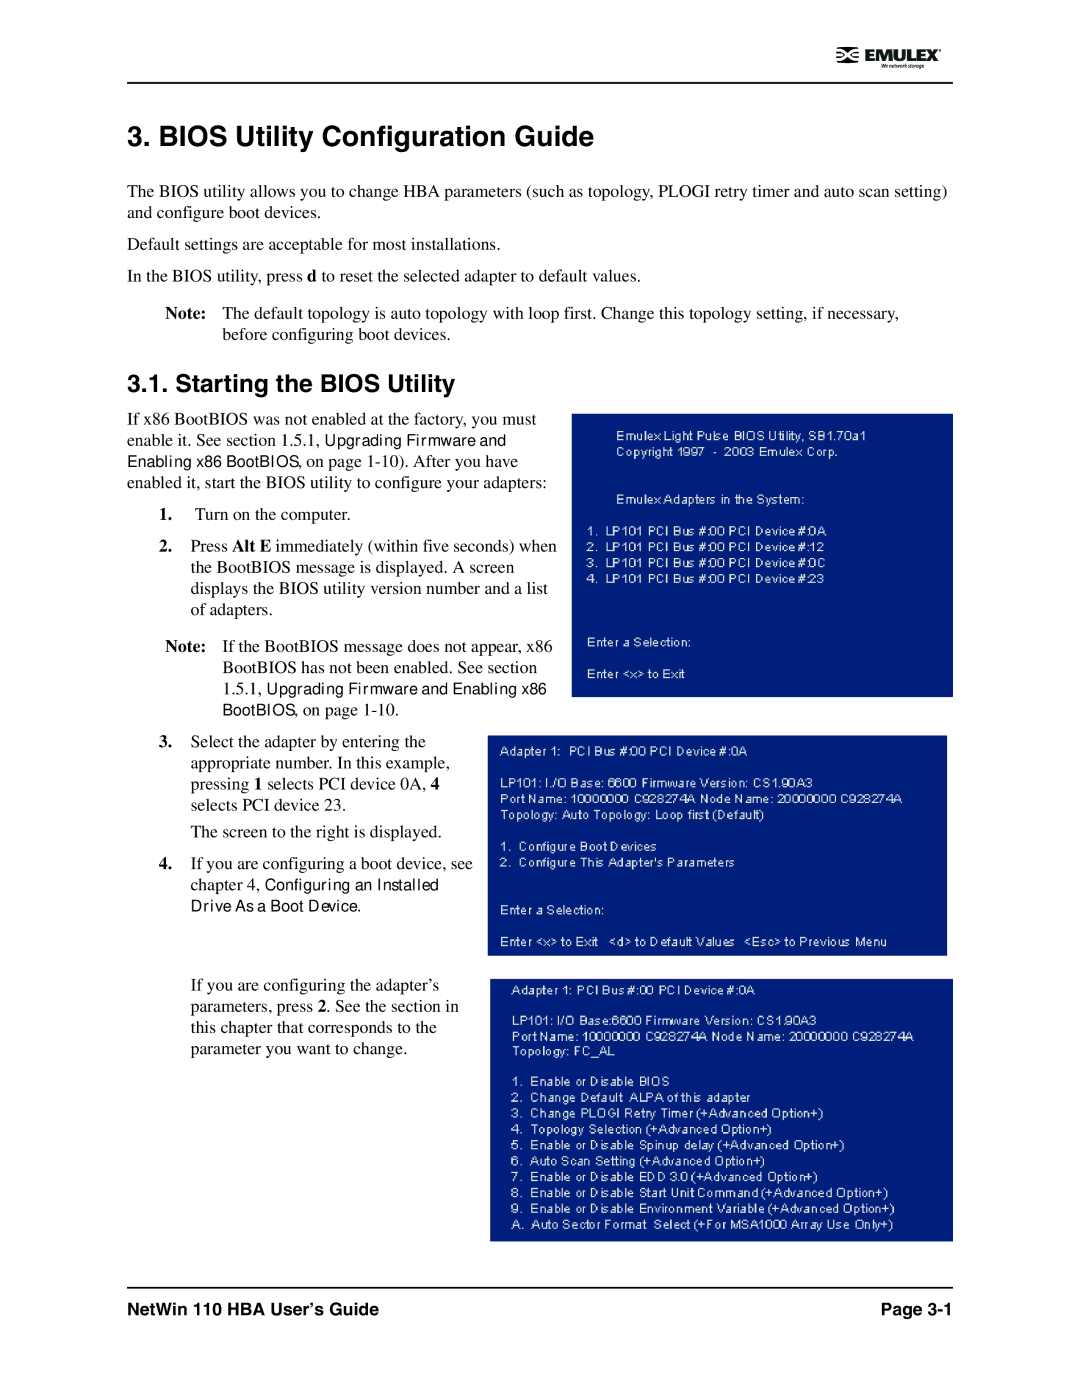
2.Press Alt E immediately (within five seconds) when the BootBIOS message is displayed. A screen displays the BIOS utility version number and a list of adapters.
Note: If the BootBIOS message does not appear, x86 BootBIOS has not been enabled. See section 1.5.1, Upgrading Firmware and Enabling x86 BootBIOS, on page
3.Select the adapter by entering the appropriate number. In this example, pressing 1 selects PCI device 0A, 4 selects PCI device 23.
The screen to the right is displayed.
4.If you are configuring a boot device, see chapter 4, Configuring an Installed Drive As a Boot Device.
If you are configuring the adapter’s parameters, press 2. See the section in this chapter that corresponds to the parameter you want to change.
NetWin 110 HBA User’s Guide | Page |