4. Configuring an Installed Drive As a Boot Device
To configure an existing storage device as a boot device, regardless of operating system, do the following:
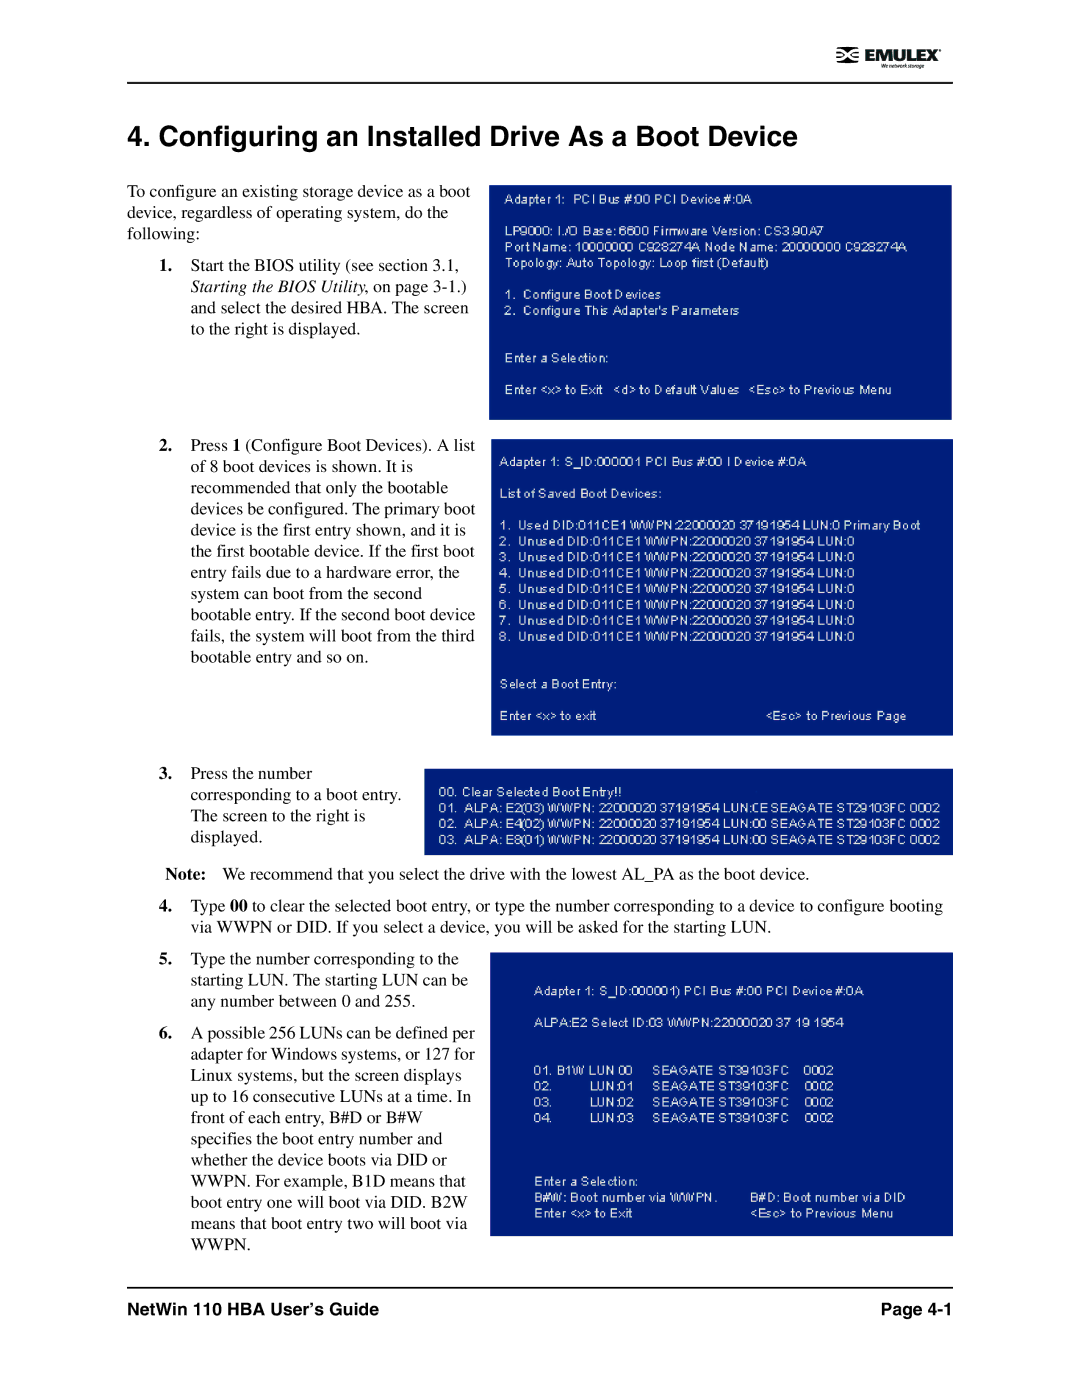
1.Start the BIOS utility (see section 3.1, Starting the BIOS Utility, on page
2.Press 1 (Configure Boot Devices). A list of 8 boot devices is shown. It is recommended that only the bootable devices be configured. The primary boot device is the first entry shown, and it is the first bootable device. If the first boot entry fails due to a hardware error, the system can boot from the second bootable entry. If the second boot device fails, the system will boot from the third bootable entry and so on.
3.Press the number corresponding to a boot entry. The screen to the right is displayed.
Note: We recommend that you select the drive with the lowest AL_PA as the boot device.
4.Type 00 to clear the selected boot entry, or type the number corresponding to a device to configure booting via WWPN or DID. If you select a device, you will be asked for the starting LUN.
5.Type the number corresponding to the starting LUN. The starting LUN can be any number between 0 and 255.
6.A possible 256 LUNs can be defined per adapter for Windows systems, or 127 for Linux systems, but the screen displays up to 16 consecutive LUNs at a time. In front of each entry, B#D or B#W specifies the boot entry number and whether the device boots via DID or WWPN. For example, B1D means that boot entry one will boot via DID. B2W means that boot entry two will boot via WWPN.
NetWin 110 HBA User’s Guide | Page |