Manuals
/
Enviro
/
Household Appliance
/
Indoor Fireplace
Enviro
C-10794
owner manual
Parts Diagram Cast
Models:
C-10794
1
40
45
45
Download
45 pages
19.59 Kb
37
38
39
40
41
42
43
44
Troubleshooting
Specs
Install
Parts list
Wiring Diagram
Wire Size Max. Length
Warranty
Maintenance
Restrictor plate settings
Spill Switch Replacement
Page 40
Image 40
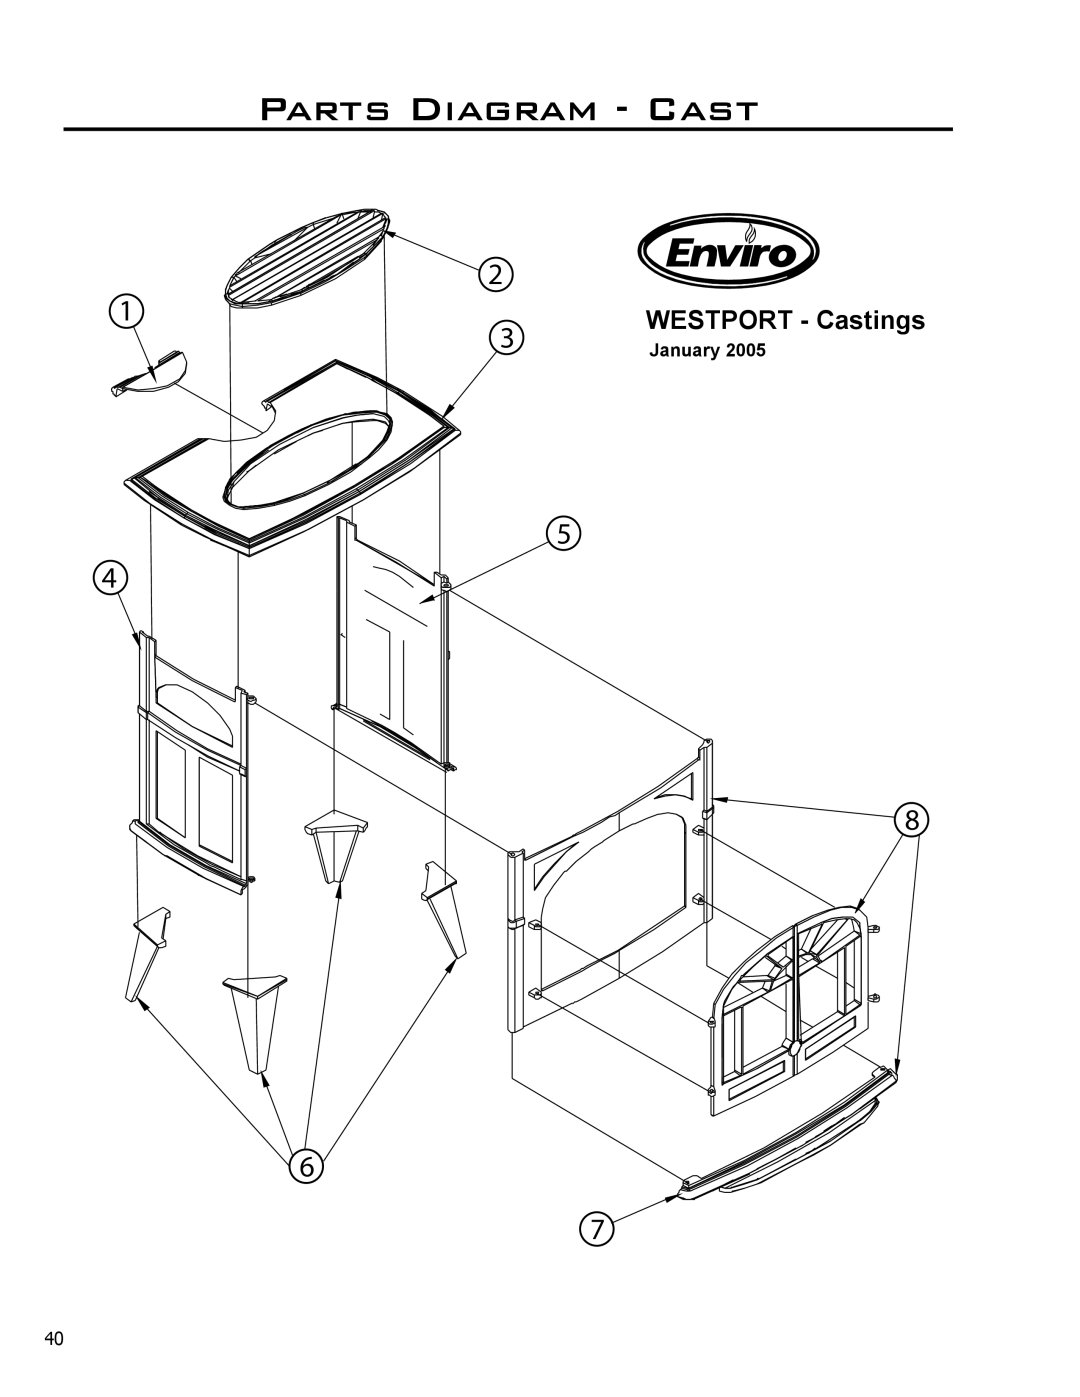
Parts Diagram - Cast
�
�
�
�
WESTPORT - Castings
January 2005
�
�
�
�
40
Page 39
Page 41
Page 40
Image 40
Page 39
Page 41
Contents
For Your Safety
Westport
Safety Precautions
General
Table of Contents
TOP Vent DV
Codes And Approvals
Rear Vent DV
Specifications
Dimensions
For Your Safetyread Before Operating
Operating Instructions
Gas valve
Maintenance And Service
Electronic Ignition Module Location
To Replace
Handles for Removing Door
To be Installed by a Qualified Service Agency only
Step
Conversion instructions Natural Gas
Initial Installation
Qualified Installers only
Venting Terminals Cannot be Recessed Into a Wall or Siding
Restrictor plate settings
For sufficient vent height above the roof line. For two
Pipes and fittings, are
Installing Vent Cap with Vinyl Siding Stand Off
Corner installation rear vented with
Once
Wall Framing for Hole for Vertical
Twist-lock the vent cap
Multi-Story Vent Pipe Installation
Installation Instructions
KIT Components
Cut away of spacers on Flex Pipe
Fire stop
Assembly of Venting into a Class ‘A’ Chimney
Turn the elbow to the rear vent position and re-fasten with
Screws removed in see Figure
Corner Installation
Installation for Top Vented Horizontal Termination
Installation
Wiring Diagram
Canadian Installations
A. Installations
General Venting Information
Venting of a Fireplace Fitted with the Drafthood Adaptor
Spill Switch Replacement
Automatic Safety Shut Down
Optional Finishing
GAS Line Connection
To Test Valve Pressures
Wire Size Max. Length
Wiring Diagram For Fan Control
Secondary Installation
Optional Blower Fan Installation
Complete Log Placement
Log Placement with Rock Wool
Brick panel bracket, slots shown
Trouble Shooting
Problem Possible Cause Solution
Parts List Cast
Reference Number Part Description Part Number
Cast Leg Each Painted
Parts Diagram Cast
Parts List Components
Reference Part Description Part Number
Parts List Components
Parts Diagram Components
Warranty
To the Dealer
Installation Data Sheet
Top
Page
Image
Contents