Stylus Color Service Manual
Adjustments
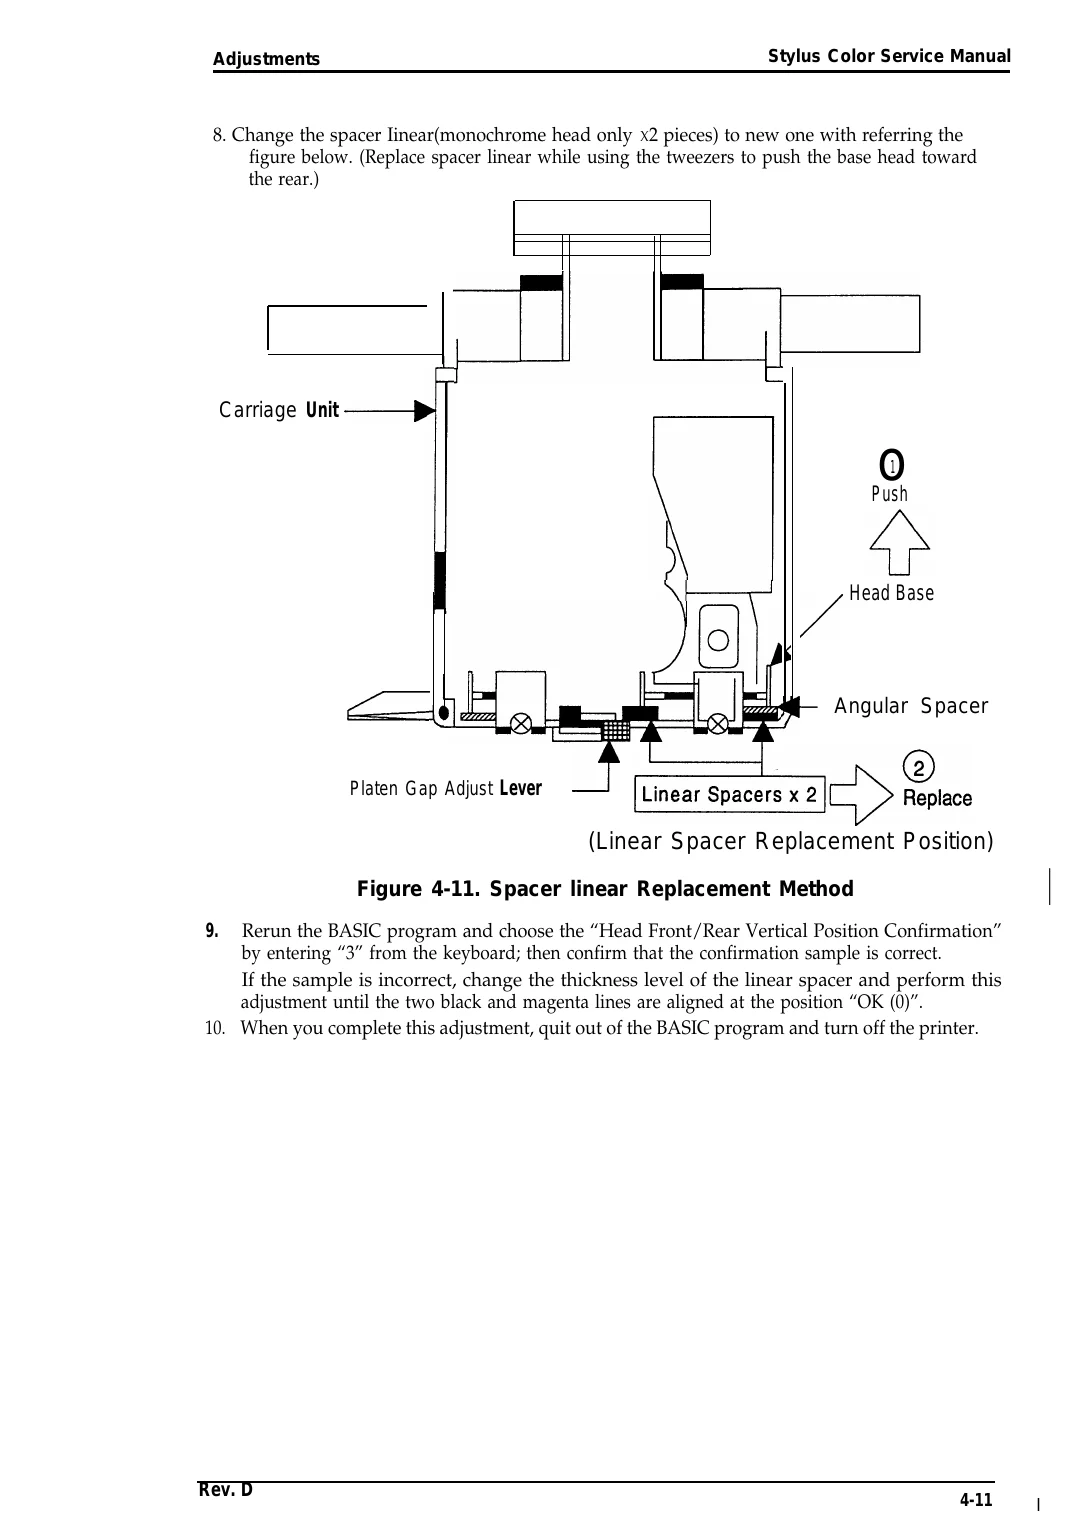
8. Change the spacer Iinear(monochrome head only X 2 pieces) to new one with referring the
figure below. (Replace spacer linear while using the tweezers to push the base head toward
the rear.)
Carriage Unit -—1
o
1
Push
Head Base
/
— Angular Spacer
Platen Gap Adjust Lever
3 ~l+~,~~e
(Linear Spacer Replacement Position)
I
Figure 4-11. Spacer linear Replacement Method
Rerun the BASIC program and choose the “Head Front/Rear Vertical Position Confirmation”
by entering “3” from the keyboard; then confirm that the confirmation sample is correct.
If the sample is incorrect, change the thickness level of the linear spacer and perform this
adjustment until the two black and magenta lines are aligned at the position “OK (0)”.
10. When you complete this adjustment, quit out of the BASIC program and turn off the printer.
9.
Rev. D
4-11
I