INSTALLATION AND ASSEMBLY
WARNING: Any change to this heater or its control can be dangerous. Provide adequate clearances and accessibility for purposes of servicing and proper operation.
A manufactured home (USA only) installation must conform with the Manufactured Home Construction and Safety Standard, Title 24 CFR, Part 3280 or, when such standard is not applicable, the Standard for Manufactured Home Installations, ANSI Z225.1.
Due to high surface temperature, keep children, clothing, and furniture away. Keep burner and control compartments clean.
INSTALLATION OVERVIEW
WARNING: Improper installation, adjustments, alteration, service, or maintenance can cause property damage, personal injury or loss of life.
Installation and service must be performed by a qualified installer, service agency, or the gas supplier.
These wall furnace models are designed for direct venting through a wall. Only venting components approved for these furnaces may be used.
This unit is to be installed on a wall from 4 1/2" to 12" (114.3 mm to 304.8 mm) thick.
Note: All references must be considered as if the observer is standing in front of the wall and/or appliance.
1
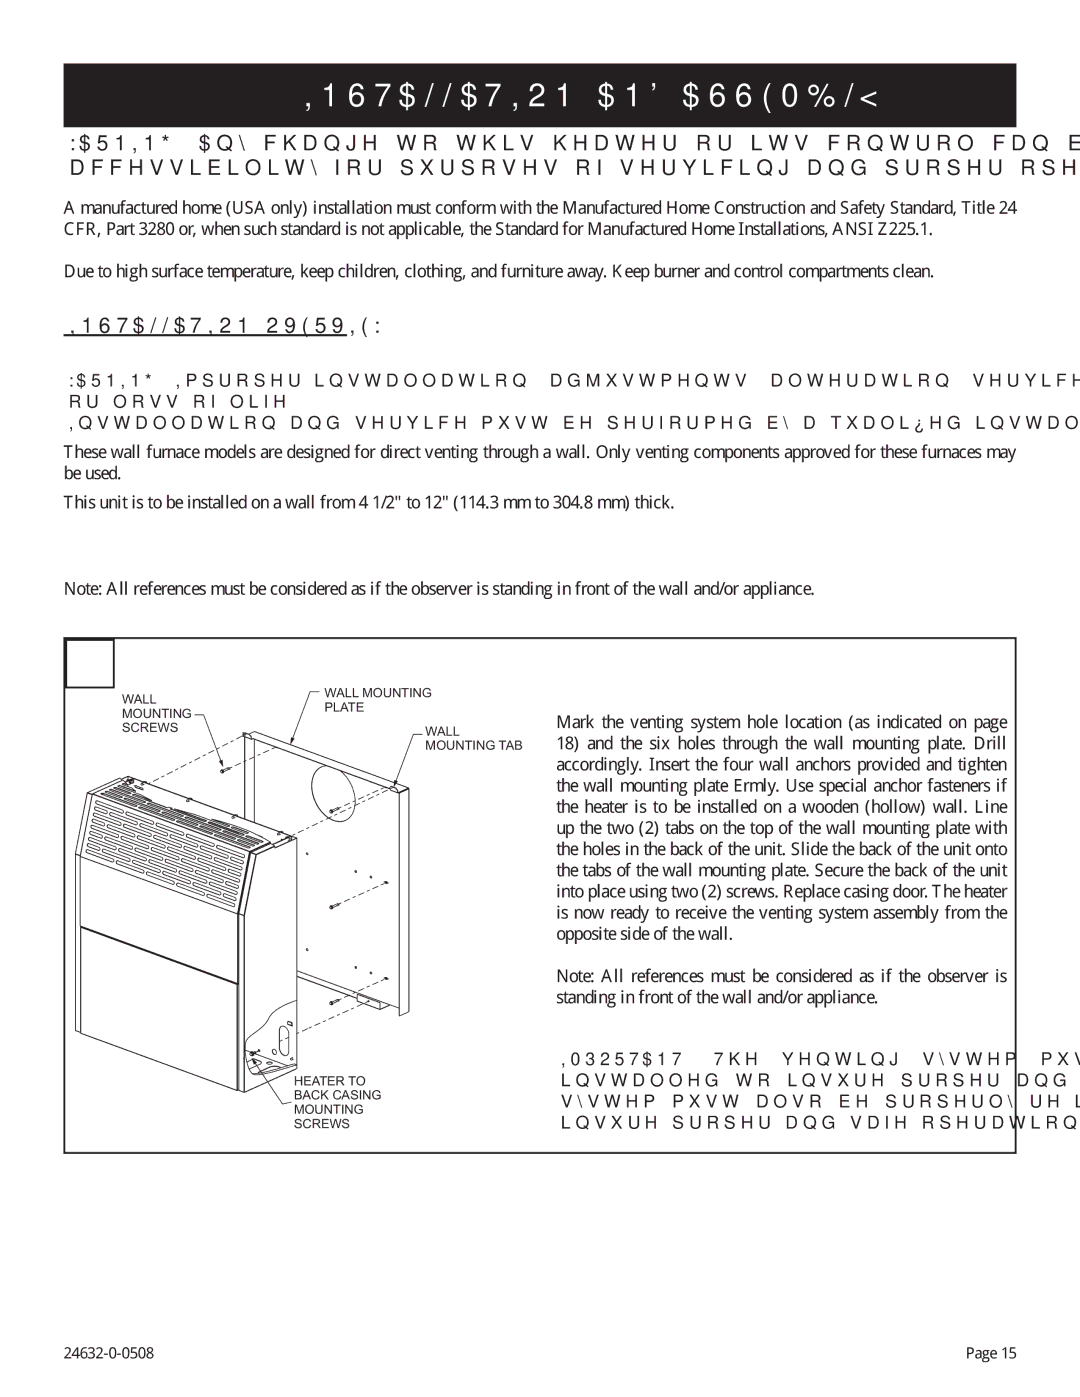
WALL | WALL MOUNTING | |
PLATE | ||
MOUNTING | ||
SCREWS | WALL | |
| MOUNTING TAB |
HEATER TO
BACK CASING
MOUNTING
SCREWS
Mark the venting system hole location (as indicated on page
18)and the six holes through the wall mounting plate. Drill accordingly. Insert the four wall anchors provided and tighten the wall mounting plate firmly. Use special anchor fasteners if the heater is to be installed on a wooden (hollow) wall. Line up the two (2) tabs on the top of the wall mounting plate with the holes in the back of the unit. Slide the back of the unit onto the tabs of the wall mounting plate. Secure the back of the unit into place using two (2) screws. Replace casing door. The heater is now ready to receive the venting system assembly from the opposite side of the wall.
Note: All references must be considered as if the observer is standing in front of the wall and/or appliance.
IMPORTANT: The venting system must be properly installed to insure proper and safe operation. The venting system must also be properly
Page 15 |