Manuals
/
Everex
/
Computer Equipment
/
Laptop
Everex
NM3700W, NM4100W, NM3500W Scan Results 5. Click Next to continue, System Specification A
Models:
NM3700W
NM3500W
NM3900W
NM4100W
1
117
120
120
Download
120 pages
4.54 Kb
113
114
115
116
117
118
119
120
Specification
Install
Password
Connecting To Peripherals
Notebook Accessories
Press F2 to Enter SETUP
Flash BIOS
Installing the Battery Pack
Cleaning Your Computer
System Recovery
Page 117
Image 117
System Specification
A
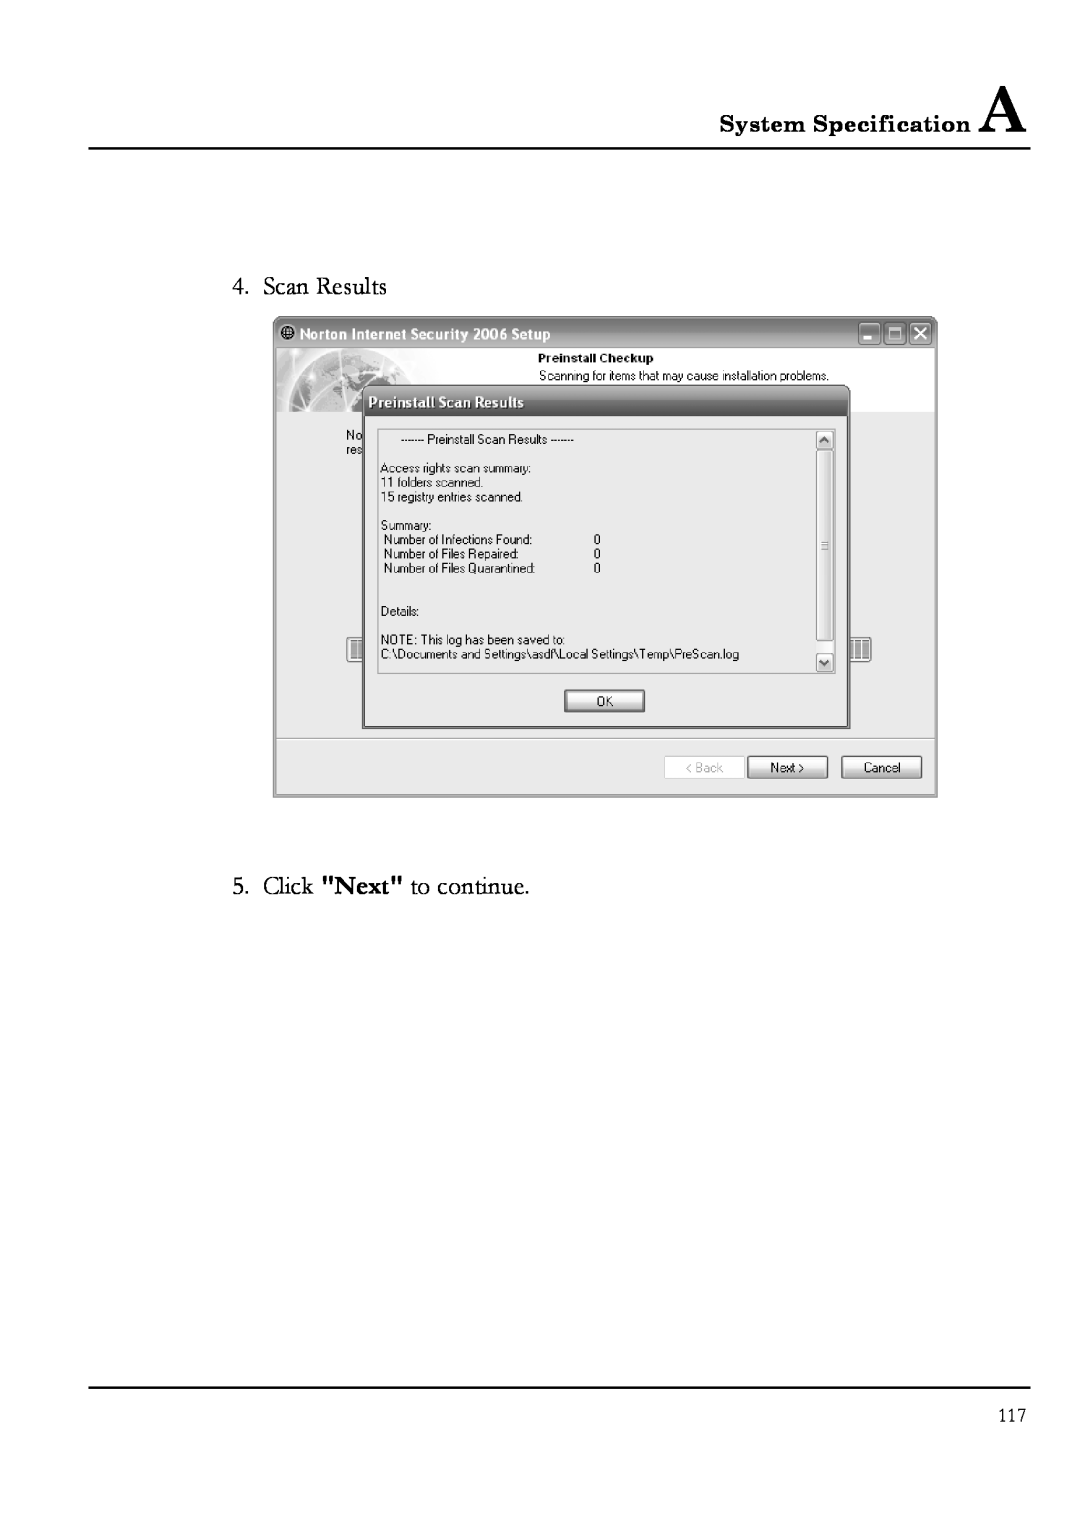
4. Scan Results
5. Click
"Next"
to continue.
117
Page 116
Page 118
Page 117
Image 117
Page 116
Page 118
Contents
Page
Copyright 2006All Rights Reserved - Printed in Taiwan
Trademarks
FCC Information to User
Safety and Care Instructions
Radio and television interference
Canadian Department of Communications Compliance Statement
Shielded Cables Notice
FCC RF Exposure
Optical Disk Drive Notice
Peripheral Devices Notice
European Notice
Use Conditions
802.11b Restrictions
About Your Notebook Computer
About Your User Guide
ABOUT YOUR NOTEBOOK COMPUTER
USING YOUR NOTEBOOK
ABOUT YOUR USER GUIDE
INTRODUCTION
FUNWITHMULTIMEDIA
CONNECTING TO PERIPHERALS
8 CARING FOR YOUR NOTEBOOK
APPENDIX A SYSTEM SPECIFICATION
APPENDIX B SYSTEM RECOVERY, DRIVER AND NORTON
INSTALLATION
Notebook User Guide
Introduction1
1 Introduction
Wireless LAN
1.1 Feature Highlight
Processing Unit
Memory
Power and System Management
Flash BIOS
Graphic System
PCI Local Bus Architecture
1.3 The Inside of the Notebook
1.2 Unpacking the Computer
Introduction1
Built-in Stereo Speaker
NOTEBOOK STATUS ICONS
Lights orange to indicate that the battery is in charging
1.5 The Rear Side of the Notebook
1.4 The Front Side of the Notebook
USB 2.0 Ports
1.6 The Left Side of the Notebook
1.7 The Right Side of the Notebook
Introduction1 Right Side Features
1.8 The Underside of the Notebook
Bottom of the System
Introduction1
1.9 Notebook Accessories
Battery Pack
AC Adapter
DVD/CD-RW Combo Device Pack
1.10 Notebook Options
DVD dual Dual Rewritable DVD combo Device Pack
DVD-RW combo
Page
Getting Started
2 Getting Started
2.1 Using the Battery Pack
Removing the Battery Pack
Installing the Battery Pack
EXTENDING BATTERY LIFE
Replacing the Battery Pack
2.2 Connecting the AC Power Source
2.3 Starting Your Computer
After a few seconds, the computer’s display will turn on and your computer will begin to execute the Power On Self Test or POST to check if all system components are running properly. Any error found during the test will be displayed on the screen and may generate short beep sound as well
2.5 Turning off Your Computer
2.4 Adjusting the Display Controls
Using Your Notebook
3 Using Your Notebook
3.2 Understanding the Keyboard Functions
3.1 Starting Your Operating System
Function Keys
Keyboard
Windows keys
Cursor Control keys
Typewriter keys
BASIC KEYBOARD FUNCTIONS
Keypad
Function Description
CURSOR CONTROL KEYS
SCREEN CONTROL KEYS
WINDOWS HOT KEYS
SPECIAL FUNCTION KEYS
3.3 Using the Touchpad Pointing Device
1. Left Selection Button
Touchpad Features
3.4 Configuring Your Screen Display
CHANGING THE DISPLAY PROPERTIES UNDER WINDOWS
POSSIBLE DISPLAY CONFIGURATIONS
Standby Mode
3.5 Knowing the Power Saving Features
3.6 Working with the Built-in HDD
Hibernation Mode
Shutdown
3.7 How to Access the Optical Drive
How to care for Optical Disks CDs, DVDs, etc
Page
Fun with Multimedia
4 Fun with Multimedia
4.2 Audio Sound System Features
4.1 Notebook Multimedia Features
4.4 Windows Multimedia Programs
4.3 Setting up the Audio Driver Properties
Figure 4-1 Entertainment Programs Group
4.5 Recording Sounds
Fun with Multimedia Figure 4-2 Sound Recorder
Figure 4-3 Audio Properties
Figure 4-4 Recording Volume Control
USING AN EXTERNAL MICROPHONE
USING THE BUILT-IN OPTICAL DRIVE
Figure 4-5 Play Audio CD by Windows Media Player
4.6 Playing Audio and Sound
USING THE WINDOWS MEDIA PLAYER
4.7 Playing Video and MPEG Files
Figure 4-6 Windows Media Player
4.8 Using DVD
Figure 4-7 To play a DVD
4.9 Using Rewritable Optical Disk Drive
Connecting to Peripherals
5 Connecting to Peripherals
5.1 Using the USB Port
5.2 Using an External Monitor Port
5.3 Using the External Audio System
5.4 Using the LAN Port
5.6 Using the Modem Port
5.5 Using the Wireless LAN
3. Connect the other end of the cable into the computer modem port
2. Connect one end of the cable into a standard wall outlet
Page
Customizing Your Notebook
6 Customizing Your Notebook
Press F2 to Enter SETUP
6.1 Running the BIOS Setup Program
Item Specific Help
Phoenix BIOS Setup Utility
6.2 Using the Main Menu Setup
Secondary Master
Primary Master
6.2.1 INTERNAL HDD SUB-MENU
6.2.2 INTERNAL OPTICAL DRIVE SUB-MENU
Setup Defaults Save and Exit
Select Item
Select Menu
6.3 Using the Advanced CMOS Setup
Legacy USB Support
6.4 Security Menu Setup
Set Supervisor Password
6.5 Using the Boot Setup
6.6 How to Exit the Setup Program
6.7 How to Upgrade the BIOS
A\Phlash XXXXXX.ROM BIOS filename or
A\XXXXXX.BAT Batch file for BIOS file
Using Options
7 Using Options
7.1 Memory Upgrade
System Upgrade
Installing Memory
Based Memory
INSTALLING A MEMORY MODULE
7.2 Hard Disk Upgrade
2. Take out the hard disk from the compartment by finger carefully
7.3 Wireless Module Installation
Caring for Your Notebook
8 Caring for Your Notebook
8.1 Important Safety Instructions
All cautions and warnings on the notebook computer should be noted
8.2 Cleaning Your Computer
8.4 Maintaining Your Hard Disk
8.3 Maintaining the LCD Quality
8.5 Battery Care Guidelines
8.6 When You Travel
Page
System Specification
APPENDIX A
System Specification A
VGA SYSTEM
System Specification
PROCESSOR UNIT
SYSTEM MEMORY
AUDIO SYSTEM
STORAGE
TOUCHPAD
KEYBOARD
I/O PORTS
FLASH BIOS
WIRELESS DEVICES
AC/DC POWER SUPPLY ADAPTER
APPENDIX B System Recovery, Driver and Norton Installation
System Recovery
7. The recovery system tool will start running. Figure
Notebook User Guide
INSTALLING WINDOWS XP FROM OPTICAL DISK DRIVE
Device Drivers Installation
INSTALLING THE CHIPSET DRIVER
DRIVER INSTALLATION NOTE
INSTALLING THE VGA DEVICE DRIVER
Installing Chipset device driver for Windows XP
INSTALLING THE MODEM DEVICE DRIVER
INSTALLING THE AUDIO DEVICE DRIVER
Installing VGA device driver for Windows XP
E\Drivers\WinXP\VGA\Setup.exe
INSTALLING ENE - KEYBOARD CONTROLLER DRIVER
Installing Wireless LAN driver for Windows XP
INSTALLING THE WIRELESS LAN DEVICE DRIVER
E\Drivers\WinXP\Modem\ssetup.exe
Installing LAN driver for Windows XP
Norton Installation
Norton Internet Security 2006 Installation
INSTALLING THE LAN DEVICE DRIVER
3. Click View Details to see the complete results of the scan
4. Scan Results 5. Click Next to continue
Notebook User Guide
6. System now executes the installation
Model NM3500W, NM3900W, etc
TECHNICAL SUPPORT
Top
Page
Image
Contents