Installation, cont’d
Mounting on a standard or VersaTools rack shelf
1. If feet were previously attached to the bottom of the SW2/SW4, remove them.
2. Mount the SW DVI A Series switcher on the rack shelf, using two
3. Install blank panel(s) or other unit(s) on the rack shelf as desired.
4. Install the shelf in the rack.
The following illustrations show examples of how the SW2/SW4 can be mounted on different sized rack shelves.
VersaTools Rack Shelf
4
3
1/2 Rack Width Front
False Faceplate
2 |
|
Use 2 mounting holes on | (2) |
opposite corners. | |
| Screws |
Mounting an SW DVI A switcher on a
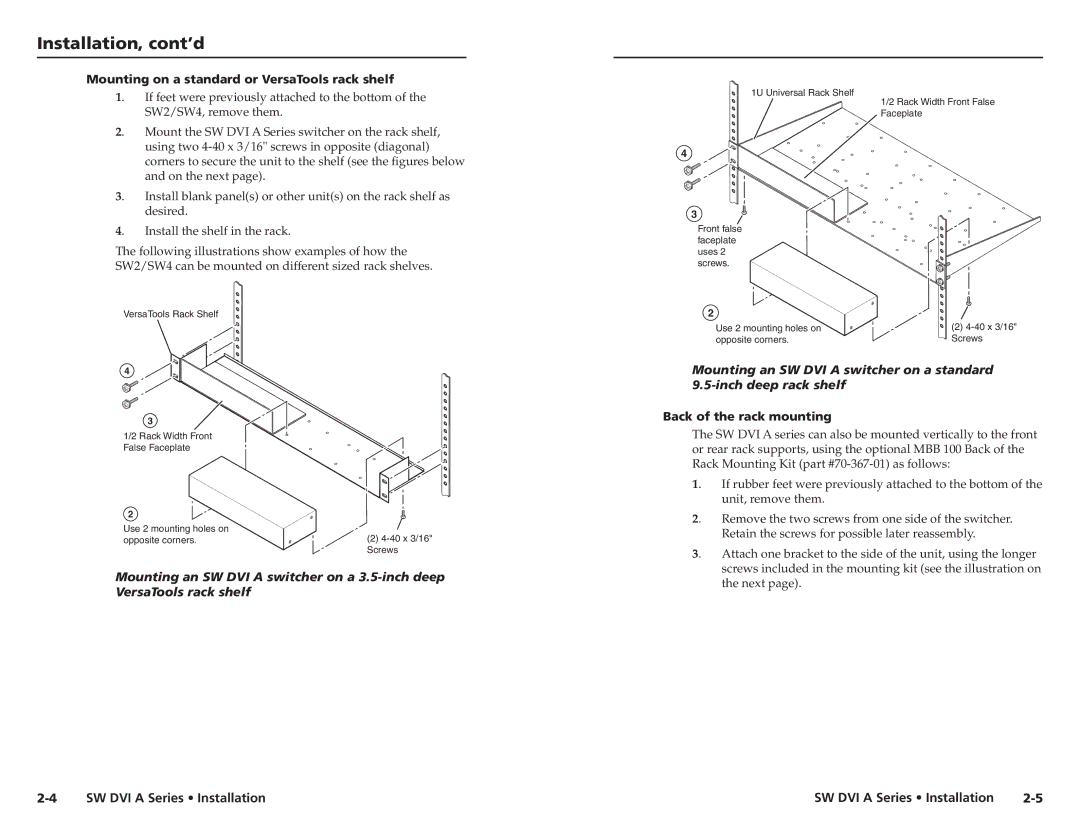
1U Universal Rack Shelf
1/2 Rack Width Front False
Faceplate
4
3
Front false faceplate uses 2 screws.
2
Use 2 mounting holes on | (2) |
opposite corners. | Screws |
Mounting an SW DVI A switcher on a standard
Back of the rack mounting
The SW DVI A series can also be mounted vertically to the front or rear rack supports, using the optional MBB 100 Back of the Rack Mounting Kit (part
1. If rubber feet were previously attached to the bottom of the unit, remove them.
2. Remove the two screws from one side of the switcher. Retain the screws for possible later reassembly.
3. Attach one bracket to the side of the unit, using the longer screws included in the mounting kit (see the illustration on the next page).
SW DVI A Series • Installation | SW DVI A Series • Installation |