Finalizing the Installation (for qualified installers only) | 53 |
3Follow the directions below to replace the orifices.
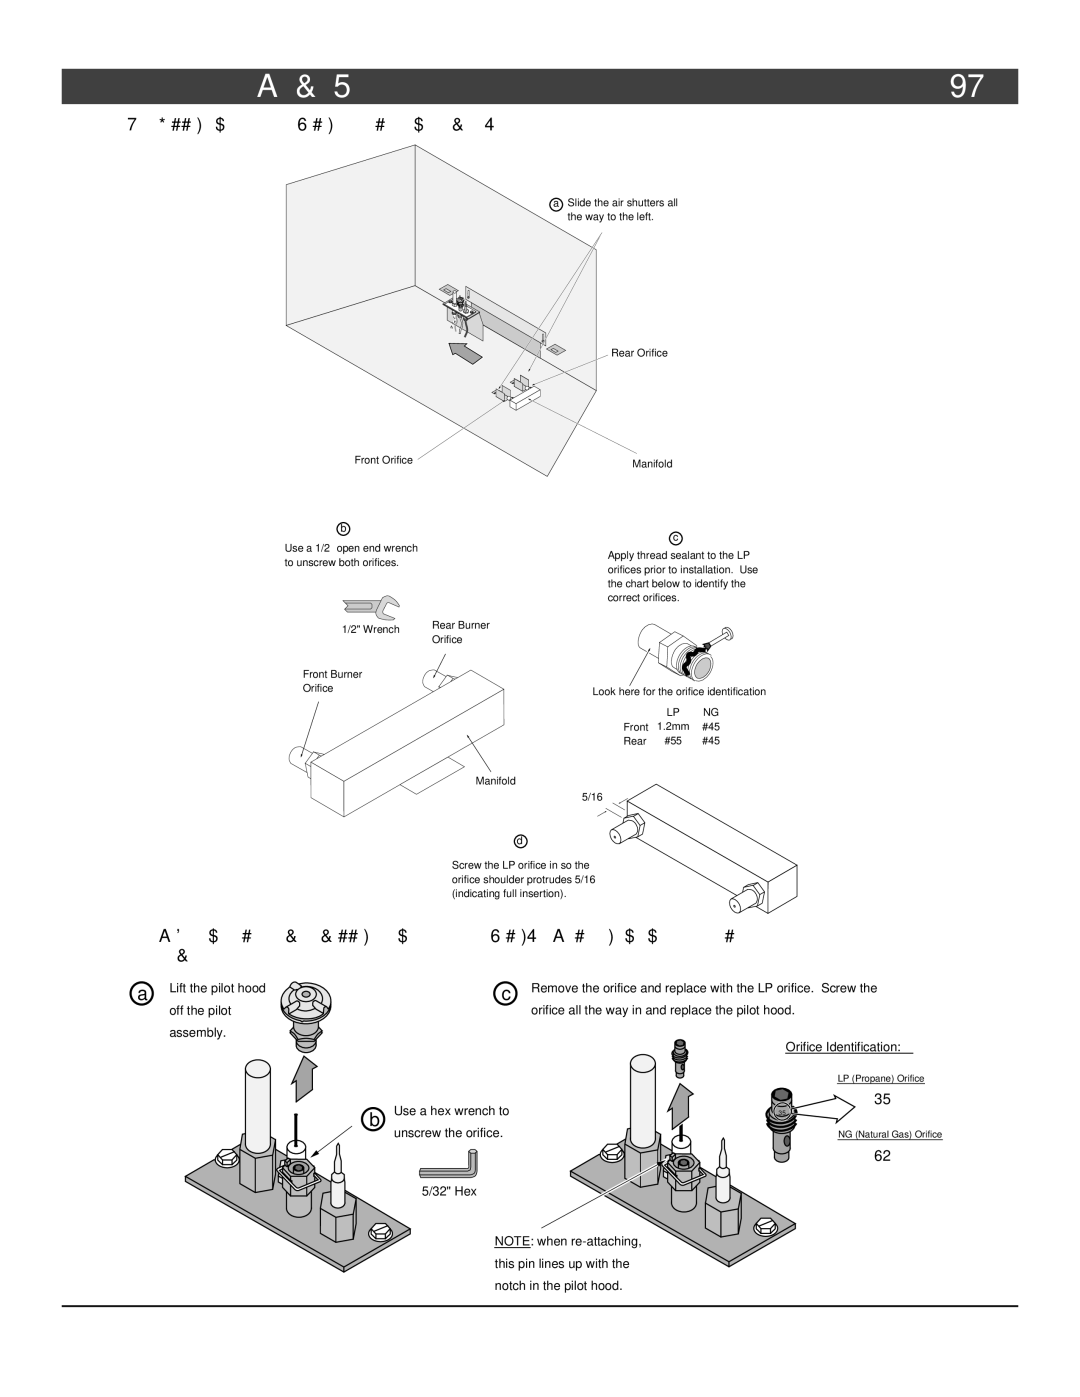
a Slide the air shutters all the way to the left.
Rear Orifice
Front Orifice | Manifold |
|
b
c
Use a 1/2” open end wrench to unscrew both orifices.
Apply thread sealant to the LP orifices prior to installation. Use the chart below to identify the correct orifices.
1/2" Wrench
Front Burner
Orifice
Rear Burner
Orifice
Look here for the orifice identification
LP NG
Front 1.2mm #45
Rear #55 #45
Manifold
5/16”
d
Screw the LP orifice in so the orifice shoulder protrudes 5/16” (indicating full insertion).
4Remove the pilot orifice following the instructions below. Replace with the propane pilot orifice
a | Lift the pilot hood | |
off the pilot | ||
| ||
| assembly. |
c | Remove the orifice and replace with the LP orifice. Screw the | |
orifice all the way in and replace the pilot hood. | ||
| ||
| Orifice Identification: |
b Use a hex wrench to unscrew the orifice.
5/32" Hex
NOTE: when
35
LP (Propane) Orifice
35
NG (Natural Gas) Orifice
62
© Travis Industries | 4080214 |