ADVANCED Operation
ALARM
Hard Drive and USB Options continued:
Formatting the USB Flash Drive
Use a USB flash drive to backup recorded video and upgrade the system`s firmware. You should always format the USB flash drive you intend to use with the system.
NOTE: Not formatting the USB flash drive may result in improper functionality.
USB Flash Drives
The system is compatible with most major brands of USB flash drives, with capacities from 256 MB to 4 GB. If you need to reformat your flash drive then click on the U DISK FORMAT button while the USB drive is connected to the USB port on the front of the DVR. Be aware that this button is not for use with any external USB hard drive you may connect to the DVR for backup. External hard drives will need to be formatted using the FAT32 format
and this can be done by connecting the drive to the USB port on a PC and reformatting it from there.
Advanced Setup
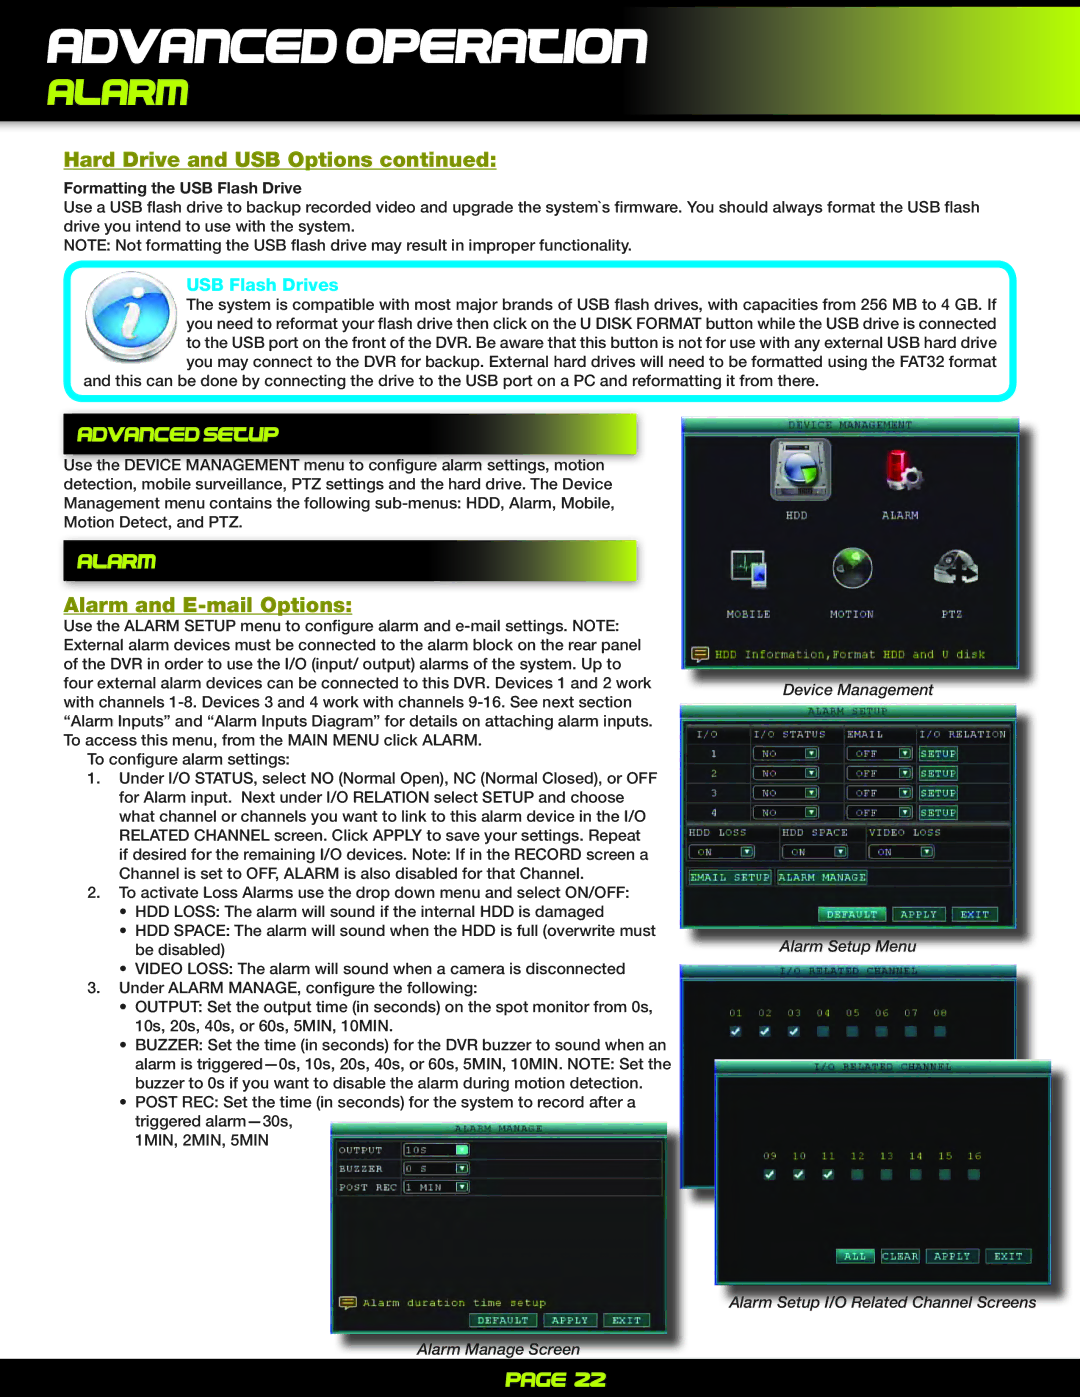
Use the DEVICE MANAGEMENT menu to configure alarm settings, motion detection, mobile surveillance, PTZ settings and the hard drive. The Device Management menu contains the following
Alarm
Alarm and E-mail Options:
Use the ALARM SETUP menu to configure alarm and
To configure alarm settings:
1.Under I/O STATUS, select NO (Normal Open), NC (Normal Closed), or OFF for Alarm input. Next under I/O RELATION select SETUP and choose what channel or channels you want to link to this alarm device in the I/O RELATED CHANNEL screen. Click APPLY to save your settings. Repeat if desired for the remaining I/O devices. Note: If in the RECORD screen a Channel is set to OFF, ALARM is also disabled for that Channel.
2.To activate Loss Alarms use the drop down menu and select ON/OFF:
•HDD LOSS: The alarm will sound if the internal HDD is damaged
•HDD SPACE: The alarm will sound when the HDD is full (overwrite must be disabled)
•VIDEO LOSS: The alarm will sound when a camera is disconnected
3.Under ALARM MANAGE, configure the following:
•OUTPUT: Set the output time (in seconds) on the spot monitor from 0s, 10s, 20s, 40s, or 60s, 5MIN, 10MIN.
•BUZZER: Set the time (in seconds) for the DVR buzzer to sound when an
alarm is
•POST REC: Set the time (in seconds) for the system to record after a triggered
1MIN, 2MIN, 5MIN
Device Management
Alarm Setup Menu
Alarm Setup I/O Related Channel Screens
Alarm Manage Screen
Page 22