VR800 Quick Operation Guide
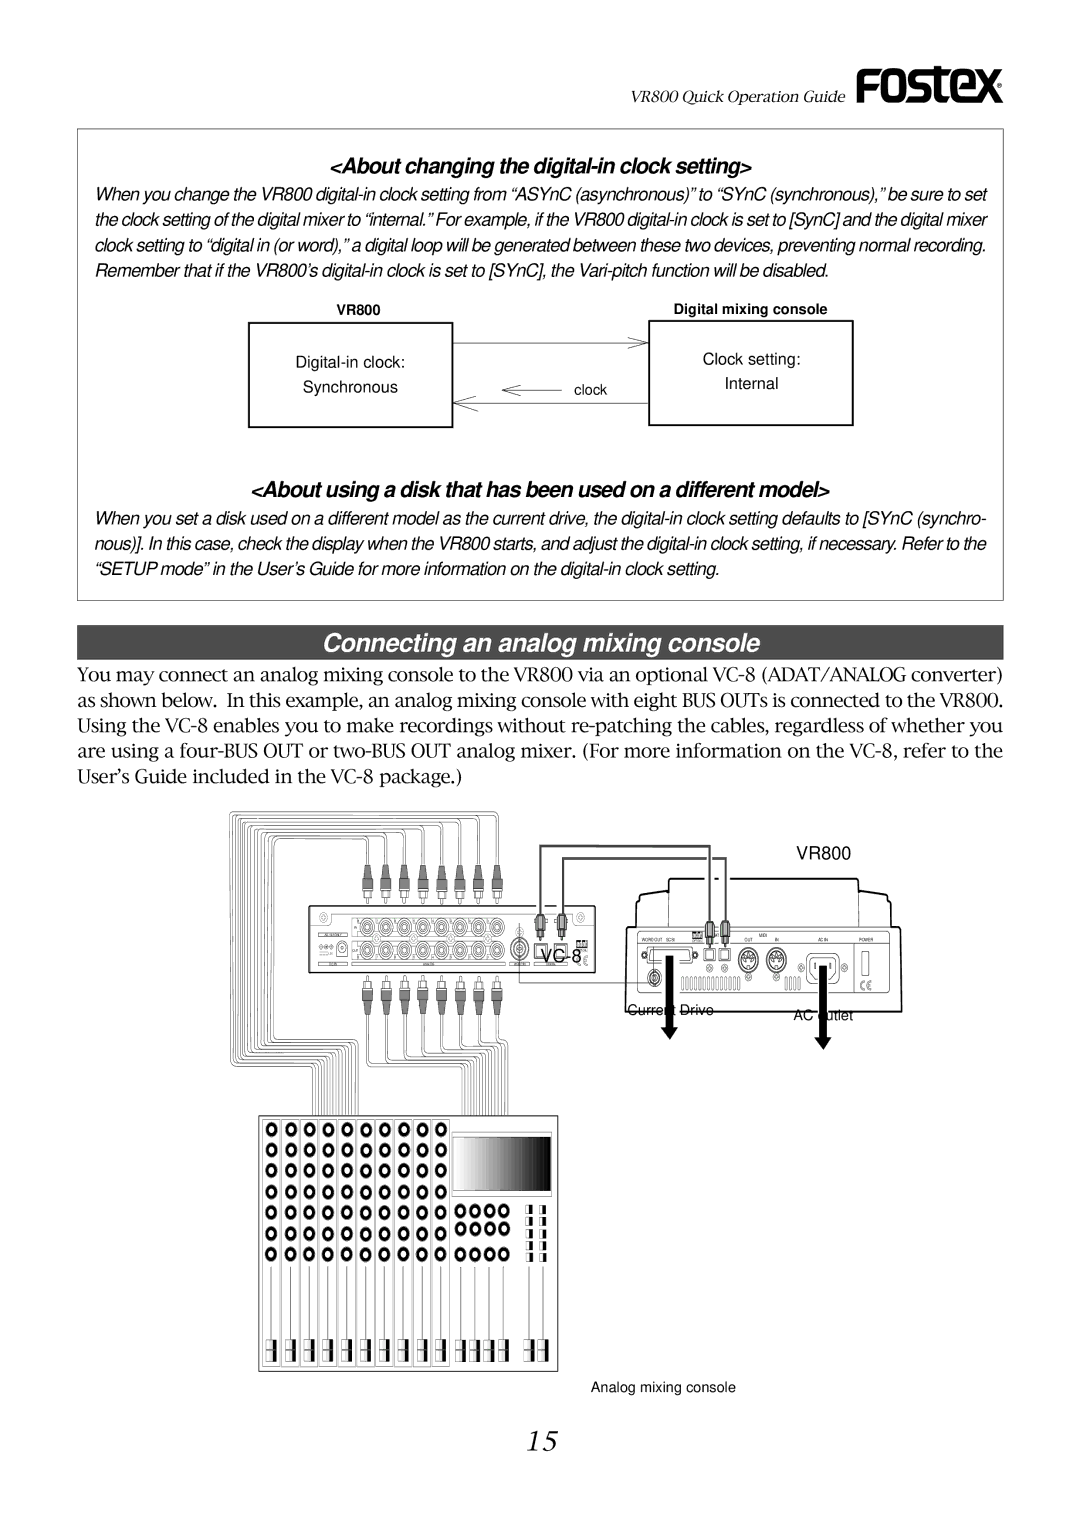
<About changing the digital-in clock setting>
When you change the VR800 digital-in clock setting from “ASYnC (asynchronous)” to “SYnC (synchronous),” be sure to set the clock setting of the digital mixer to “internal.” For example, if the VR800 digital-in clock is set to [SynC] and the digital mixer clock setting to “digital in (or word),” a digital loop will be generated between these two devices, preventing normal recording. Remember that if the VR800’s digital-in clock is set to [SYnC], the Vari-pitch function will be disabled.
VR800
Digital-in clock:
Synchronous
Digital mixing console
Clock setting:
Internal
<About using a disk that has been used on a different model>
When you set a disk used on a different model as the current drive, the digital-in clock setting defaults to [SYnC (synchro- nous)]. In this case, check the display when the VR800 starts, and adjust the digital-in clock setting, if necessary. Refer to the “SETUP mode” in the User’s Guide for more information on the digital-in clock setting.
Connecting an analog mixing console
You may connect an analog mixing console to the VR800 via an optional VC-8 (ADAT/ANALOG converter) as shown below. In this example, an analog mixing console with eight BUS OUTs is connected to the VR800. Using the VC-8 enables you to make recordings without re-patching the cables, regardless of whether you are using a four-BUS OUT or two-BUS OUT analog mixer. (For more information on the VC-8, refer to the User’s Guide included in the VC-8 package.)
VR800
8 | 7 | 6 | 5 | 4 | 3 | 2 | 1 | OUT |
IN | | | | | | | | |
AD-12A ONLY | | | | | | | | |
OUT | | | | | | | | OPTICAL |
12V | | | | | | | | |
8 | 7 | 6 | 5 | 4 | 3 | 2 | 1 | |
DC IN | | | | ANALOG | | | WORD IN | DIGITAL |
| | | | | | VC-8 |
DATA