VR800 Quick Operation Guide
Installing an E-IDE hard disk in the VR800
Follow the steps below to install a
<Caution>
*Before you start, be sure to remove the power cable from the VR800. Also, NEVER let your hands or metal objects touch the motherboard or the connectors for the hard disk.
*Wear gloves when you install the hard disk. Customers are not expected to touch the bottom part of the VR800, and the bottom is not designed to prevent injury. Therefore, if you touch the bottom panel with you bare hand while installing the hard disk, you may be injured. Be sure to follow the correct procedure and pay careful attention to avoid injury.
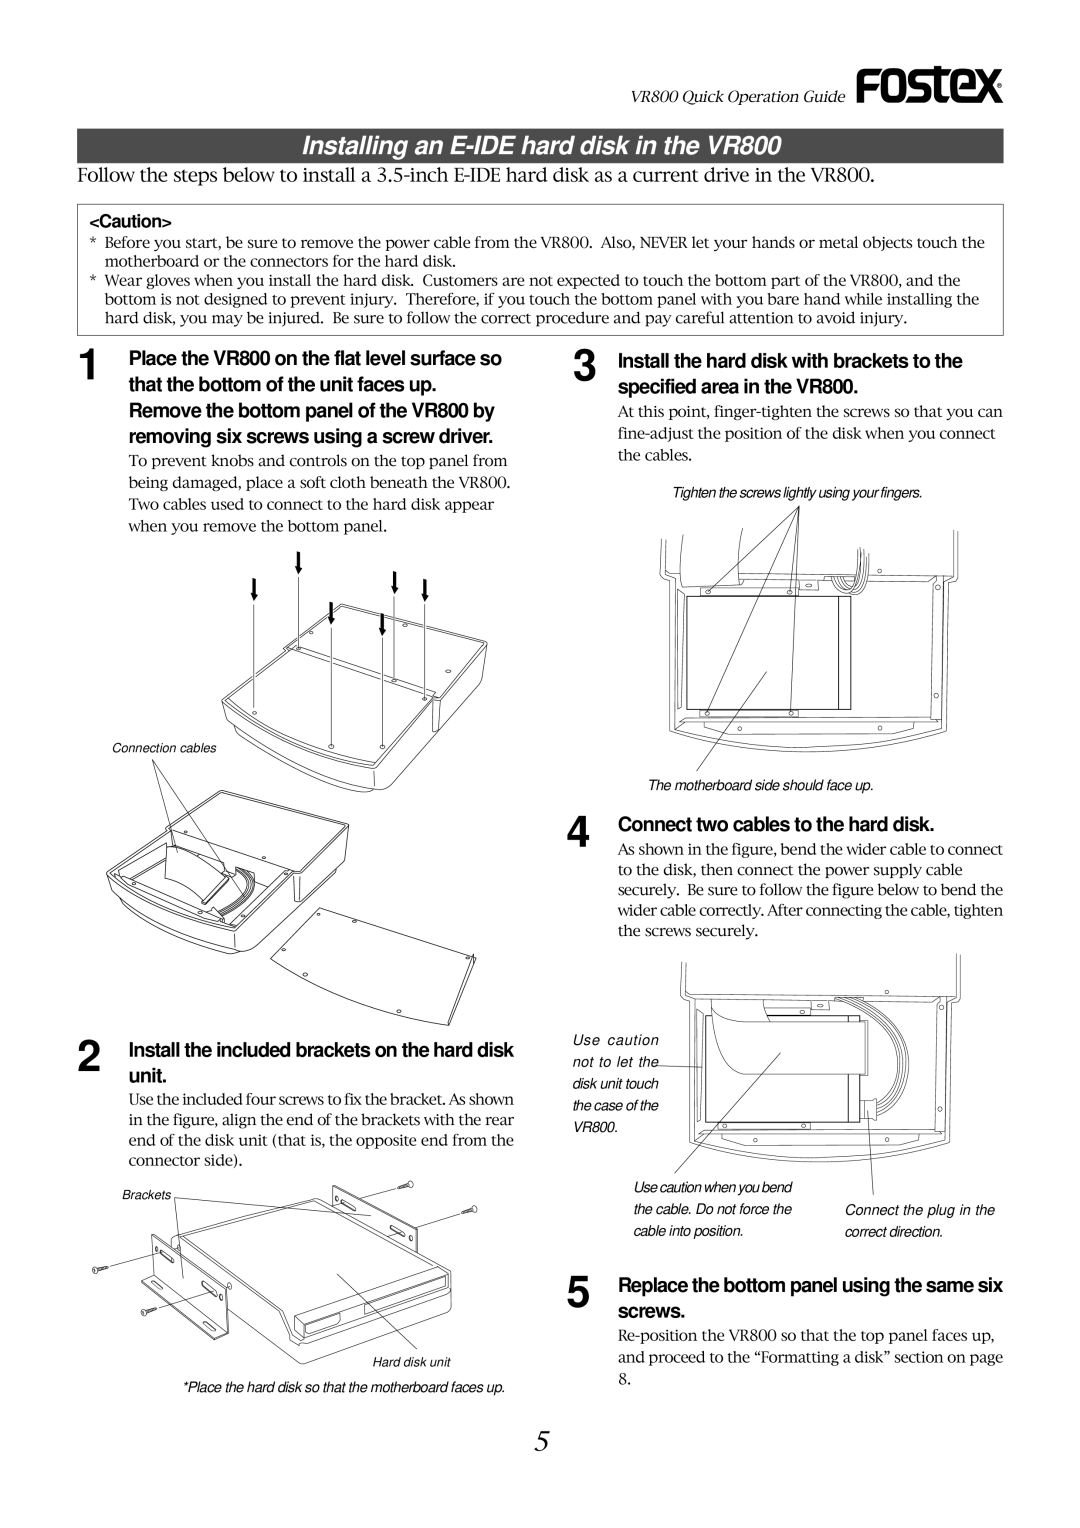
1 | Place the VR800 on the flat level surface so | 3 | Install the hard disk with brackets to the |
| that the bottom of the unit faces up. |
| specified area in the VR800. |
| Remove the bottom panel of the VR800 by |
| At this point, |
| removing six screws using a screw driver. |
| |
| To prevent knobs and controls on the top panel from |
| the cables. |
|
|
|
being damaged, place a soft cloth beneath the VR800. Two cables used to connect to the hard disk appear when you remove the bottom panel.
Tighten the screws lightly using your fingers.
Connection cables
4
The motherboard side should face up.
Connect two cables to the hard disk.
As shown in the figure, bend the wider cable to connect to the disk, then connect the power supply cable securely. Be sure to follow the figure below to bend the wider cable correctly. After connecting the cable, tighten the screws securely.
2 | Install the included brackets on the hard disk |
| unit. |
Use the included four screws to fix the bracket. As shown in the figure, align the end of the brackets with the rear end of the disk unit (that is, the opposite end from the connector side).
Brackets
Use caution not to let the disk unit touch the case of the VR800.
Use caution when you bend the cable. Do not force the cable into position.
Connect the plug in the
correct direction.
Hard disk unit
*Place the hard disk so that the motherboard faces up.
5 Replacescrews. the bottom panel using the same six
5