VR800 Quick Operation Guide
Basic recording procedure
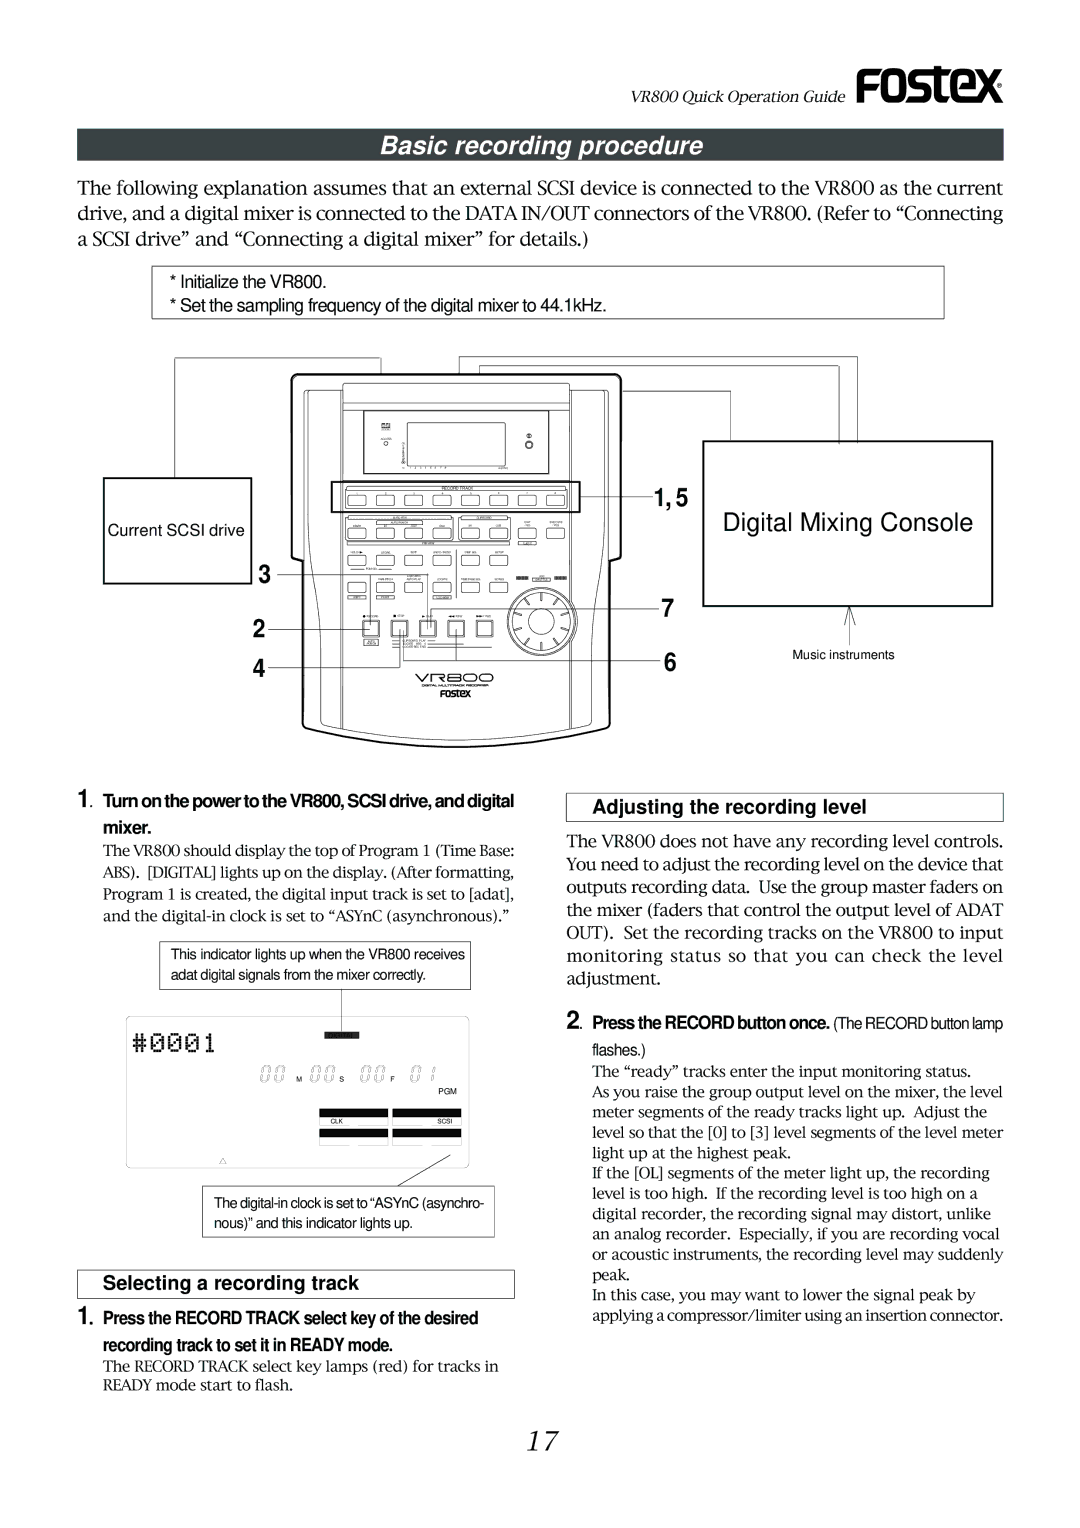
The following explanation assumes that an external SCSI device is connected to the VR800 as the current drive, and a digital mixer is connected to the DATA IN/OUT connectors of the VR800. (Refer to “Connecting a SCSI drive” and “Connecting a digital mixer” for details.)
*Initialize the VR800.
*Set the sampling frequency of the digital mixer to 44.1kHz.
Current SCSI drive
3
2
4
ACCESS
OL 0
6
12
24
1 2 3 4 5 6 7 8A SYNC
RECORD TRACK
1 | 2 | 3 | 4 | 5 | 6 | 7 | 8 |
|
| AUTO RTN |
| CLIPBOARD |
|
| |
| AUTO PUNCH |
|
|
| EXIT | EXECUTE | |
START | IN | OUT | END | IN | OUT | / NO | / YES |
|
|
| PREVIEW |
|
| EJECT |
|
HOLD/ | STORE | EDIT | UNDO / REDO | DISP SEL | SETUP |
|
|
PGM SEL |
|
|
|
|
|
|
|
|
| AUTO RTN |
|
|
|
| JOG |
| VARI PITCH | AUTO PLAY | LOCATE | TIME BASE SEL | SCRUB |
| SHUTTLE |
SHIFT | P.EDIT |
| LOC MEM |
|
|
|
|
RECORD |
| STOP | PLAY | REW | F FWD |
|
|
AUTO |
| CLIPBOARD PLAY |
|
|
|
| |
PUNCH |
| LOCATE ABS | 0 |
|
|
|
|
|
| LOCATE REC END |
|
|
|
| |
1, 5
7
6
Digital Mixing Console
Music instruments
1. Turn on the power to the VR800, SCSI drive, and digital
mixer.
The VR800 should display the top of Program 1 (Time Base: ABS). [DIGITAL] lights up on the display. (After formatting, Program 1 is created, the digital input track is set to [adat], and the
This indicator lights up when the VR800 receives adat digital signals from the mixer correctly.
DIGITAL44.1kHz
Adjusting the recording level
The VR800 does not have any recording level controls. You need to adjust the recording level on the device that outputs recording data. Use the group master faders on the mixer (faders that control the output level of ADAT OUT). Set the recording tracks on the VR800 to input monitoring status so that you can check the level adjustment.
2. Press the RECORD button once. (The RECORD button lamp
ABS
M | S | F |
|
| PGM |
| SYNC OUT | DRIVE |
| CLK | SCSI |
| AUTO | A.PUNCH |
The
Selecting a recording track
1. Press the RECORD TRACK select key of the desired
recording track to set it in READY mode.
The RECORD TRACK select key lamps (red) for tracks in READY mode start to flash.
flashes.)
The “ready” tracks enter the input monitoring status.
As you raise the group output level on the mixer, the level meter segments of the ready tracks light up. Adjust the level so that the [0] to [3] level segments of the level meter light up at the highest peak.
If the [OL] segments of the meter light up, the recording level is too high. If the recording level is too high on a digital recorder, the recording signal may distort, unlike an analog recorder. Especially, if you are recording vocal or acoustic instruments, the recording level may suddenly peak.
In this case, you may want to lower the signal peak by applying a compressor/limiter using an insertion connector.
17