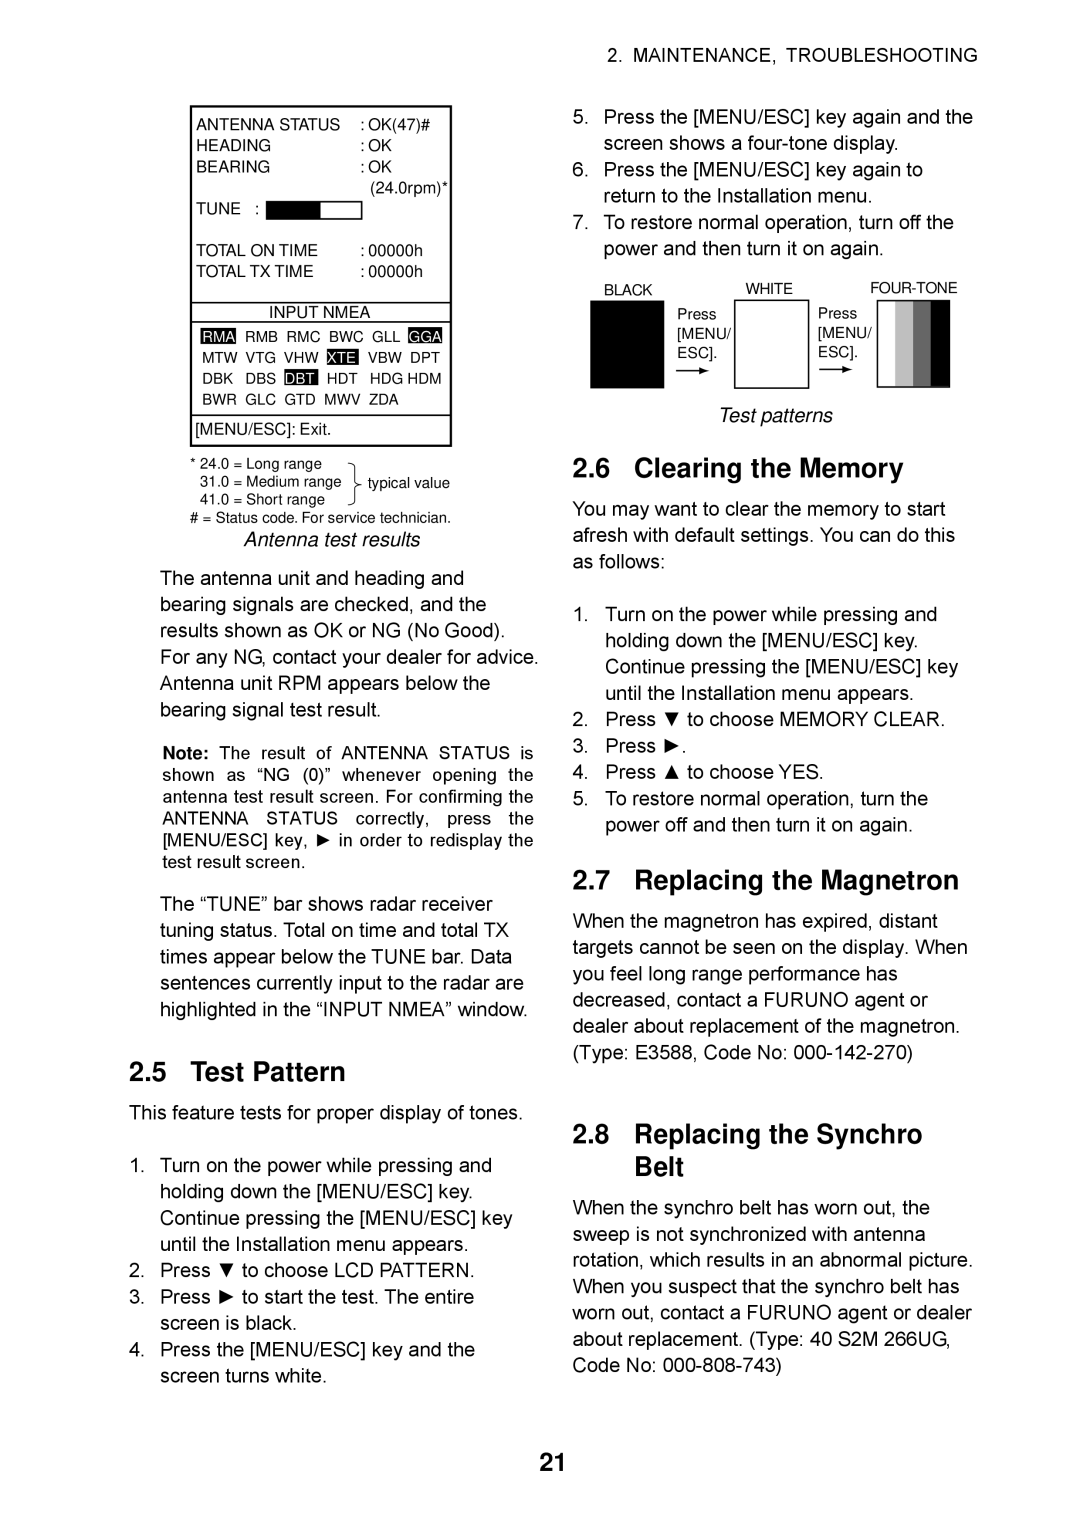
ANTENNA STATUS | : OK(47)# | ||
HEADING | : OK | ||
BEARING | : OK | ||
|
|
| (24.0rpm)* |
TUNE : |
|
|
|
|
|
| |
TOTAL ON TIME | : 00000h | ||
TOTAL TX TIME | : 00000h | ||
INPUT NMEA
RMA RMB RMC BWC GLL GGA
MTW VTG VHW XTE VBW DPT
DBK DBS DBT HDT HDG HDM
BWR GLC GTD MWV ZDA
[MENU/ESC]: Exit.
* 24.0 = Long range 31.0 = Medium range
41.0= Short range
#= Status code. For service technician.
Antenna test results
The antenna unit and heading and bearing signals are checked, and the results shown as OK or NG (No Good). For any NG, contact your dealer for advice. Antenna unit RPM appears below the bearing signal test result.
Note: The result of ANTENNA STATUS is shown as “NG (0)” whenever opening the antenna test result screen. For confirming the ANTENNA STATUS correctly, press the [MENU/ESC] key, ► in order to redisplay the test result screen.
The “TUNE” bar shows radar receiver tuning status. Total on time and total TX times appear below the TUNE bar. Data sentences currently input to the radar are highlighted in the “INPUT NMEA” window.
2.5 Test Pattern
This feature tests for proper display of tones.
1. Turn on the power while pressing and holding down the [MENU/ESC] key. Continue pressing the [MENU/ESC] key until the Installation menu appears.
2.Press ▼ to choose LCD PATTERN.
3.Press ► to start the test. The entire screen is black.
4.Press the [MENU/ESC] key and the screen turns white.
2.MAINTENANCE, TROUBLESHOOTING
5.Press the [MENU/ESC] key again and the screen shows a
6.Press the [MENU/ESC] key again to return to the Installation menu.
7.To restore normal operation, turn off the power and then turn it on again.
BLACK | WHITE |
|
| |||||||||
|
| Press |
| Press |
|
|
|
|
| |||
|
| [MENU/ |
| [MENU/ |
|
|
|
|
| |||
|
| ESC]. |
| ESC]. |
|
|
|
|
| |||
|
|
|
|
|
|
|
|
|
|
|
|
|
|
|
|
|
|
|
|
|
|
|
|
|
|
Test patterns
2.6 Clearing the Memory
You may want to clear the memory to start afresh with default settings. You can do this as follows:
1. Turn on the power while pressing and holding down the [MENU/ESC] key. Continue pressing the [MENU/ESC] key until the Installation menu appears.
2.Press ▼ to choose MEMORY CLEAR.
3.Press ►.
4.Press ▲ to choose YES.
5.To restore normal operation, turn the power off and then turn it on again.
2.7 Replacing the Magnetron
When the magnetron has expired, distant targets cannot be seen on the display. When you feel long range performance has decreased, contact a FURUNO agent or dealer about replacement of the magnetron. (Type: E3588, Code No:
2.8Replacing the Synchro Belt
When the synchro belt has worn out, the sweep is not synchronized with antenna rotation, which results in an abnormal picture. When you suspect that the synchro belt has worn out, contact a FURUNO agent or dealer about replacement. (Type: 40 S2M 266UG, Code No:
21