4.3 LCD/Keyboard Test & ROM Version No. Confirmation
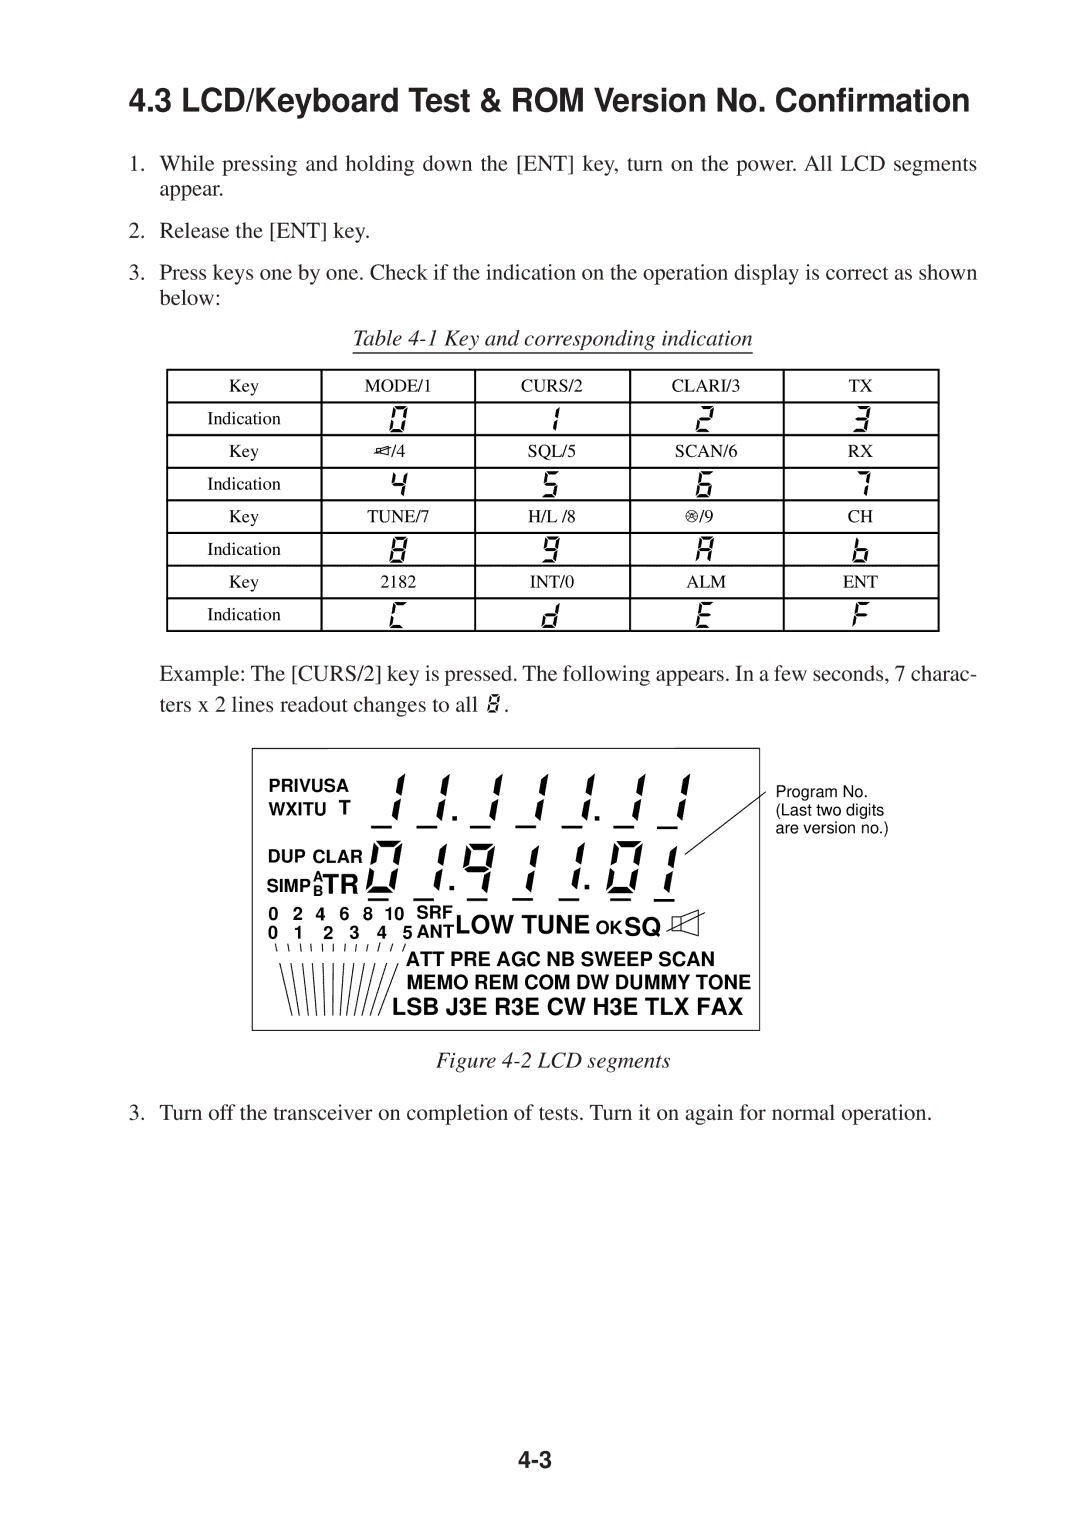
1.While pressing and holding down the [ENT] key, turn on the power. All LCD segments appear.
2.Release the [ENT] key.
3.Press keys one by one. Check if the indication on the operation display is correct as shown below:
Table 4-1 Key and corresponding indication
Key | MODE/1 | CURS/2 | CLARI/3 | TX |
Indication
Key | /4 | SQL/5 | SCAN/6 | RX |
Indication
Key | TUNE/7 | H/L /8 | /9 | CH |
Indication
Key | 2182 | INT/0 | ALM | ENT |
Indication
Example: The [CURS/2] key is pressed. The following appears. In a few seconds, 7 charac- ters x 2 lines readout changes to all ![]()
![]() .
.
PRIVUSA
WXITU T
DUP CLAR ![]()
SIMP ABTR ![]()
![]()
0 2 4 6 8 10 SRF
0 1 2 3 4 5 ANTLOW TUNE OK SQ
![]() ATT PRE AGC NB SWEEP SCAN MEMO REM COM DW DUMMY TONE
ATT PRE AGC NB SWEEP SCAN MEMO REM COM DW DUMMY TONE
LSB J3E R3E CW H3E TLX FAX
Program No. (Last two digits are version no.)
Figure 4-2 LCD segments
3. Turn off the transceiver on completion of tests. Turn it on again for normal operation.
