Page 3
BASIC RANGE 1 - BASIC RANGE 8: Set range of each of the eight basic ranges.
Note 1: All default basic ranges are restored whenever the depth unit is changed. Therefore, change the depth unit before changing the basic ranges.
Note 2: A range may not be lower than the range preceding it. For example, if basic range 3 is 60 feet, basic range 4 must be greater than 60 feet.
ZOOM RANGE: Choose the range to zoom in the
B/L RANGE: The expansion width for the
ZOOM MARKER: The zoom marker appears in the normal, bottom marker and bottom zoom displays and marks the area which is expanded in the bottom marker and bottom zoom pictures. You can turn the marker on or off as desired.
2.2 Installation Menu
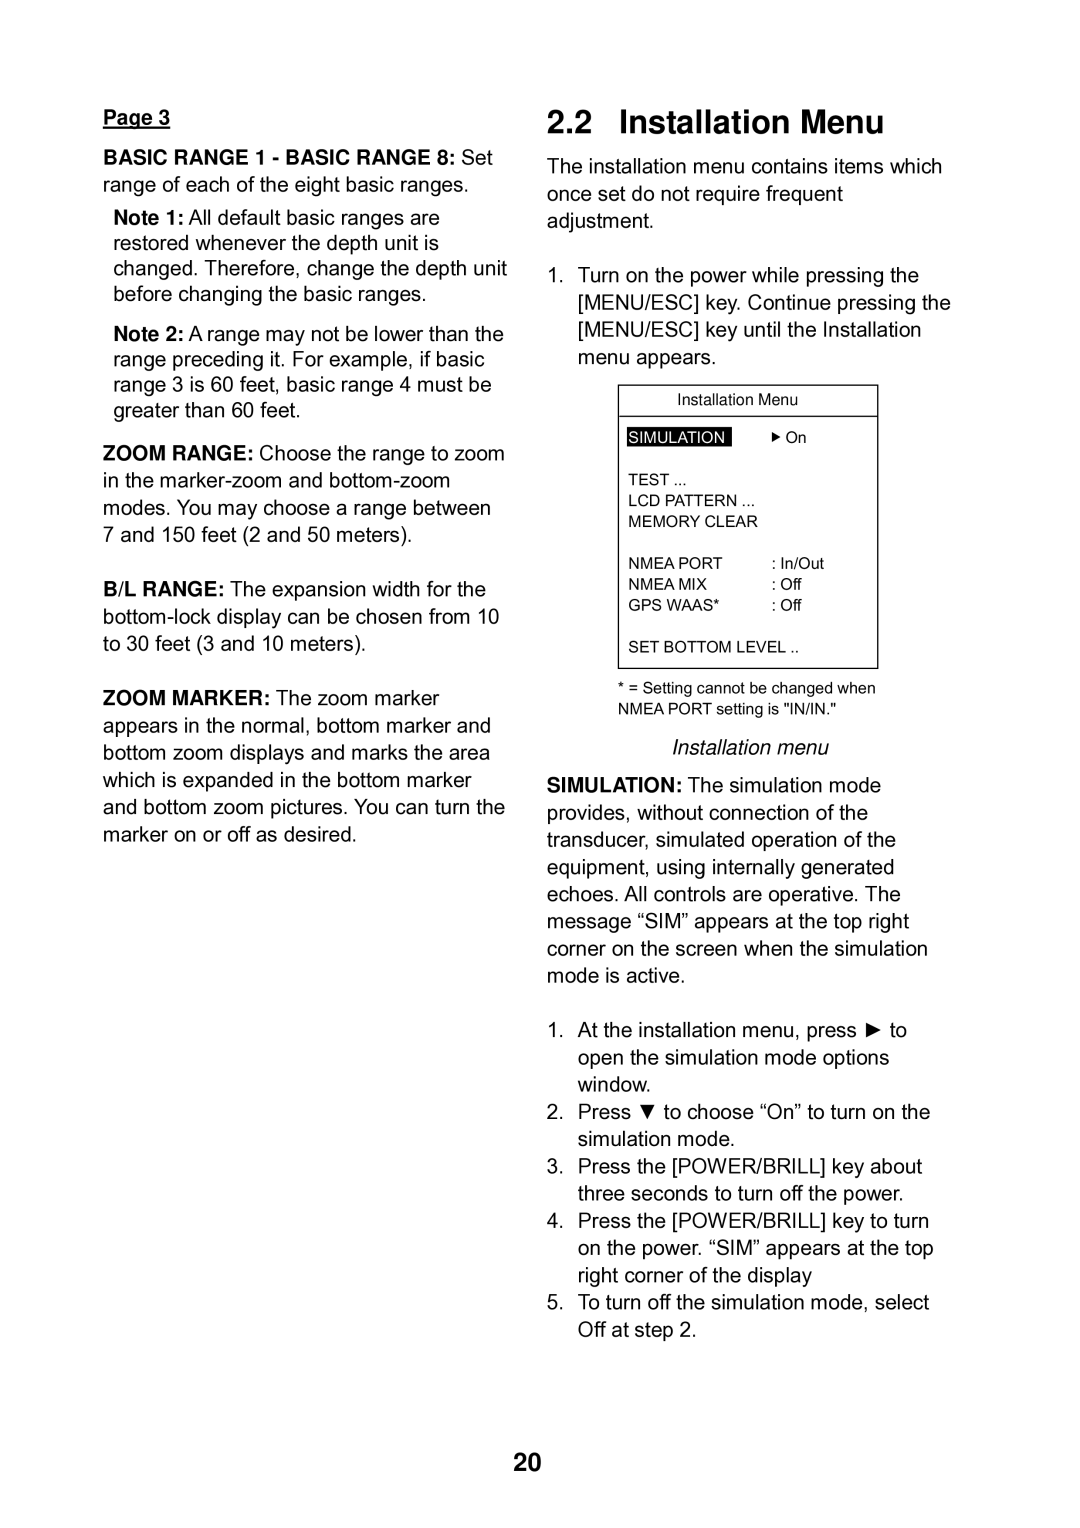
The installation menu contains items which once set do not require frequent adjustment.
1.Turn on the power while pressing the [MENU/ESC] key. Continue pressing the
[MENU/ESC] key until the Installation menu appears.
Installation Menu
SIMULATION |
| On |
TEST ... |
| |
LCD PATTERN ... |
| |
MEMORY CLEAR |
| |
NMEA PORT | : In/Out | |
NMEA MIX | : Off | |
GPS WAAS* | : Off | |
SET BOTTOM LEVEL ..
*= Setting cannot be changed when NMEA PORT setting is "IN/IN."
Installation menu
SIMULATION: The simulation mode provides, without connection of the transducer, simulated operation of the equipment, using internally generated echoes. All controls are operative. The message “SIM” appears at the top right corner on the screen when the simulation mode is active.
1.At the installation menu, press ► to open the simulation mode options window.
2.Press ▼ to choose “On” to turn on the simulation mode.
3.Press the [POWER/BRILL] key about three seconds to turn off the power.
4.Press the [POWER/BRILL] key to turn on the power. “SIM” appears at the top right corner of the display
5.To turn off the simulation mode, select Off at step 2.
20
