640t – Installation and Operating Instructions
Tension Controls | Roller Pressure Handle |
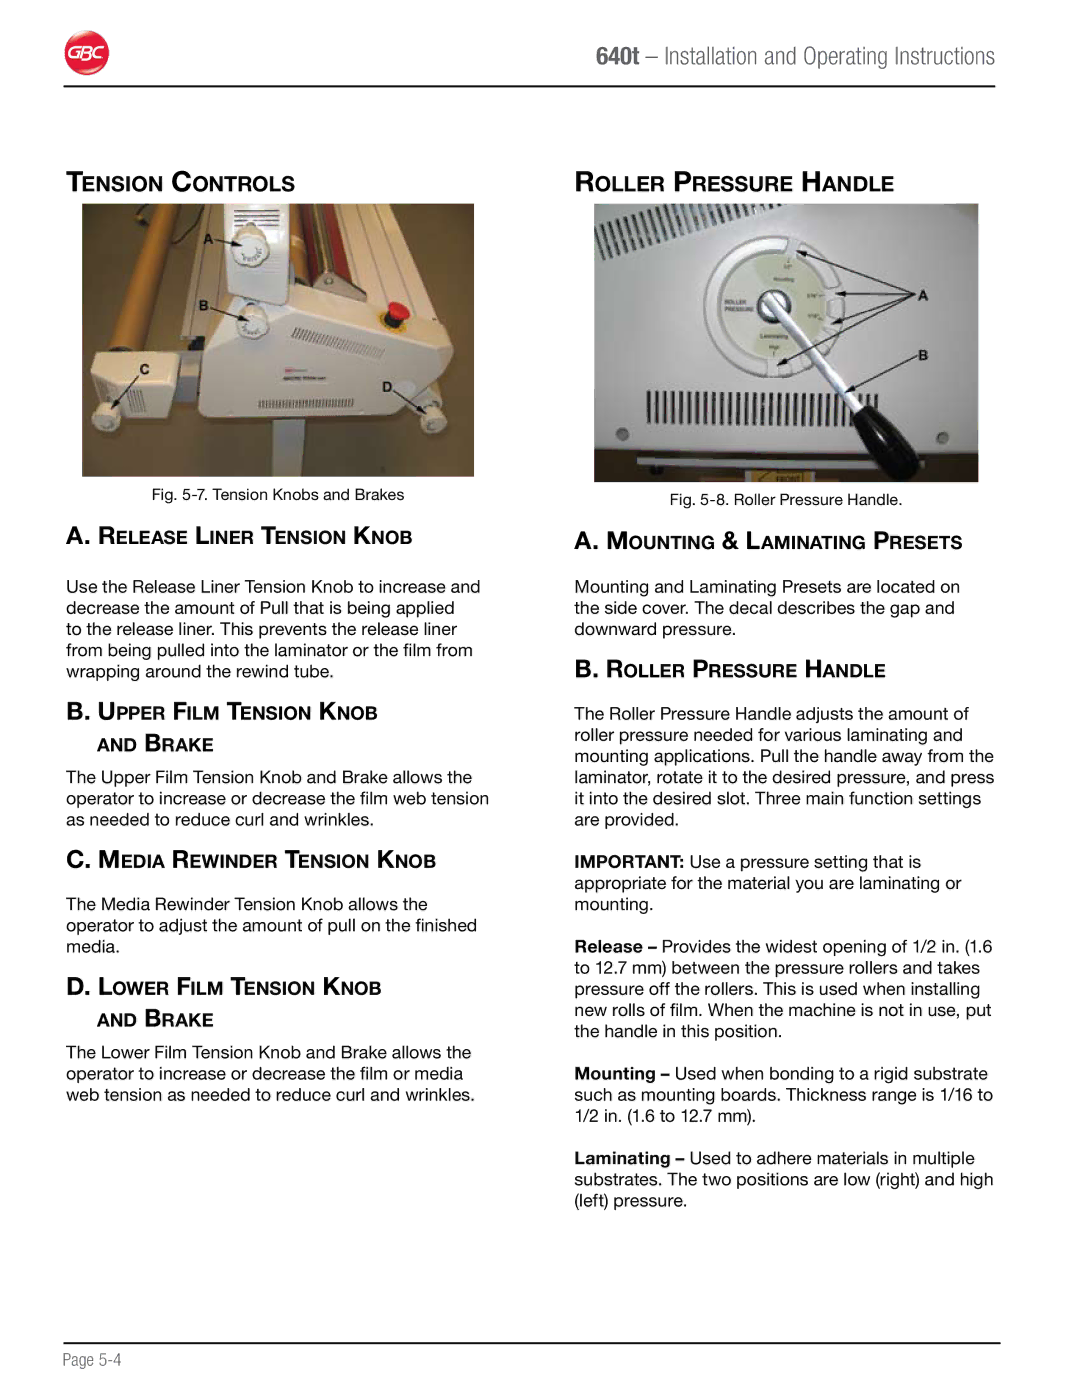
Fig. 5-7. Tension Knobs and Brakes
A.Release Liner Tension Knob
Use the Release Liner Tension Knob to increase and decrease the amount of Pull that is being applied to the release liner. This prevents the release liner from being pulled into the laminator or the film from wrapping around the rewind tube.
B.Upper Film Tension Knob and Brake
The Upper Film Tension Knob and Brake allows the operator to increase or decrease the film web tension as needed to reduce curl and wrinkles.
C.Media Rewinder Tension Knob
The Media Rewinder Tension Knob allows the operator to adjust the amount of pull on the finished media.
D.Lower Film Tension Knob and Brake
The Lower Film Tension Knob and Brake allows the operator to increase or decrease the film or media web tension as needed to reduce curl and wrinkles.
Fig. 5-8. Roller Pressure Handle.
A.Mounting & Laminating Presets
Mounting and Laminating Presets are located on the side cover. The decal describes the gap and downward pressure.
B.Roller Pressure Handle
The Roller Pressure Handle adjusts the amount of roller pressure needed for various laminating and mounting applications. Pull the handle away from the laminator, rotate it to the desired pressure, and press it into the desired slot. Three main function settings are provided.
IMPORTANT: Use a pressure setting that is appropriate for the material you are laminating or mounting.
Release – Provides the widest opening of 1/2 in. (1.6 to 12.7 mm) between the pressure rollers and takes pressure off the rollers. This is used when installing new rolls of film. When the machine is not in use, put the handle in this position.
Mounting – Used when bonding to a rigid substrate such as mounting boards. Thickness range is 1/16 to 1/2 in. (1.6 to 12.7 mm).
Laminating – Used to adhere materials in multiple substrates. The two positions are low (right) and high (left) pressure.
Page
