3.The Welcome screen appears. Click [Next] to continue or [Cancel] to terminate the procedure.
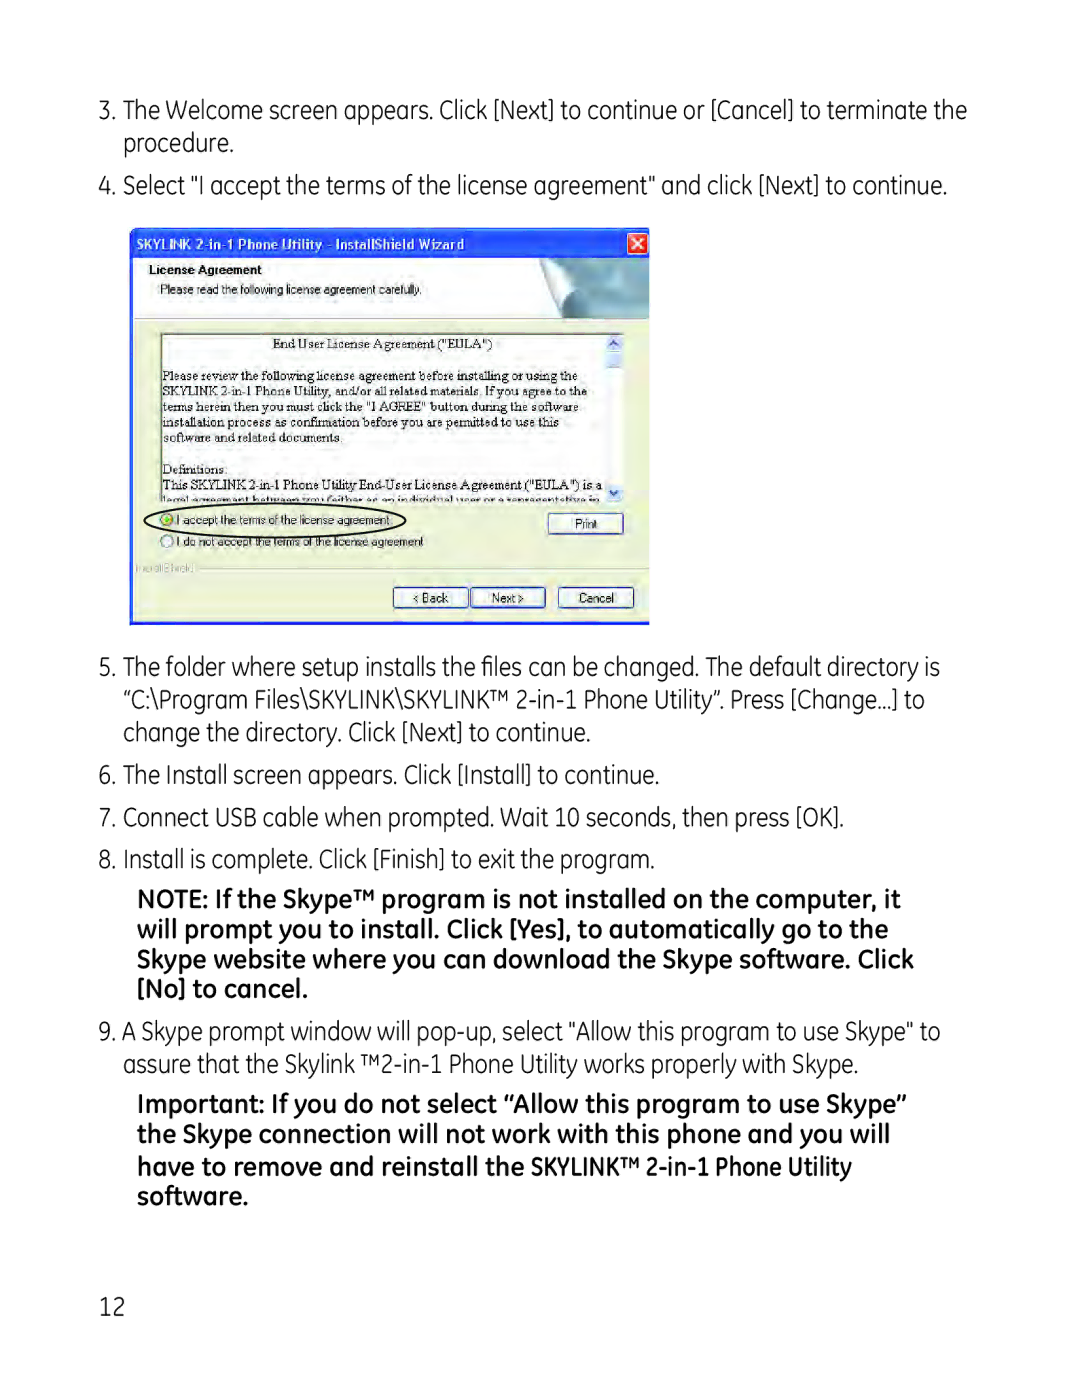
4.Select "I accept the terms of the license agreement" and click [Next] to continue.
5.The folder where setup installs the files can be changed. The default directory is “C:\Program Files\SKYLINK\SKYLINK™
6.The Install screen appears. Click [Install] to continue.
7.Connect USB cable when prompted. Wait 10 seconds, then press [OK].
8.Install is complete. Click [Finish] to exit the program.
NOTE: If the Skype™ program is not installed on the computer, it will prompt you to install. Click [Yes], to automatically go to the Skype website where you can download the Skype software. Click [No] to cancel.
9.A Skype prompt window will
Important: If you do not select “Allow this program to use Skype” the Skype connection will not work with this phone and you will have to remove and reinstall the SKYLINK™
12