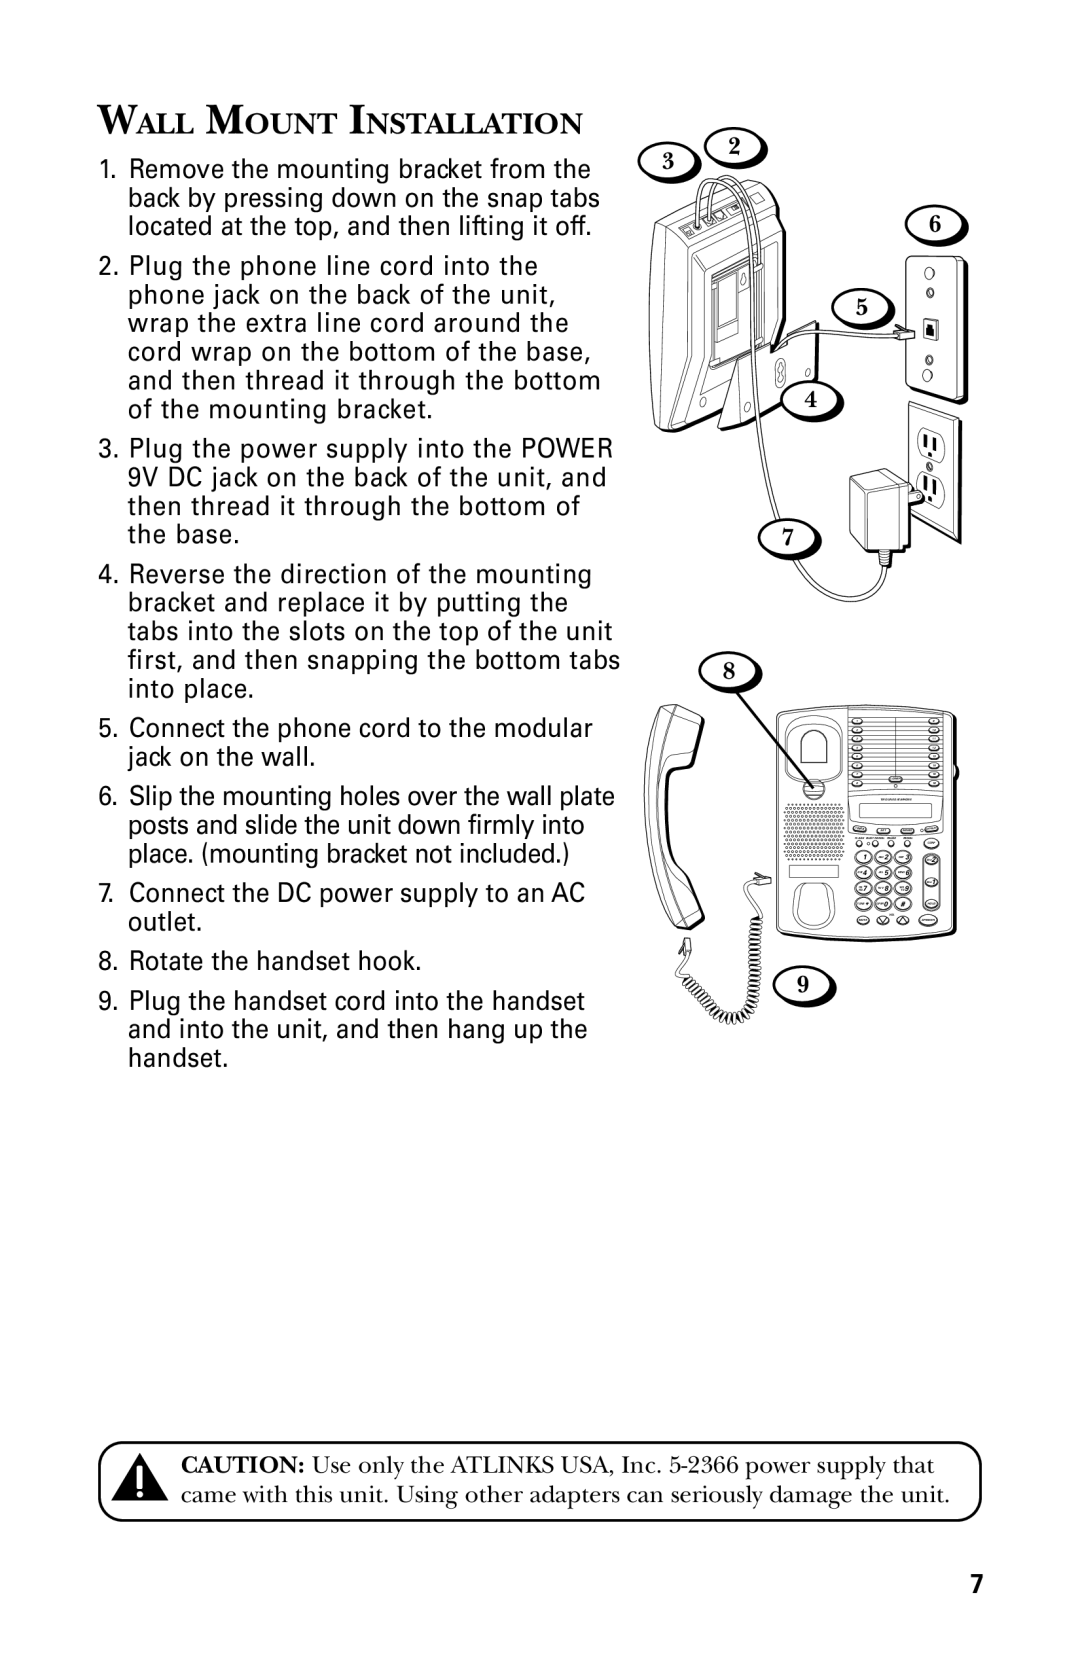
WALL MOUNT INSTALLATION
1. Remove the mounting bracket from the | 3 | 2 |
| ||
back by pressing down on the snap tabs |
|
|
located at the top, and then lifting it off. |
| 6 |
2. Plug the phone line cord into the |
|
|
phone jack on the back of the unit, |
| 5 |
wrap the extra line cord around the |
| |
|
| |
cord wrap on the bottom of the base, |
|
|
and then thread it through the bottom |
| 4 |
of the mounting bracket. |
| |
|
| |
3. Plug the power supply into the POWER |
|
|
9V DC jack on the back of the unit, and |
|
|
then thread it through the bottom of |
|
|
the base. |
| 7 |
4.Reverse the direction of the mounting bracket and replace it by putting the
tabs into the slots on the top of the unit
first, and then snapping the bottom tabs 8 into place.
5. Connect the phone cord to the modular | 3 | 11 |
| 1 | 9 |
jack on the wall. | 2 | 10 |
6 | 14 | |
| 4 | 12 |
| 5 | 13 |
| 7 | 15 |
|
| LOWER |
6.Slip the mounting holes over the wall plate posts and slide the unit down firmly into place. (mounting bracket not included.)
816
TWO LINE DATAPHONE
SET | MEMO |
FLASH BUSY REDIAL PAUSE | REDIAL |
| CONF |
1 | 2 | 3 | line2 |
4 5 6
7.Connect the DC power supply to an AC outlet.
8.Rotate the handset hook.
9.Plug the handset cord into the handset and into the unit, and then hang up the handset.
7 | 8 |
| line1 |
| 9 | ||
* | 0 | # | HOLD |
|
| VOL |
|
MUTE |
|
| SPEAKER |
9
CAUTION: Use only the ATLINKS USA, Inc.
7