Installation Instructions
SWITCHING THE WASHER AND DRYER BACKSPLASHES (not required for most installations)
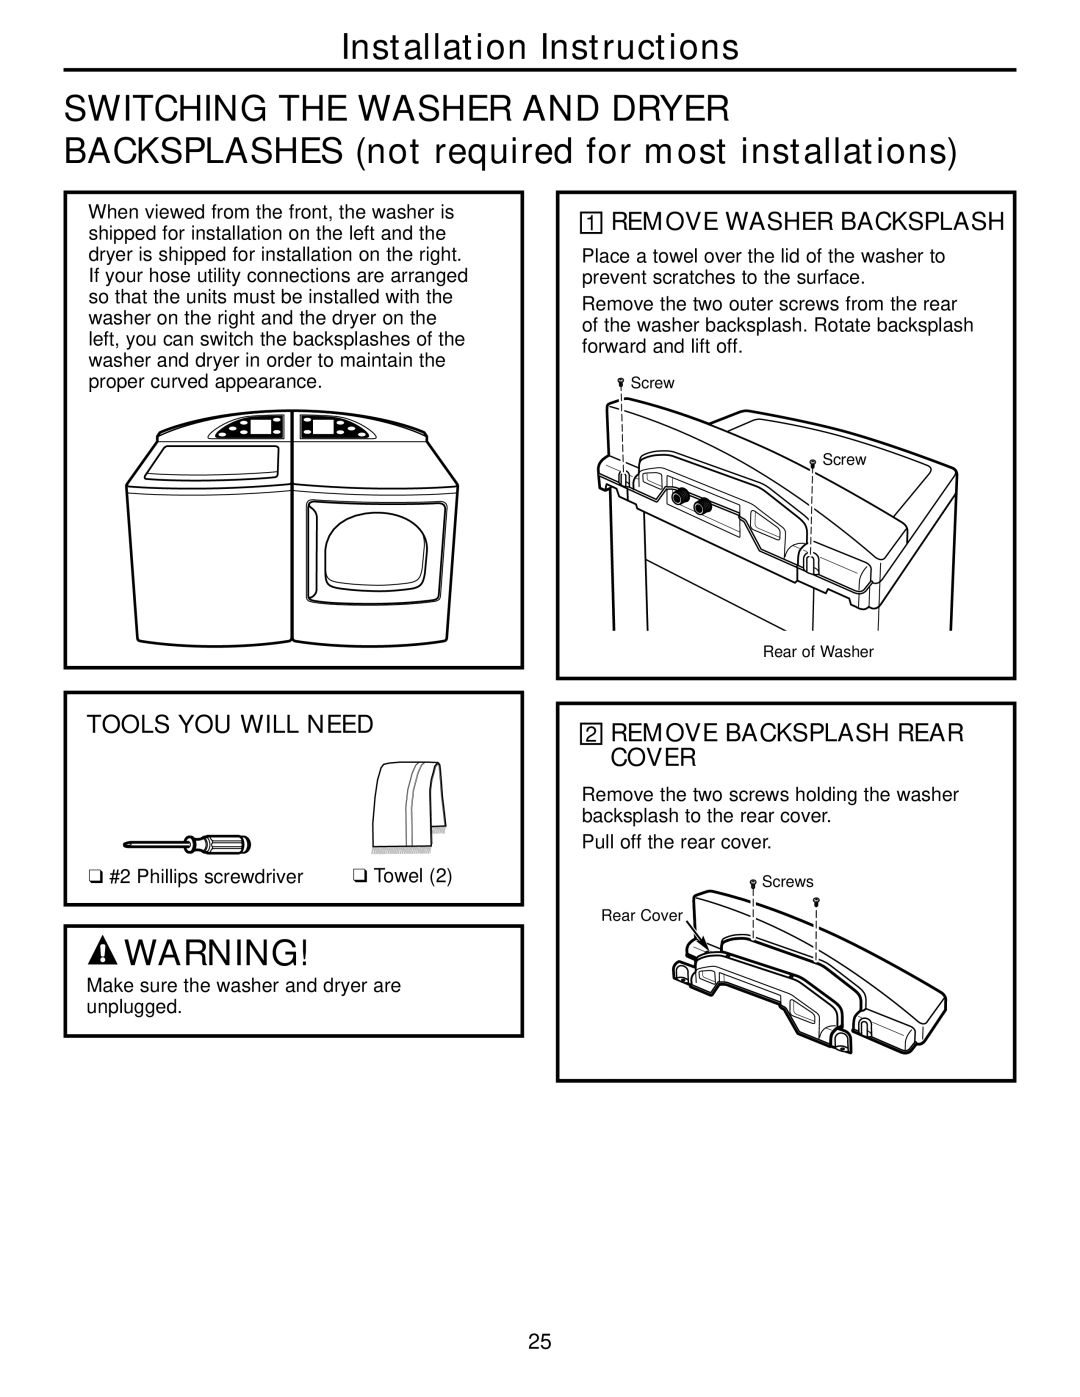
When viewed from the front, the washer is shipped for installation on the left and the dryer is shipped for installation on the right. If your hose utility connections are arranged so that the units must be installed with the washer on the right and the dryer on the left, you can switch the backsplashes of the washer and dryer in order to maintain the proper curved appearance.
1REMOVE WASHER BACKSPLASH
Place a towel over the lid of the washer to prevent scratches to the surface.
Remove the two outer screws from the rear of the washer backsplash. Rotate backsplash forward and lift off.
![]() Screw
Screw
Screw |
Rear of Washer
TOOLS YOU WILL NEED
❑ #2 Phillips screwdriver | ❑ Towel (2) |
![]() WARNING!
WARNING!
Make sure the washer and dryer are unplugged.
2REMOVE BACKSPLASH REAR COVER
Remove the two screws holding the washer backsplash to the rear cover.
Pull off the rear cover.
Screws |
Rear Cover
25