Installation Instructions
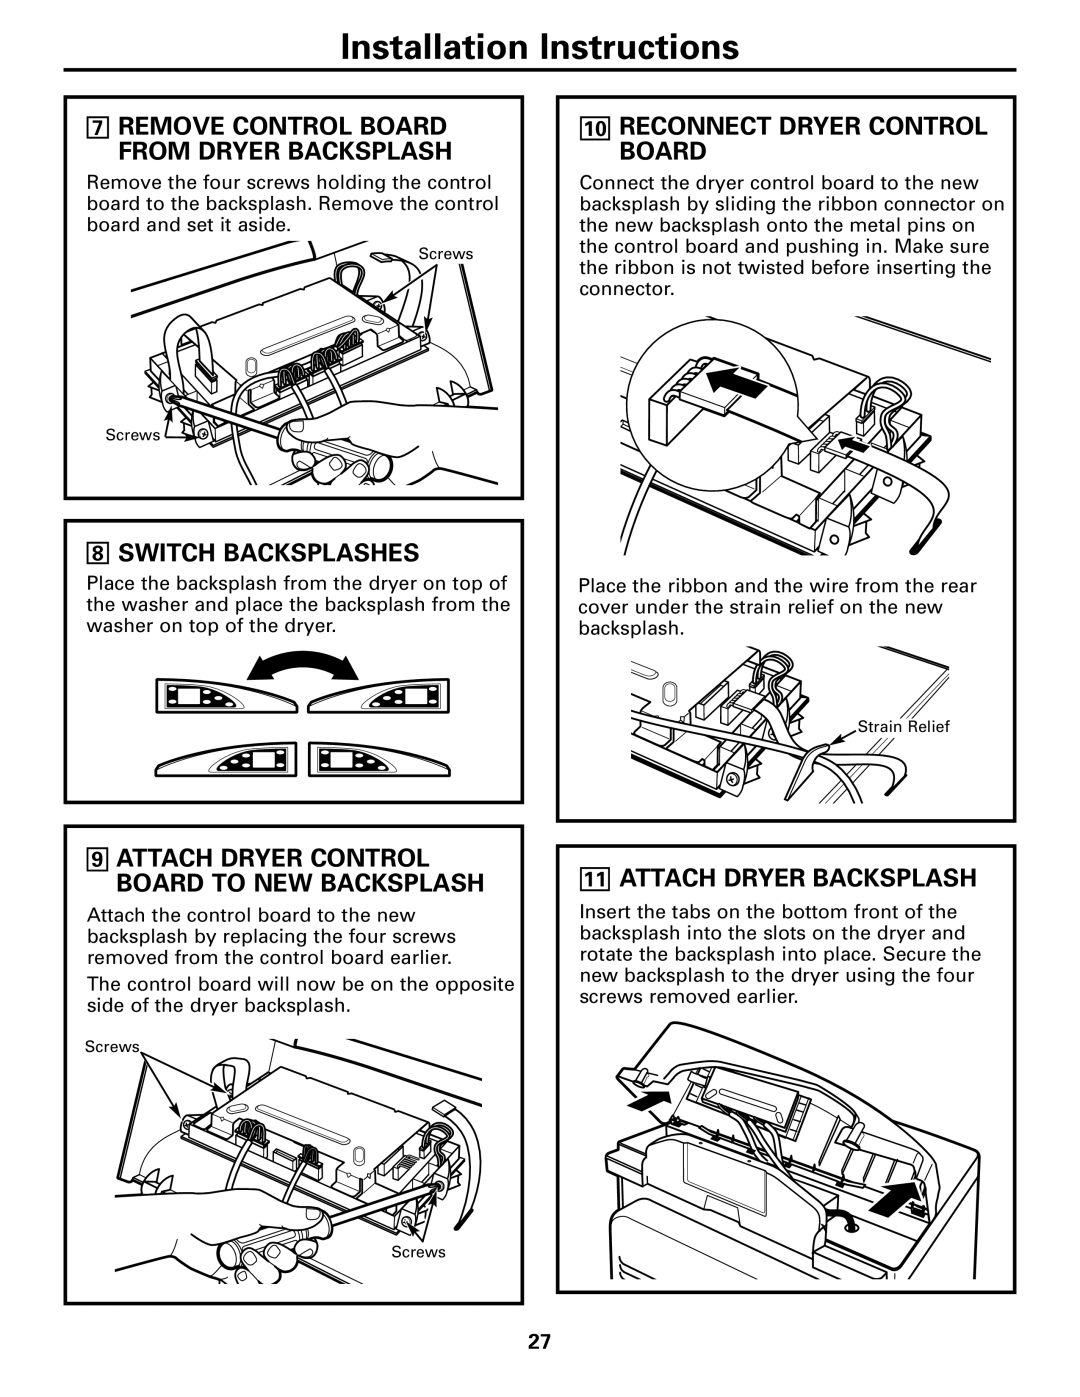
7REMOVE CONTROL BOARD FROM DRYER BACKSPLASH
Remove the four screws holding the control board to the backsplash. Remove the control board and set it aside.
![]() Screws
Screws
Screws |
8SWITCH BACKSPLASHES
Place the backsplash from the dryer on top of the washer and place the backsplash from the washer on top of the dryer.
10RECONNECT DRYER CONTROL BOARD
Connect the dryer control board to the new backsplash by sliding the ribbon connector on the new backsplash onto the metal pins on the control board and pushing in. Make sure the ribbon is not twisted before inserting the connector.
Place the ribbon and the wire from the rear cover under the strain relief on the new backsplash.
Strain Relief
9ATTACH DRYER CONTROL BOARD TO NEW BACKSPLASH
Attach the control board to the new backsplash by replacing the four screws removed from the control board earlier.
The control board will now be on the opposite side of the dryer backsplash.
Screws
Screws
11ATTACH DRYER BACKSPLASH
Insert the tabs on the bottom front of the backsplash into the slots on the dryer and rotate the backsplash into place. Secure the new backsplash to the dryer using the four screws removed earlier.
27