Installation Instructions
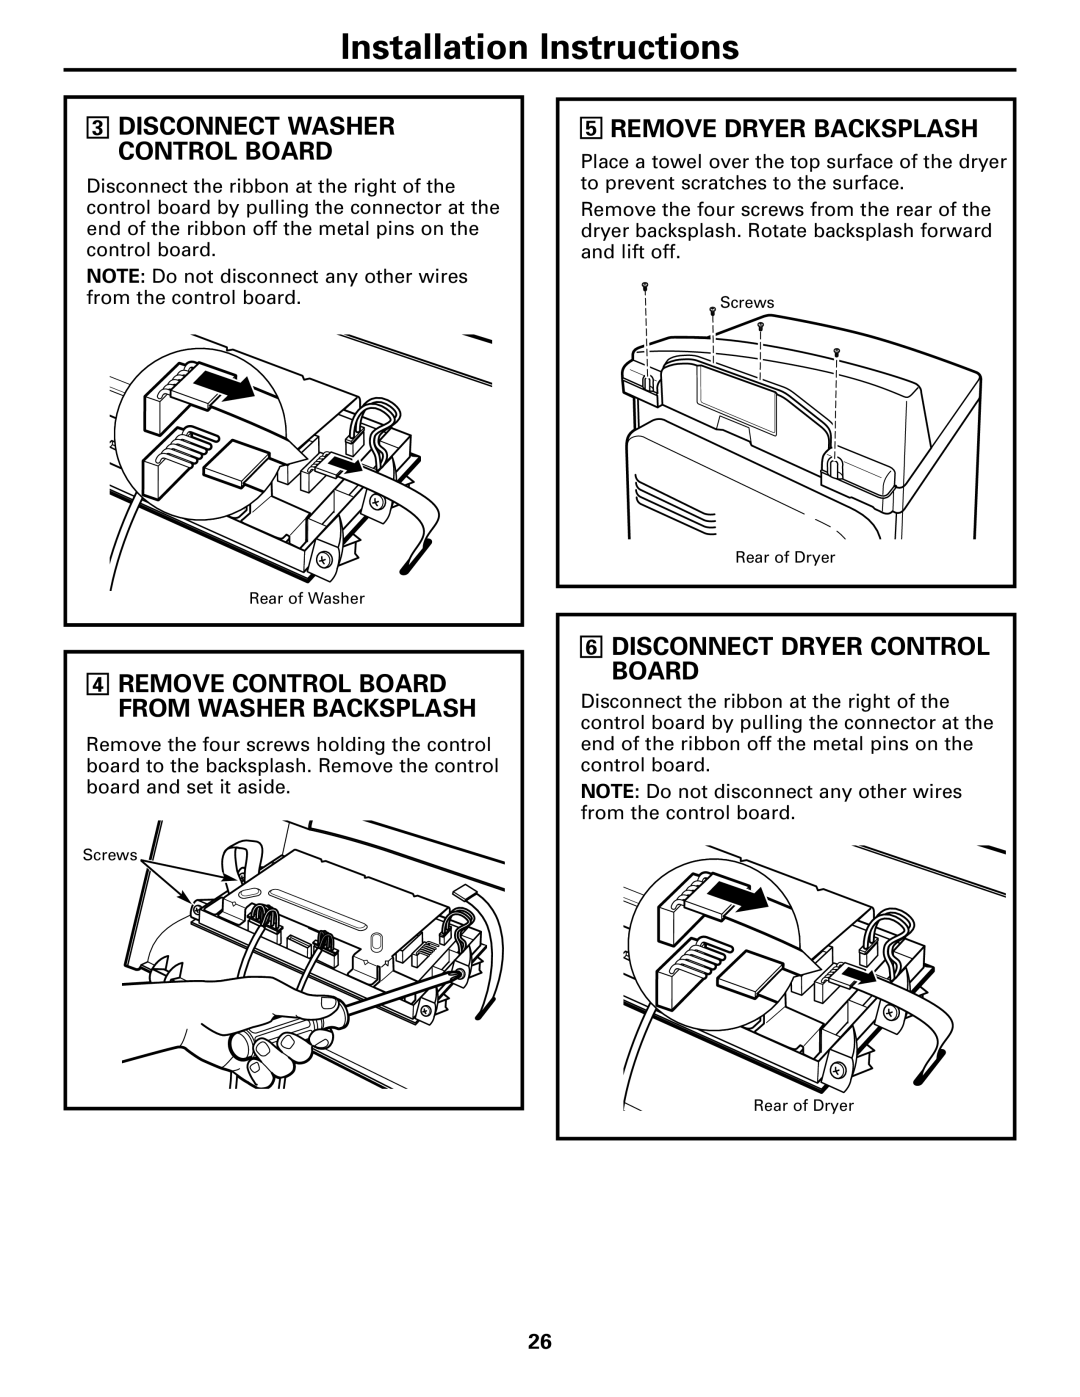
3DISCONNECT WASHER CONTROL BOARD
Disconnect the ribbon at the right of the control board by pulling the connector at the end of the ribbon off the metal pins on the control board.
NOTE: Do not disconnect any other wires from the control board.
Rear of Washer
4REMOVE CONTROL BOARD FROM WASHER BACKSPLASH
Remove the four screws holding the control board to the backsplash. Remove the control board and set it aside.
Screws
5REMOVE DRYER BACKSPLASH
Place a towel over the top surface of the dryer to prevent scratches to the surface.
Remove the four screws from the rear of the dryer backsplash. Rotate backsplash forward and lift off.
Screws
Rear of Dryer
6DISCONNECT DRYER CONTROL BOARD
Disconnect the ribbon at the right of the control board by pulling the connector at the end of the ribbon off the metal pins on the control board.
NOTE: Do not disconnect any other wires from the control board.
Rear of Dryer
26