IMMRTMT WFEN WARUIHG
~ls range must be properly secured to the floor by using the included
N~: Hthe range is ever moved to a different location,the
~~W~ON ~~U~ONS Tools Required:
5/lW Nutdriver or Nat Head Screwdriver Adjustable Wrench
3/W Electric Dfl & 3/l& Diameter Bit
3/lV Diameter Masonry Drill (i instiing in concrete)
1.Unfoldthe paper template and place it flat on the floor with the back and side edges positioned endy where the back and sides of the range dl be locatedwhen instied. @se the diagramto locate the brackets tithe template is not available.)
2.Mark on the floor the location of the 4 mounting holes shown on tie template. For easier installation,3/16 diameter pilot holes, 1/7 deep can be dri~ed into the floor.
3.Remove the template and place the brackets on the floor with turned up flanges to the front. Line up the holes in the brackets with marks on the floor and a~ch with the 4 screws provided. Brackets must be secured to a sotid floor. H attaching to masonry floor,first drill 3/l& diameter pilot holes using a concrete bit
4.bvel the range if necessary, by adjusting the 4 leg levelers with a wrench. (Aminimum clearance of l/W is required between the bottom of the range and the rear leveling feet)
5.Slide tie range into place making sure the rear legs are trapped by tie ends of the brackets. me range may need to be shifted slightiy to one side as it is being pushed back to allowthe rear legs to tign with the brackets. Removethe storage drawer to inspect brackets or grasp the top rear edge of the range and carefully attempt to tilt it forward to make sure the range is properly anchored.
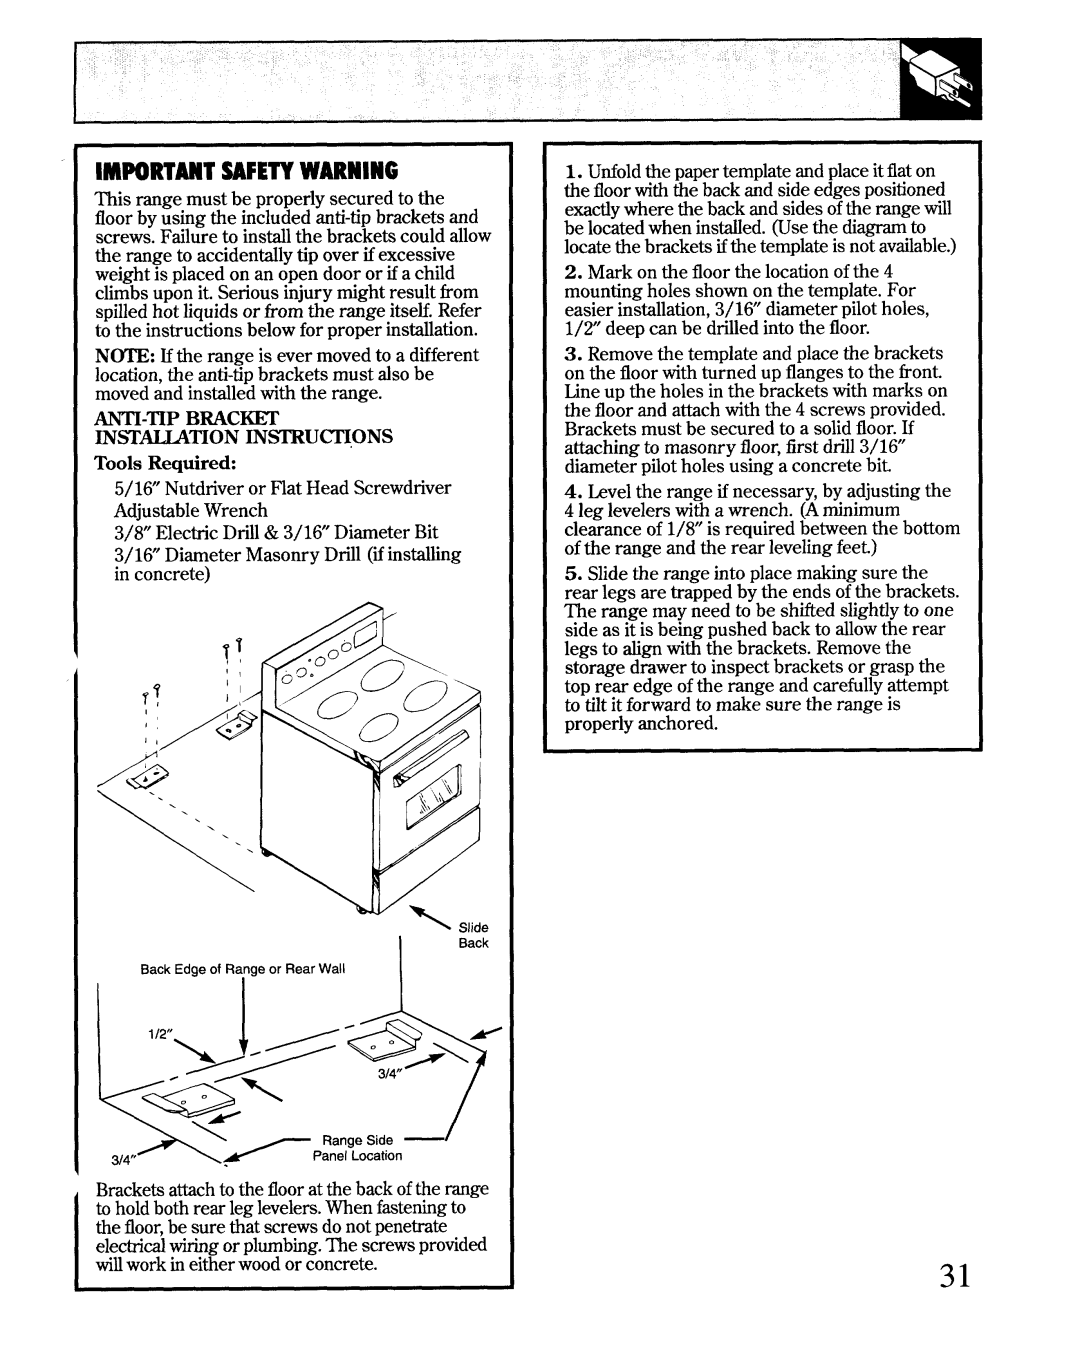
Back Edge of Range or Rear Wall
III
Brackets attach to the floorat the back of the range to hold both rear leg levelers.When fasteningto the floor,be sure that screws do not penetrate electricalwiringor plumbing.me screws provided
wiflwork in either wood or concrete.
31