Installation Instructions
UNPACKING YOUR COOKTOP
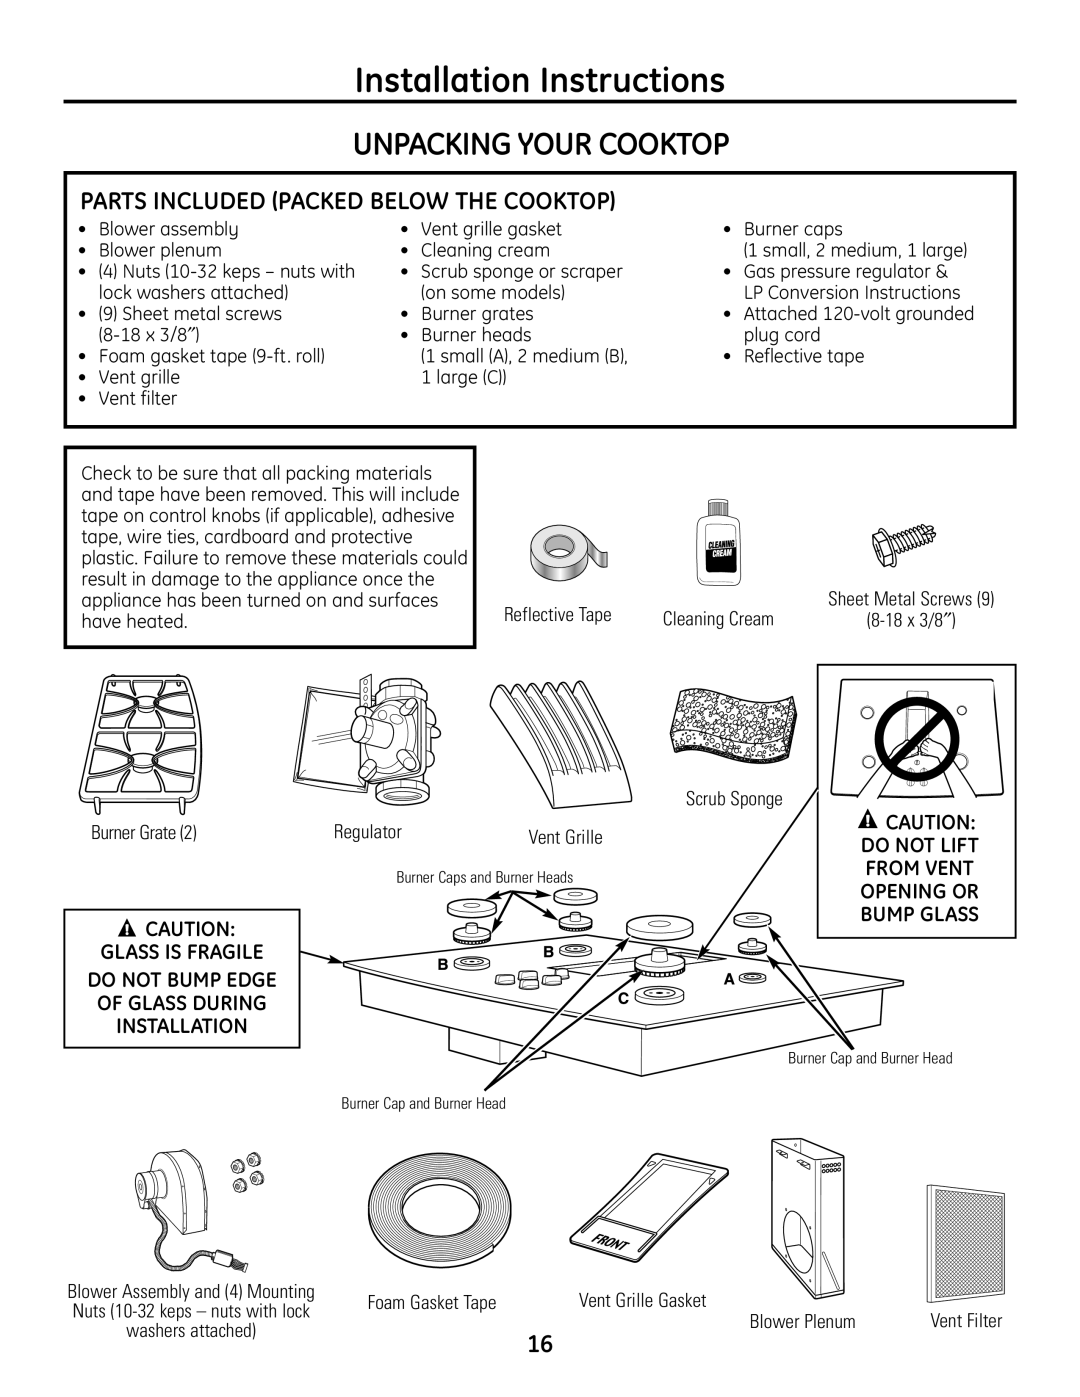
PARTS INCLUDED (PACKED BELOW THE COOKTOP)
• | Blower assembly | • | Vent grille gasket | • | Burner caps |
• | Blower plenum | • | Cleaning cream |
| (1 small, 2 medium, 1 large) |
• (4) Nuts | • Scrub sponge or scraper | • Gas pressure regulator & | |||
| lock washers attached) | • | (on some models) | • | LP Conversion Instructions |
• (9) Sheet metal screws | Burner grates | Attached | |||
| • | Burner heads | • | plug cord | |
• Foam gasket tape |
| (1 small (A), 2 medium (B), | Reflective tape | ||
• | Vent grille |
| 1 large (C)) |
|
|
•Vent filter
Check to be sure that all packing materials and tape have been removed. This will include tape on control knobs (if applicable), adhesive tape, wire ties, cardboard and protective plastic. Failure to remove these materials could result in damage to the appliance once the appliance has been turned on and surfaces have heated.
Reflective Tape
Cleaning Cream
Scrub Sponge
Sheet Metal Screws (9) |
CAUTION: |
Burner Grate (2) | Regulator | Vent Grille |
| Burner Caps and Burner Heads | |
![]() CAUTION:
CAUTION:
GLASS IS FRAGILE
DO NOT BUMP EDGE
OF GLASS DURING
INSTALLATION
DO NOT LIFT |
FROM VENT |
OPENING OR |
BUMP GLASS |
Burner Cap and Burner Head
Burner Cap and Burner Head
Blower Assembly and (4) Mounting | Foam Gasket Tape | Vent Grille Gasket |
| |
Nuts | Vent Filter | |||
| Blower Plenum | |||
washers attached) |
| |||
| 16 |
| ||
|
|
|