Setting the Clock
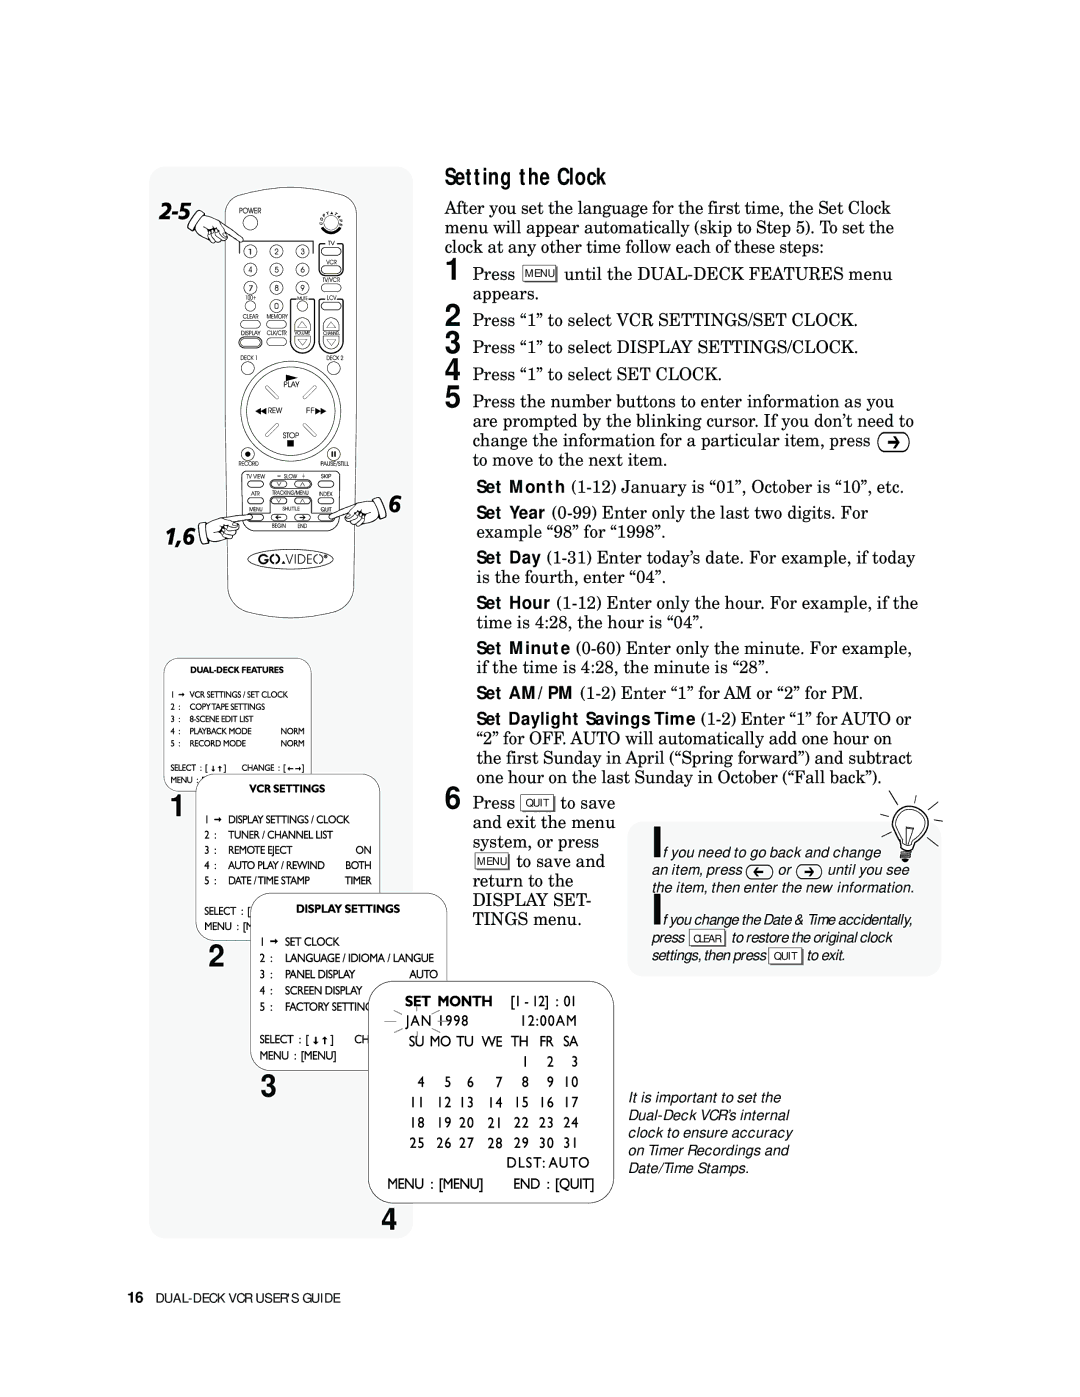
After you set the language for the first time, the Set Clock menu will appear automatically (skip to Step 5). To set the clock at any other time follow each of these steps:
1 Press MENU until the
2 Press “1” to select VCR SETTINGS/SET CLOCK.
3 Press “1” to select DISPLAY SETTINGS/CLOCK.
4 Press “1” to select SET CLOCK.
5 Press the number buttons to enter information as you are prompted by the blinking cursor. If you don’t need to change the information for a particular item, press ![]()
to move to the next item.
Set Month
Set Year
Set Day
Set Hour
Set Minute
Set AM/PM
Set Daylight Savings Time
1
2![]()
![]()
![]()
![]()
![]()
![]()
![]()
![]()
![]()
![]()
![]()
![]()
![]()
![]()
3
6 Press QUIT to save and exit the menu system, or press MENU to save and return to the
DISPLAY SET- TINGS menu.
If you need to go back and change
an item, press ![]() or
or ![]() until you see the item, then enter the new information.
until you see the item, then enter the new information.
If you change the Date & Time accidentally, press CLEAR to restore the original clock settings, then press QUIT to exit.
It is important to set the
4
16
