
312353B specifications
The Graco 312353B is an innovative airless paint sprayer designed for both DIY enthusiasts and professional painters, offering exceptional performance in a compact package. This reliable unit is specifically engineered to provide a seamless painting experience for a variety of surfaces, making it ideal for users tackling projects of all sizes.One of the standout features of the Graco 312353B is its powerful motor, which drives the sprayer to deliver a consistent and high-quality finish. With the ability to handle a wide range of coatings, from paints to stains, this model accommodates various viscosities, allowing users to tackle different projects efficiently. Its adjustable pressure control enables painters to customize the spray pattern and flow rate based on the requirements of each task, ensuring optimal coverage and a professional-looking result.
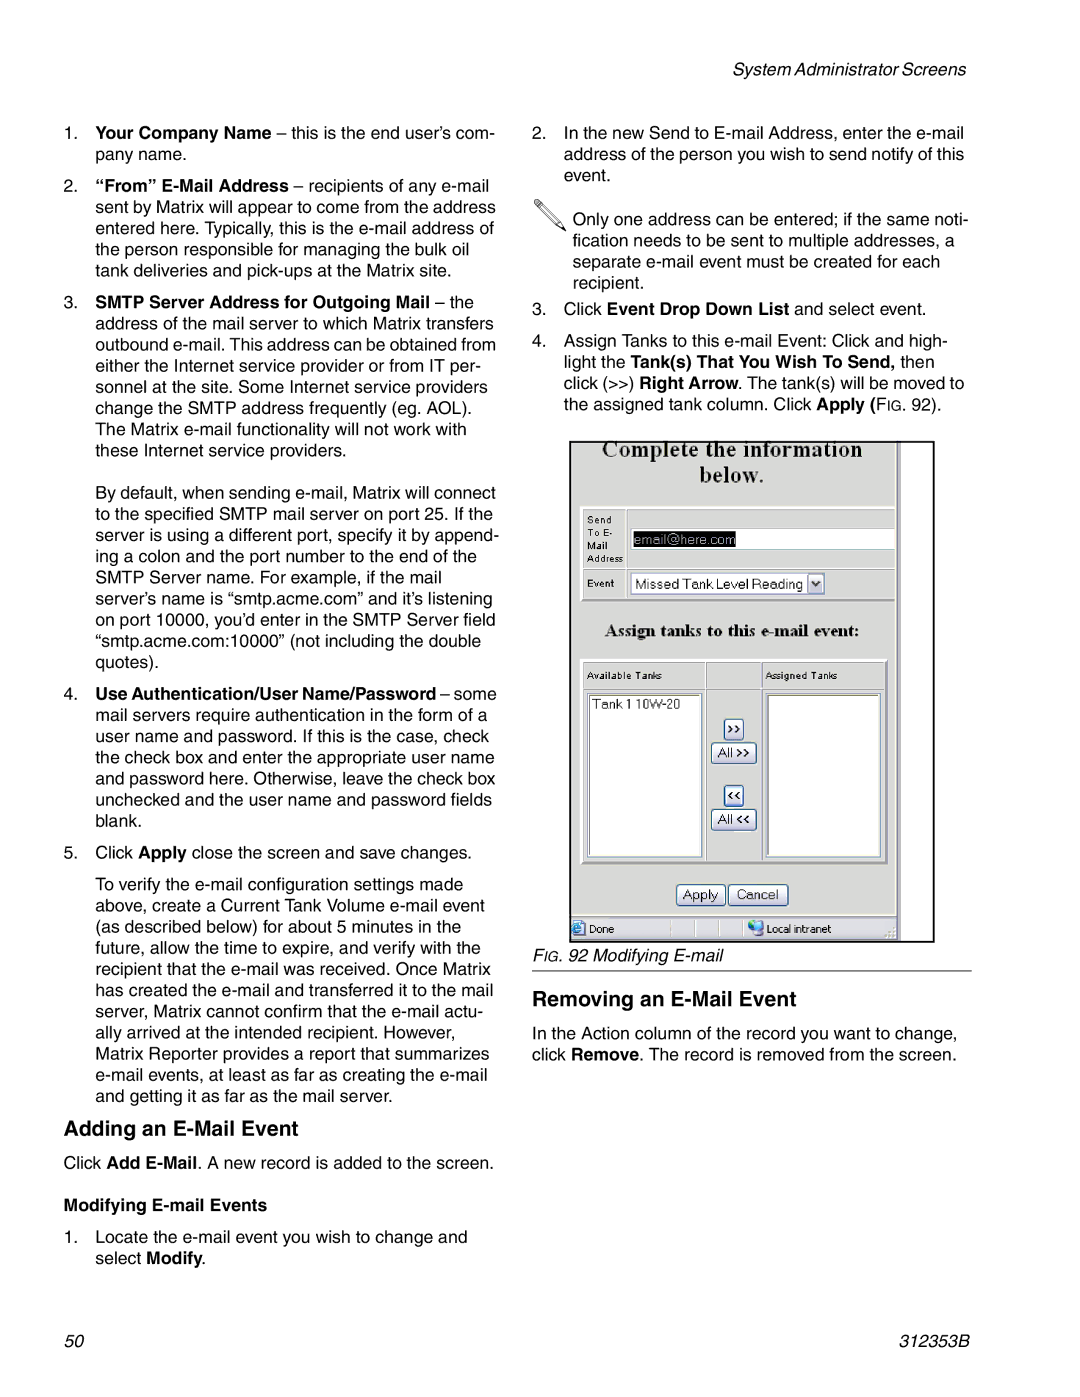
Complementing its powerful motor is the Graco TrueCoat technology, which enhances the spraying experience by providing an even, smooth application. This technology minimizes overspray and allows for easy control over the spraying process, reducing the risk of paint waste. Additionally, the sprayer is equipped with a reversible tip system, which allows users to quickly change the spray tip to address clogs and maintain uninterrupted operation.
The Graco 312353B is designed with user comfort in mind. Its lightweight and portable design make it easy to transport and maneuver, even in tight spaces. The integrated carry handle enhances portability, while the included wheeled cart simplifies transport to different job sites. Moreover, the sprayer's easy assembly and straightforward controls ensure that anyone, regardless of skill level, can achieve professional results.
Durability is another key characteristic of the Graco 312353B. Constructed from high-quality materials, this sprayer is built to withstand the rigors of frequent use. The reliable design not only enhances longevity but also contributes to consistent performance throughout various projects.
In summary, the Graco 312353B is a versatile and efficient airless paint sprayer that combines power, technology, and user-friendly design. With its adjustable pressure, TrueCoat technology, and robust construction, it is a valuable addition for anyone looking to elevate their painting projects to the next level. Whether you're a seasoned professional or a weekend warrior, this sprayer offers the features and performance needed to achieve outstanding results with ease.