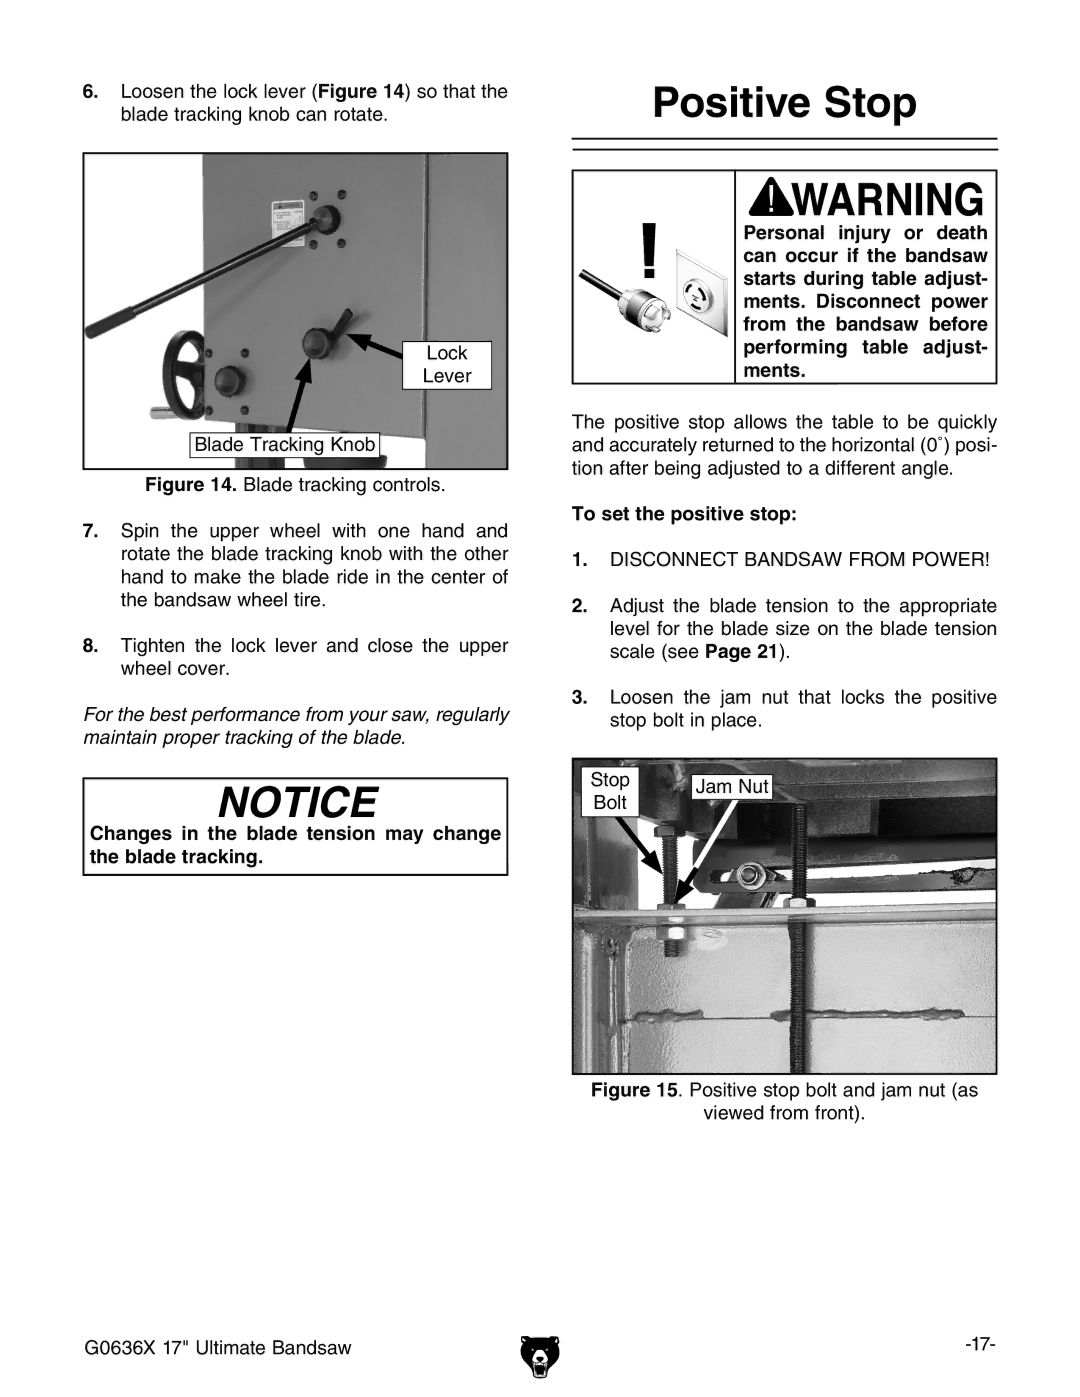
6.Loosen the lock lever (Figure 14) so that the blade tracking knob can rotate.
Lock
Lever
Blade Tracking Knob
Figure 14. Blade tracking controls.
7.Spin the upper wheel with one hand and rotate the blade tracking knob with the other hand to make the blade ride in the center of the bandsaw wheel tire.
8.Tighten the lock lever and close the upper wheel cover.
For the best performance from your saw, regularly maintain proper tracking of the blade.
NOTICE Changes in the blade tension may change the blade tracking.
Positive Stop
Personal injury or death can occur if the bandsaw starts during table adjust- ments. Disconnect power from the bandsaw before performing table adjust- ments.
The positive stop allows the table to be quickly and accurately returned to the horizontal (0˚) posi- tion after being adjusted to a different angle.
To set the positive stop:
1.DISCONNECT BANDSAW FROM POWER!
2.Adjust the blade tension to the appropriate level for the blade size on the blade tension scale (see Page 21).
3.Loosen the jam nut that locks the positive stop bolt in place.
Stop | Jam Nut | |
Bolt | ||
|
Figure 15. Positive stop bolt and jam nut (as viewed from front).
G0636X 17" Ultimate Bandsaw |
