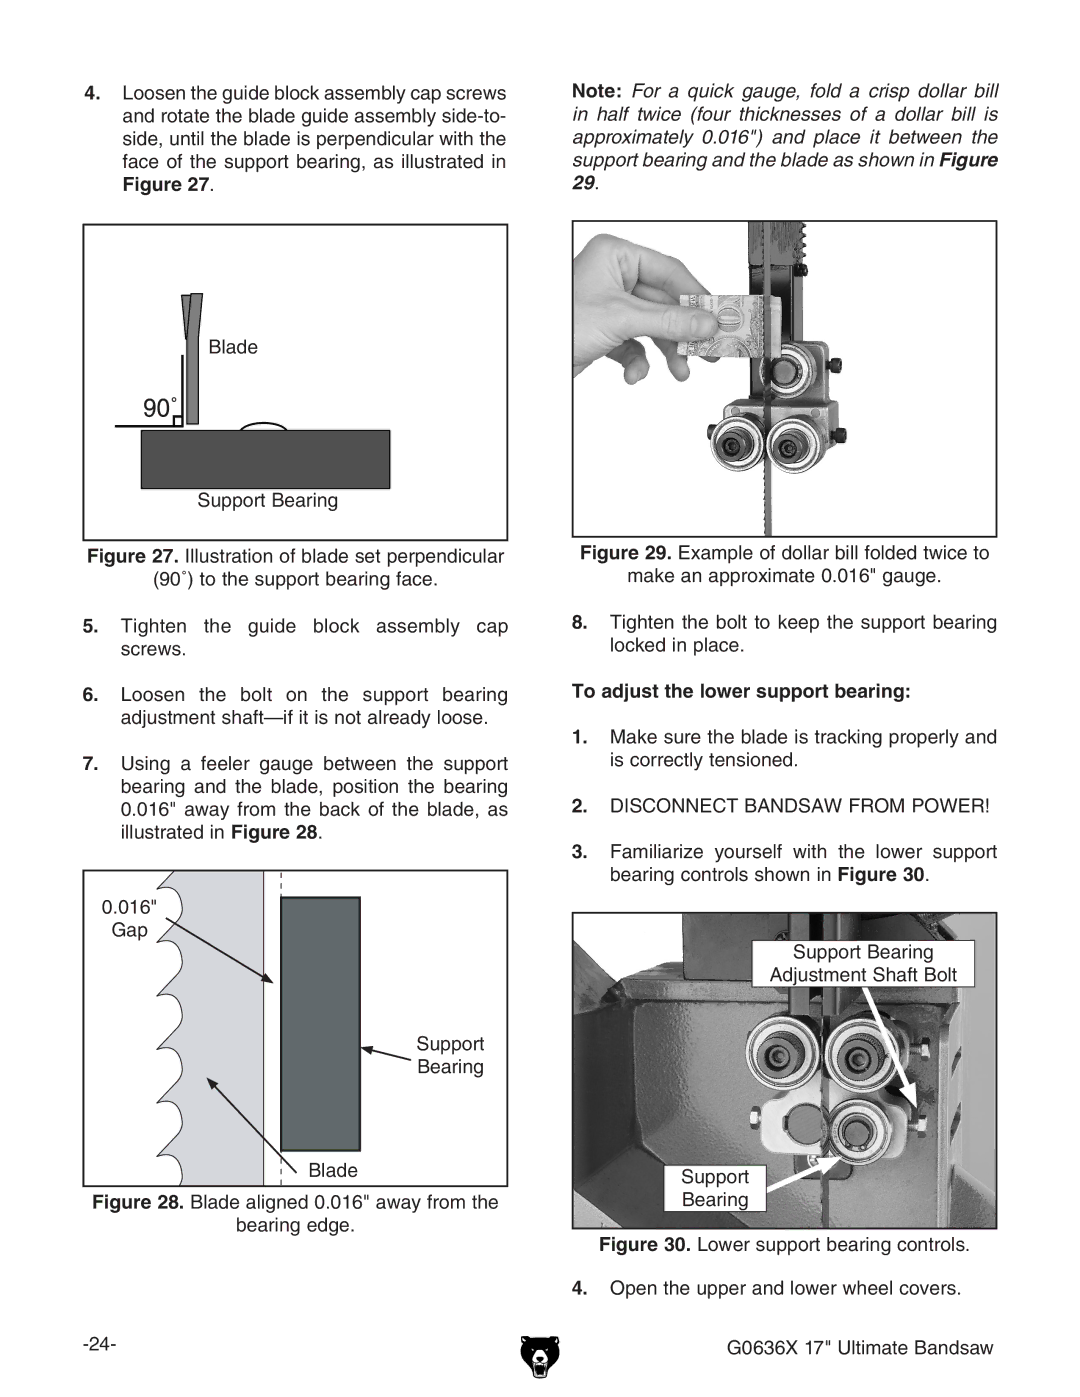
4.Loosen the guide block assembly cap screws and rotate the blade guide assembly
Note: For a quick gauge, fold a crisp dollar bill in half twice (four thicknesses of a dollar bill is approximately 0.016") and place it between the support bearing and the blade as shown in Figure 29.
| Blade |
|
| |
| Support Bearing |
|
| |
Figure 27. | Illustration of blade set perpendicular | Figure 29. | Example of dollar bill folded twice to | |
make an approximate 0.016" gauge. | ||||
(90˚) to the support bearing face. | ||||
|
| |||
5.Tighten the guide block assembly cap screws.
6.Loosen the bolt on the support bearing adjustment
7.Using a feeler gauge between the support bearing and the blade, position the bearing 0.016" away from the back of the blade, as illustrated in Figure 28.
0.016" |
Gap |
Support |
Bearing |
Blade |
Figure 28. Blade aligned 0.016" away from the
bearing edge.
8.Tighten the bolt to keep the support bearing locked in place.
To adjust the lower support bearing:
1.Make sure the blade is tracking properly and is correctly tensioned.
2.DISCONNECT BANDSAW FROM POWER!
3.Familiarize yourself with the lower support bearing controls shown in Figure 30.
Support Bearing
Adjustment Shaft Bolt
Support
Bearing
Figure 30. Lower support bearing controls.
4.Open the upper and lower wheel covers.
G0636X 17" Ultimate Bandsaw |
